Project Setup: Importing Samples & Metadata
The first step in any Platforma analysis is to import your data. This involves two key parts: importing your raw sequencing files (e.g., FASTQ) and associating them with your experimental metadata (e.g., sample, treatment, genotype).
This guide will walk you through the steps to import multi-lane, paired-end FASTQ data from a remote server, use the file parser to correctly group your samples, and import a metadata file to annotate your experiment.
1. Importing Raw Sequencing Files (FASTQ)
We will start by importing the raw .fastq.gz files from a server.
1. Start the Import Process
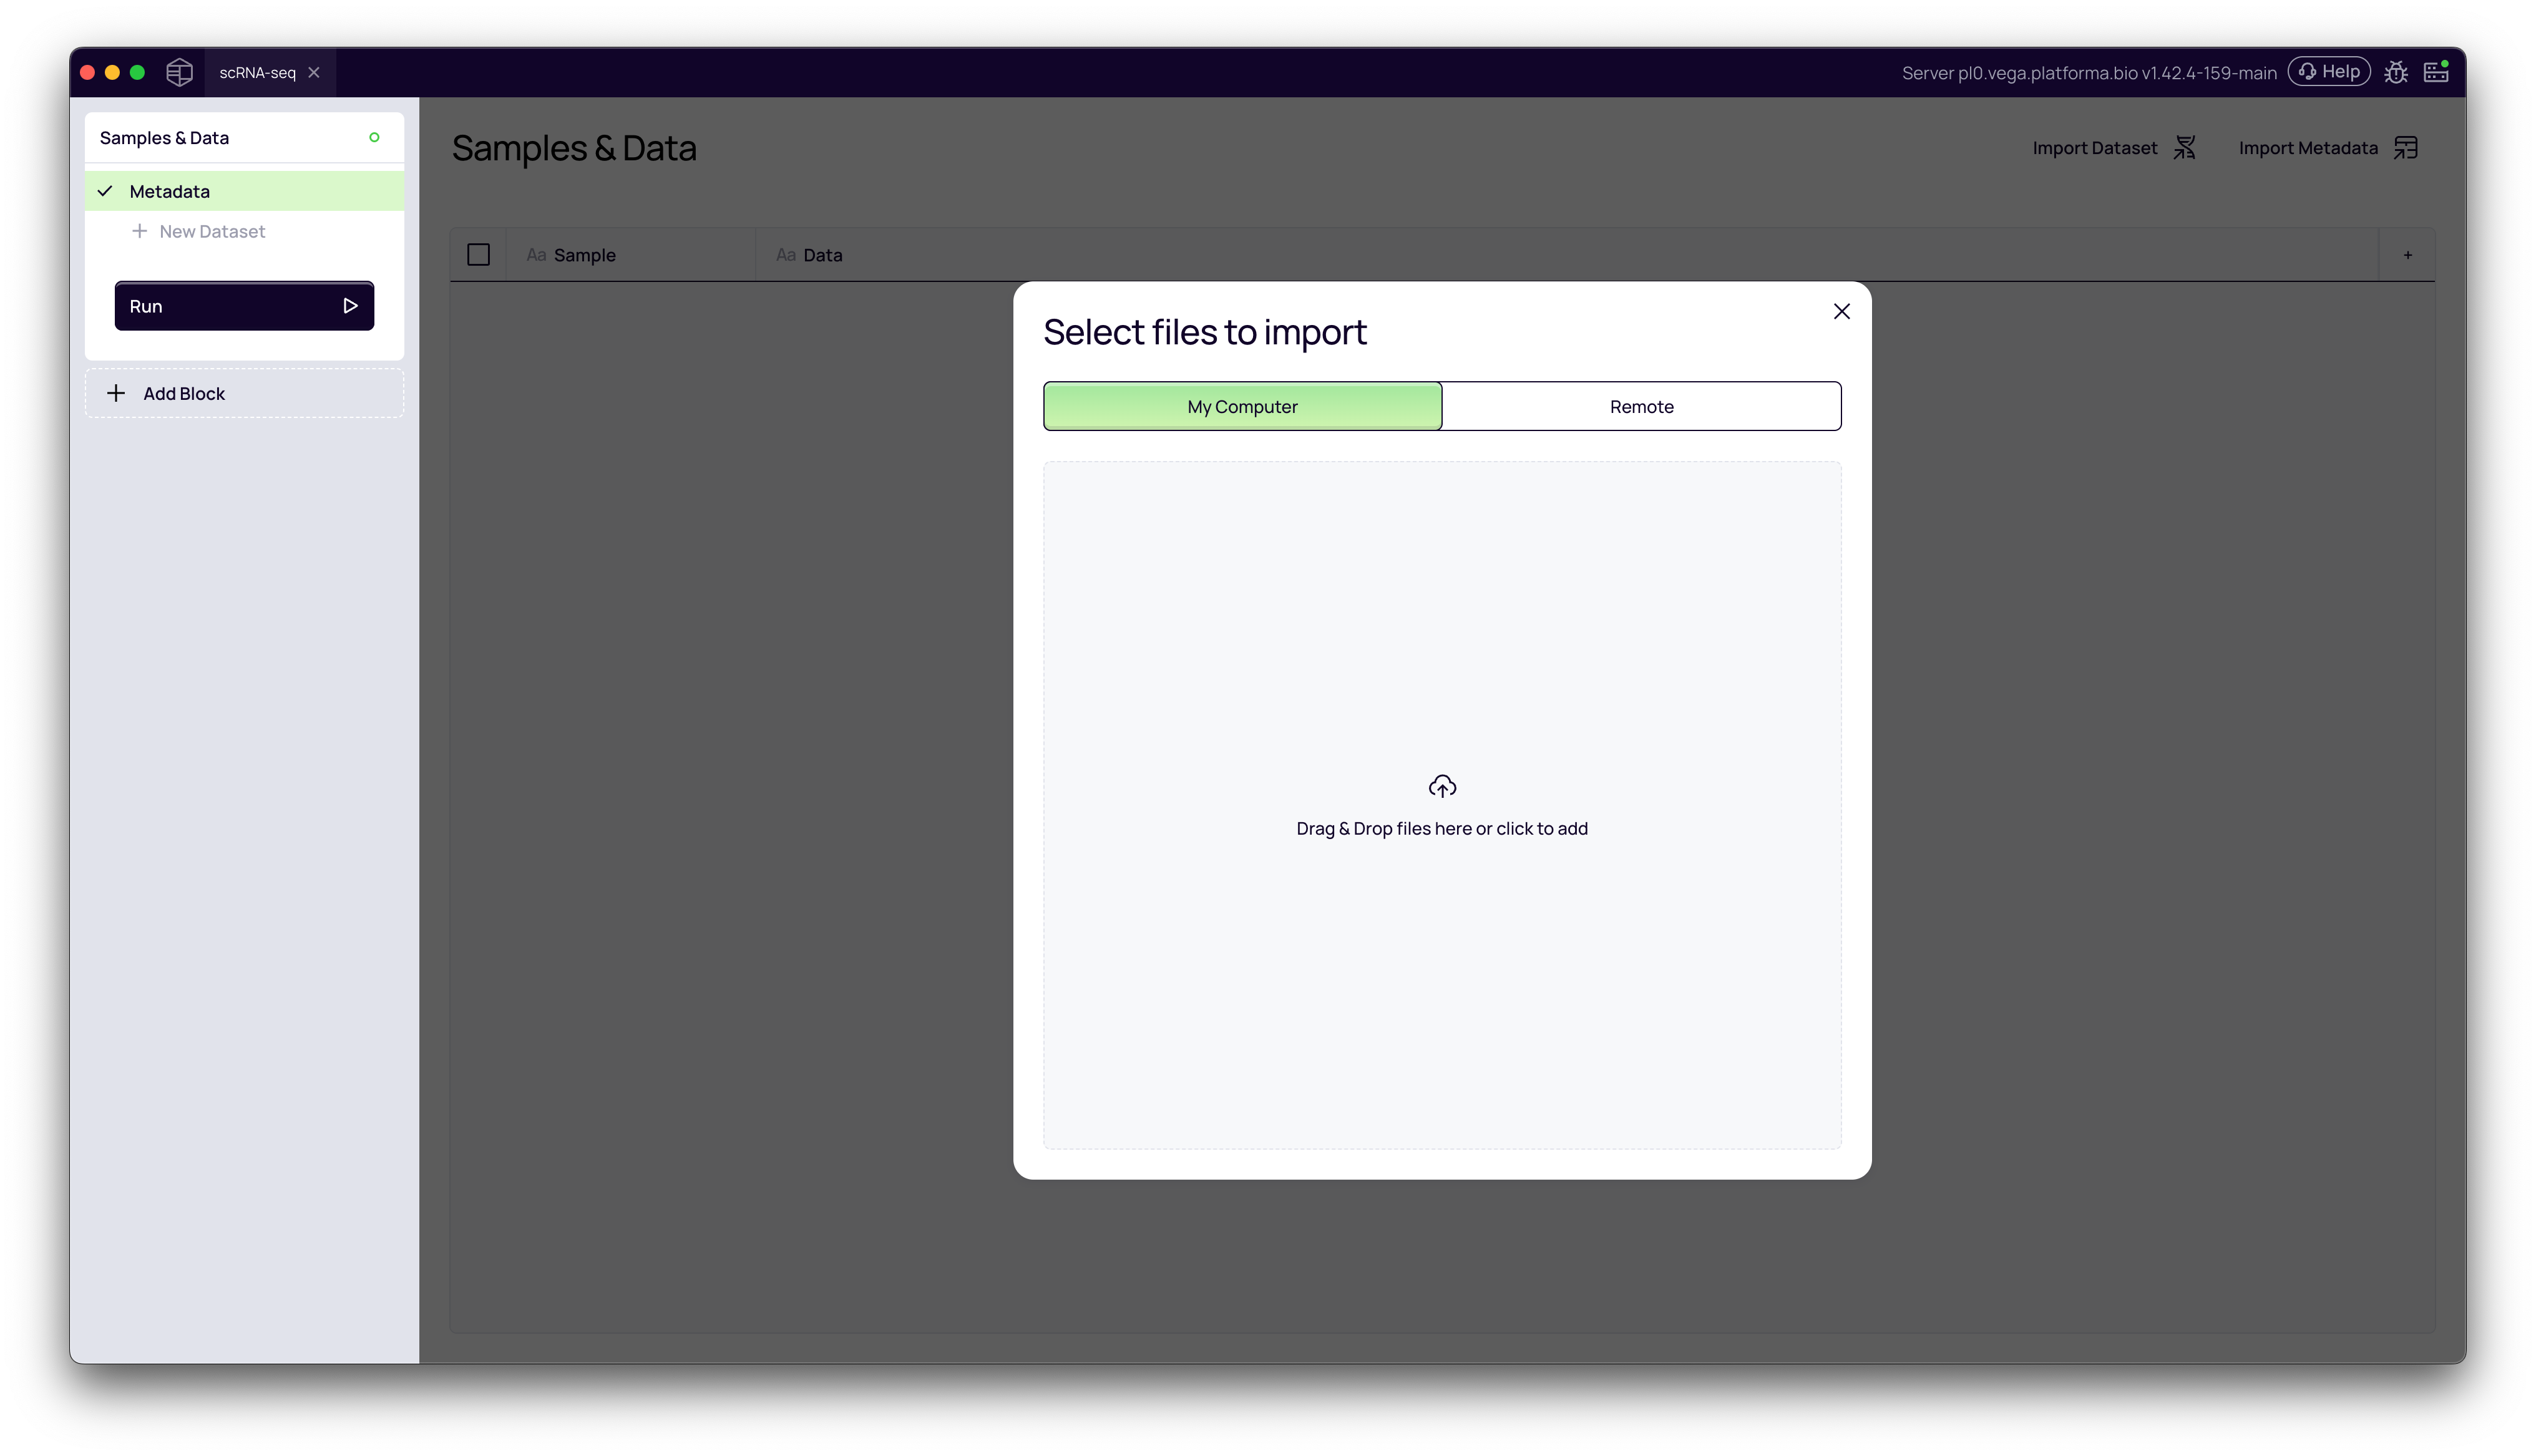
From your project's Samples & Data page, click the Import Dataset button in the top-right corner. This will open the Select files to import window.
2. Select Import Source (Remote)
You have two options for importing files:
- My Computer: For dragging and dropping files from your local machine.
- Remote: For accessing files stored on a connected server, which is common for large sequencing datasets.
In this tutorial, we will select the Remote tab.
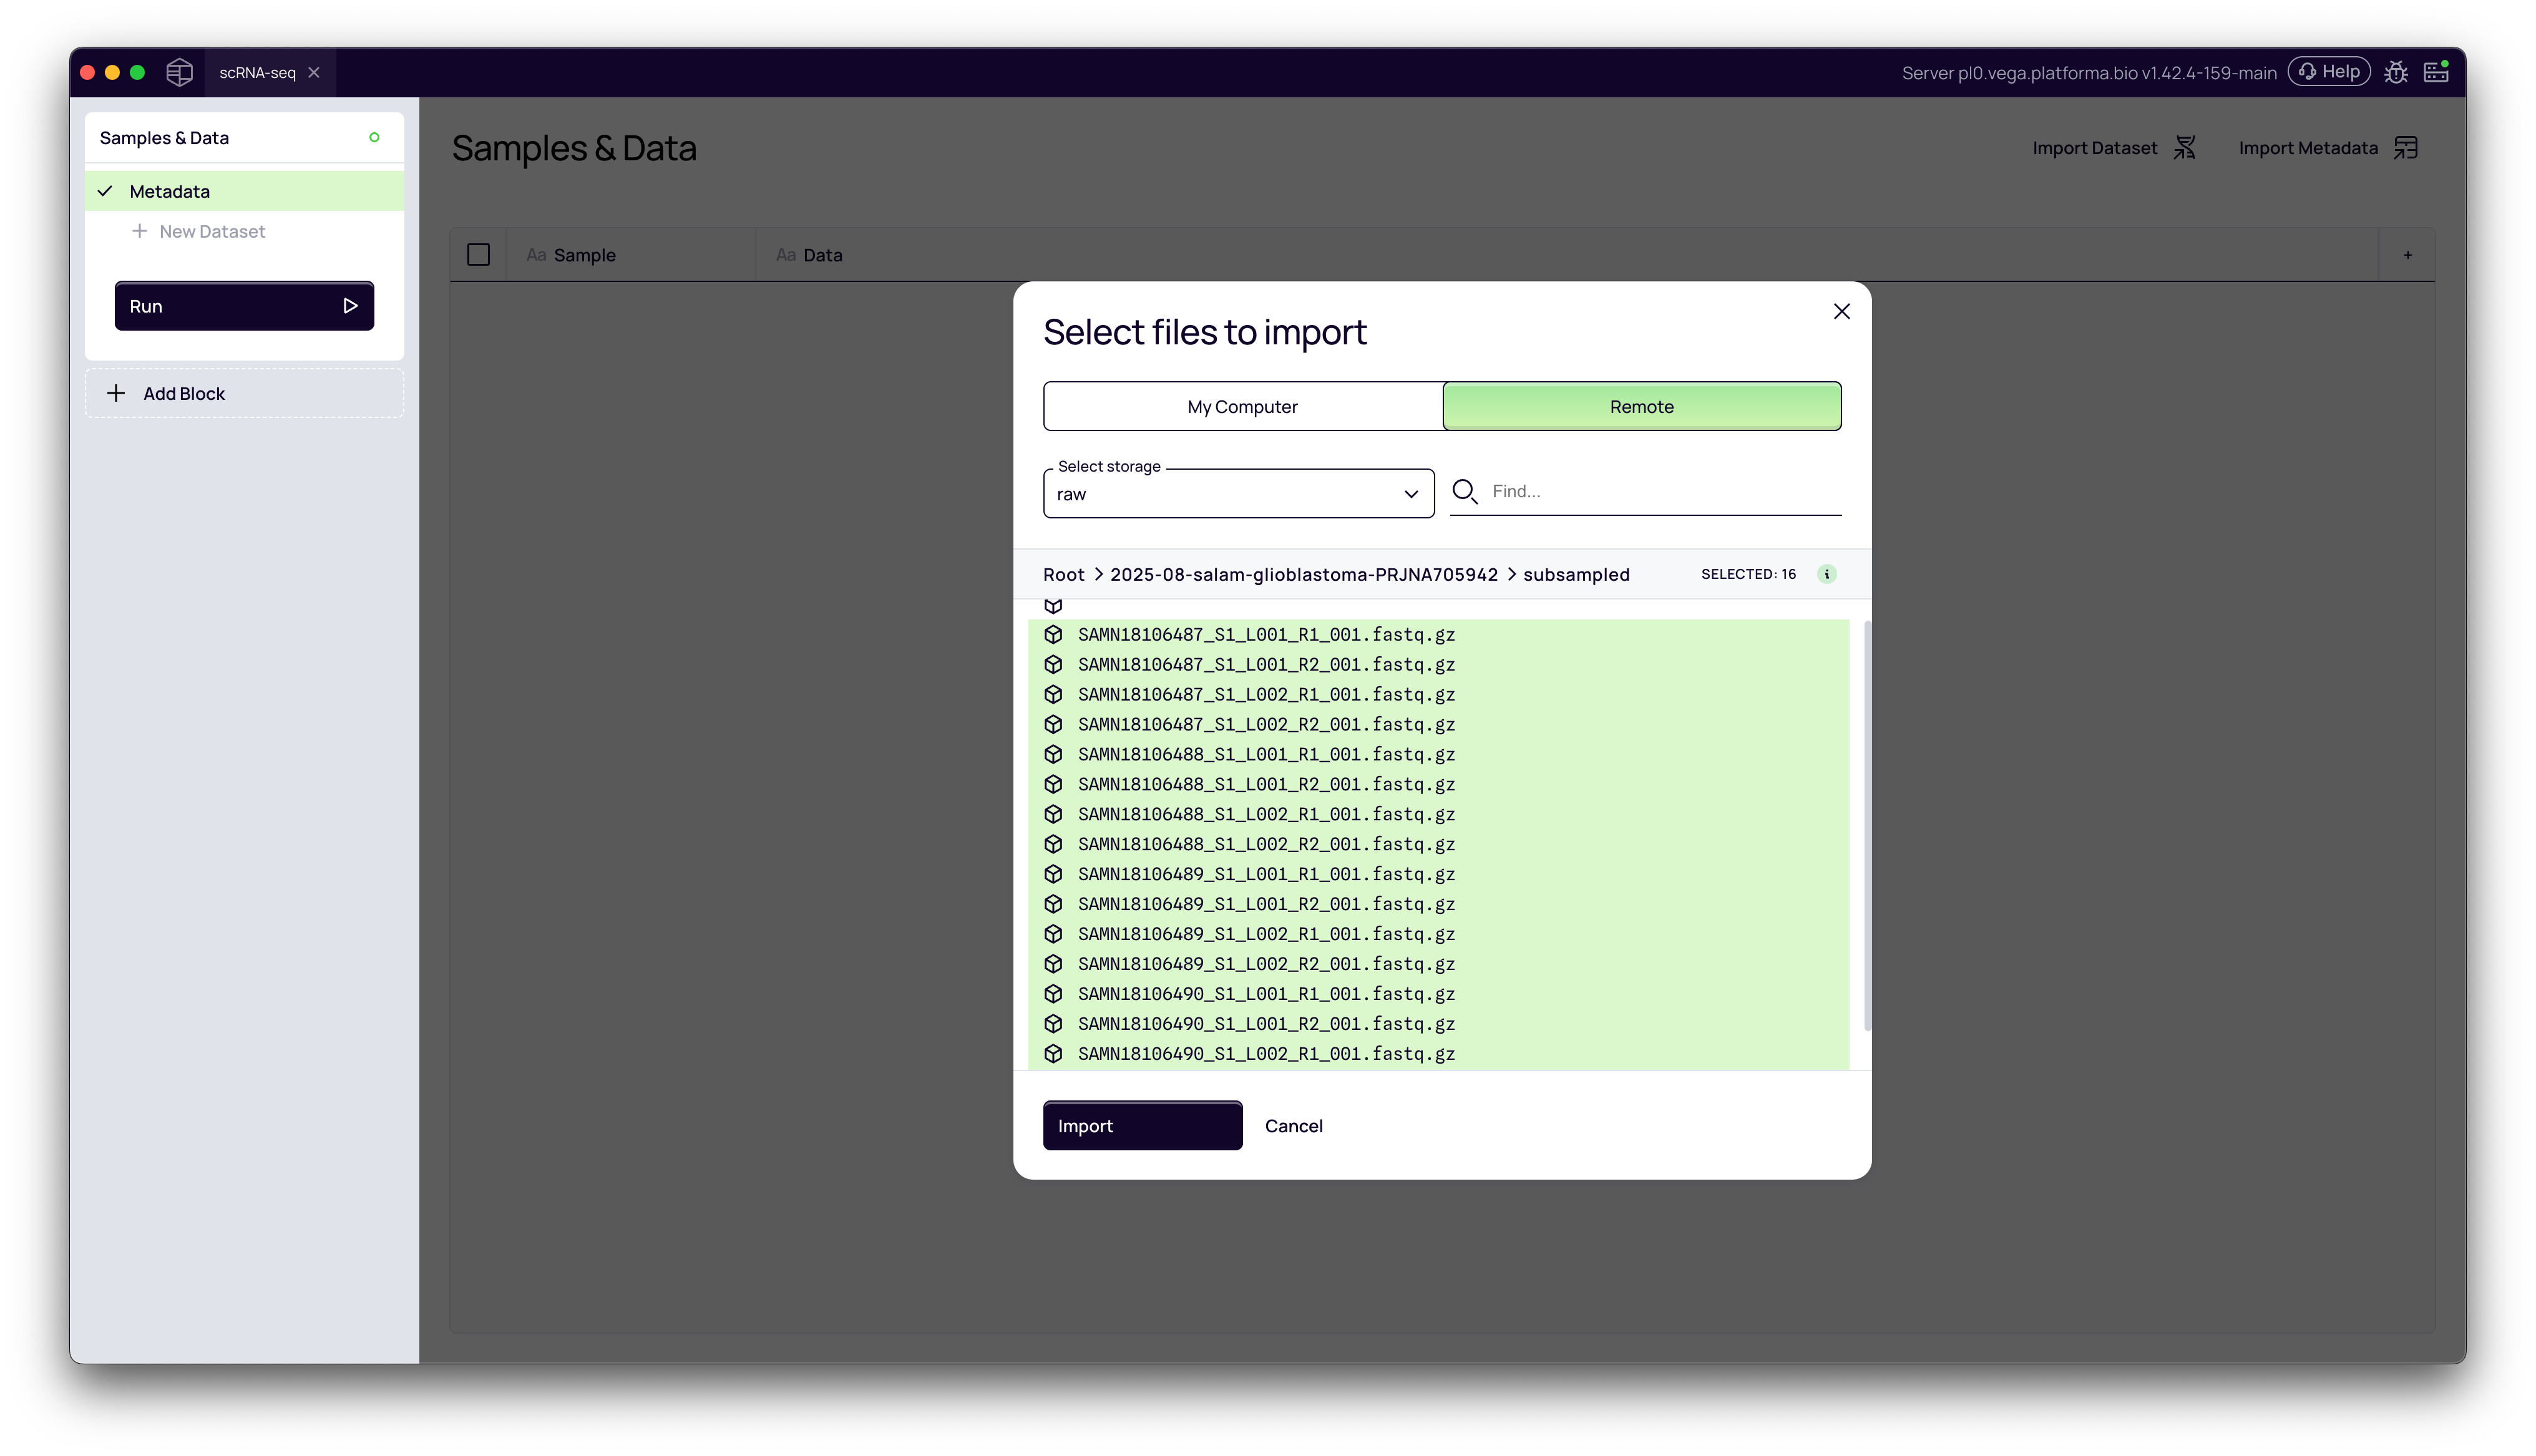
3. Navigate and Select Your Files
Use the file browser to navigate your server's directory structure to find your FASTQ files. Once in the correct folder, select all the files you wish to import and click the Import button.
2. Parsing File Names
After selecting your files, Platforma will open the Import files modal. This is a powerful tool for ensuring your files are grouped correctly.
1. Understanding the Import Files Modal
Platforma automatically attempts to parse your filenames to identify key components. It will color-code the parts it identifies:
- Green (
[Sample]): The part of the name identified as the unique sample identifier. - Purple (
[Lane]): The part identified as the sequencing lane (e.g.,L001,L002). Platforma will automatically group files from different lanes that share the same sample name. - Red (
[Read]): The part identified as the read pair (e.g.,R1,R2).
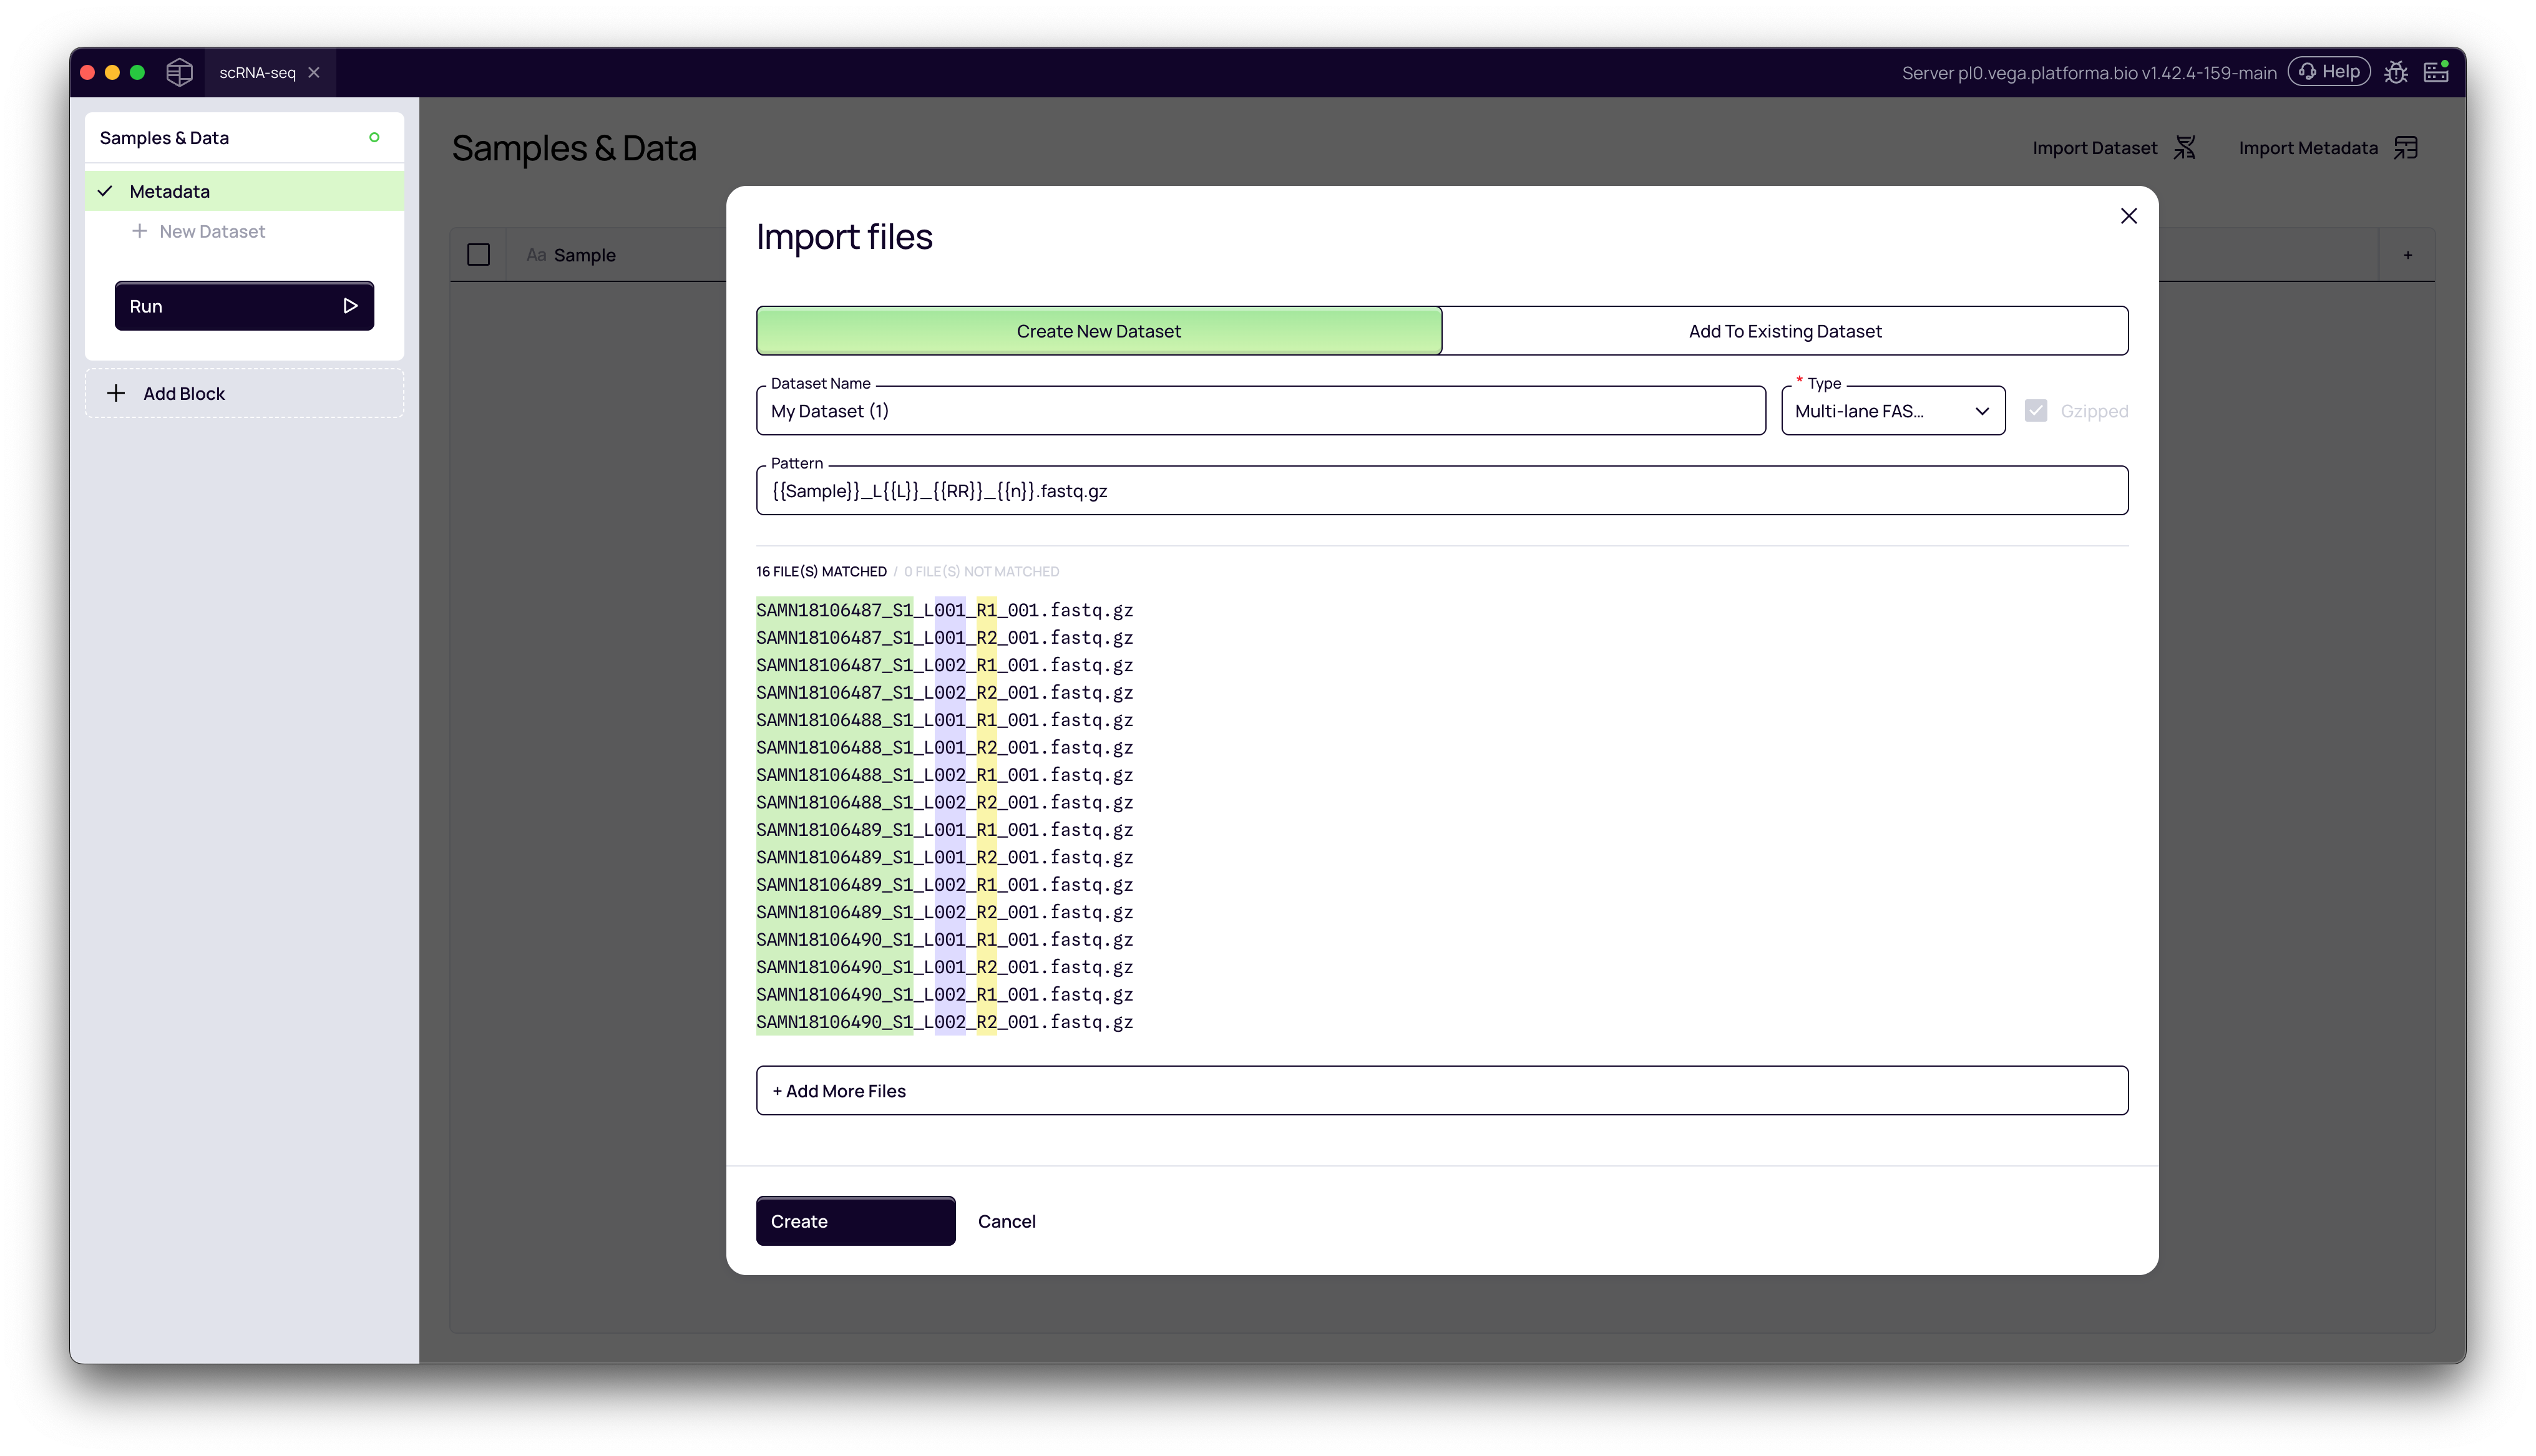
2. Customizing the Parsing Pattern
In some cases, the default parsing may not be perfect. For example, our filenames are in the format SAMN18106487_S1_L001_R1_001.fastq.gz. Platforma correctly identifies SAMN18106487_S1 as the sample, but we want our sample name to be just SAMN18106487.
We can fix this by editing the Pattern field:
-
Locate the part of the pattern corresponding to the part you want to skip. The default pattern might be:
{{Sample}}_L{{L}}_{{R}}_{{n}}.fastq.gz(Note: In the video, the initial parse was{{Sample}}_L{{L}}...where{{Sample}}wasSAMN18106487_S1) -
To skip a part of the filename, replace its position in the pattern with
{{*}}. The{{*}}acts as a "skip" wildcard. In our example we want to skip the text surrounded by_after the actual sample name and before letterLwhich is followed by the lane number. -
Our final, corrected pattern is:
{{Sample}}_{{*}}_L{{L}}_{{R}}_{{n}}.fastq.gz
As you edit the pattern, the Files Matched list below will update in real-time, allowing you to confirm your sample names are correct before proceeding.
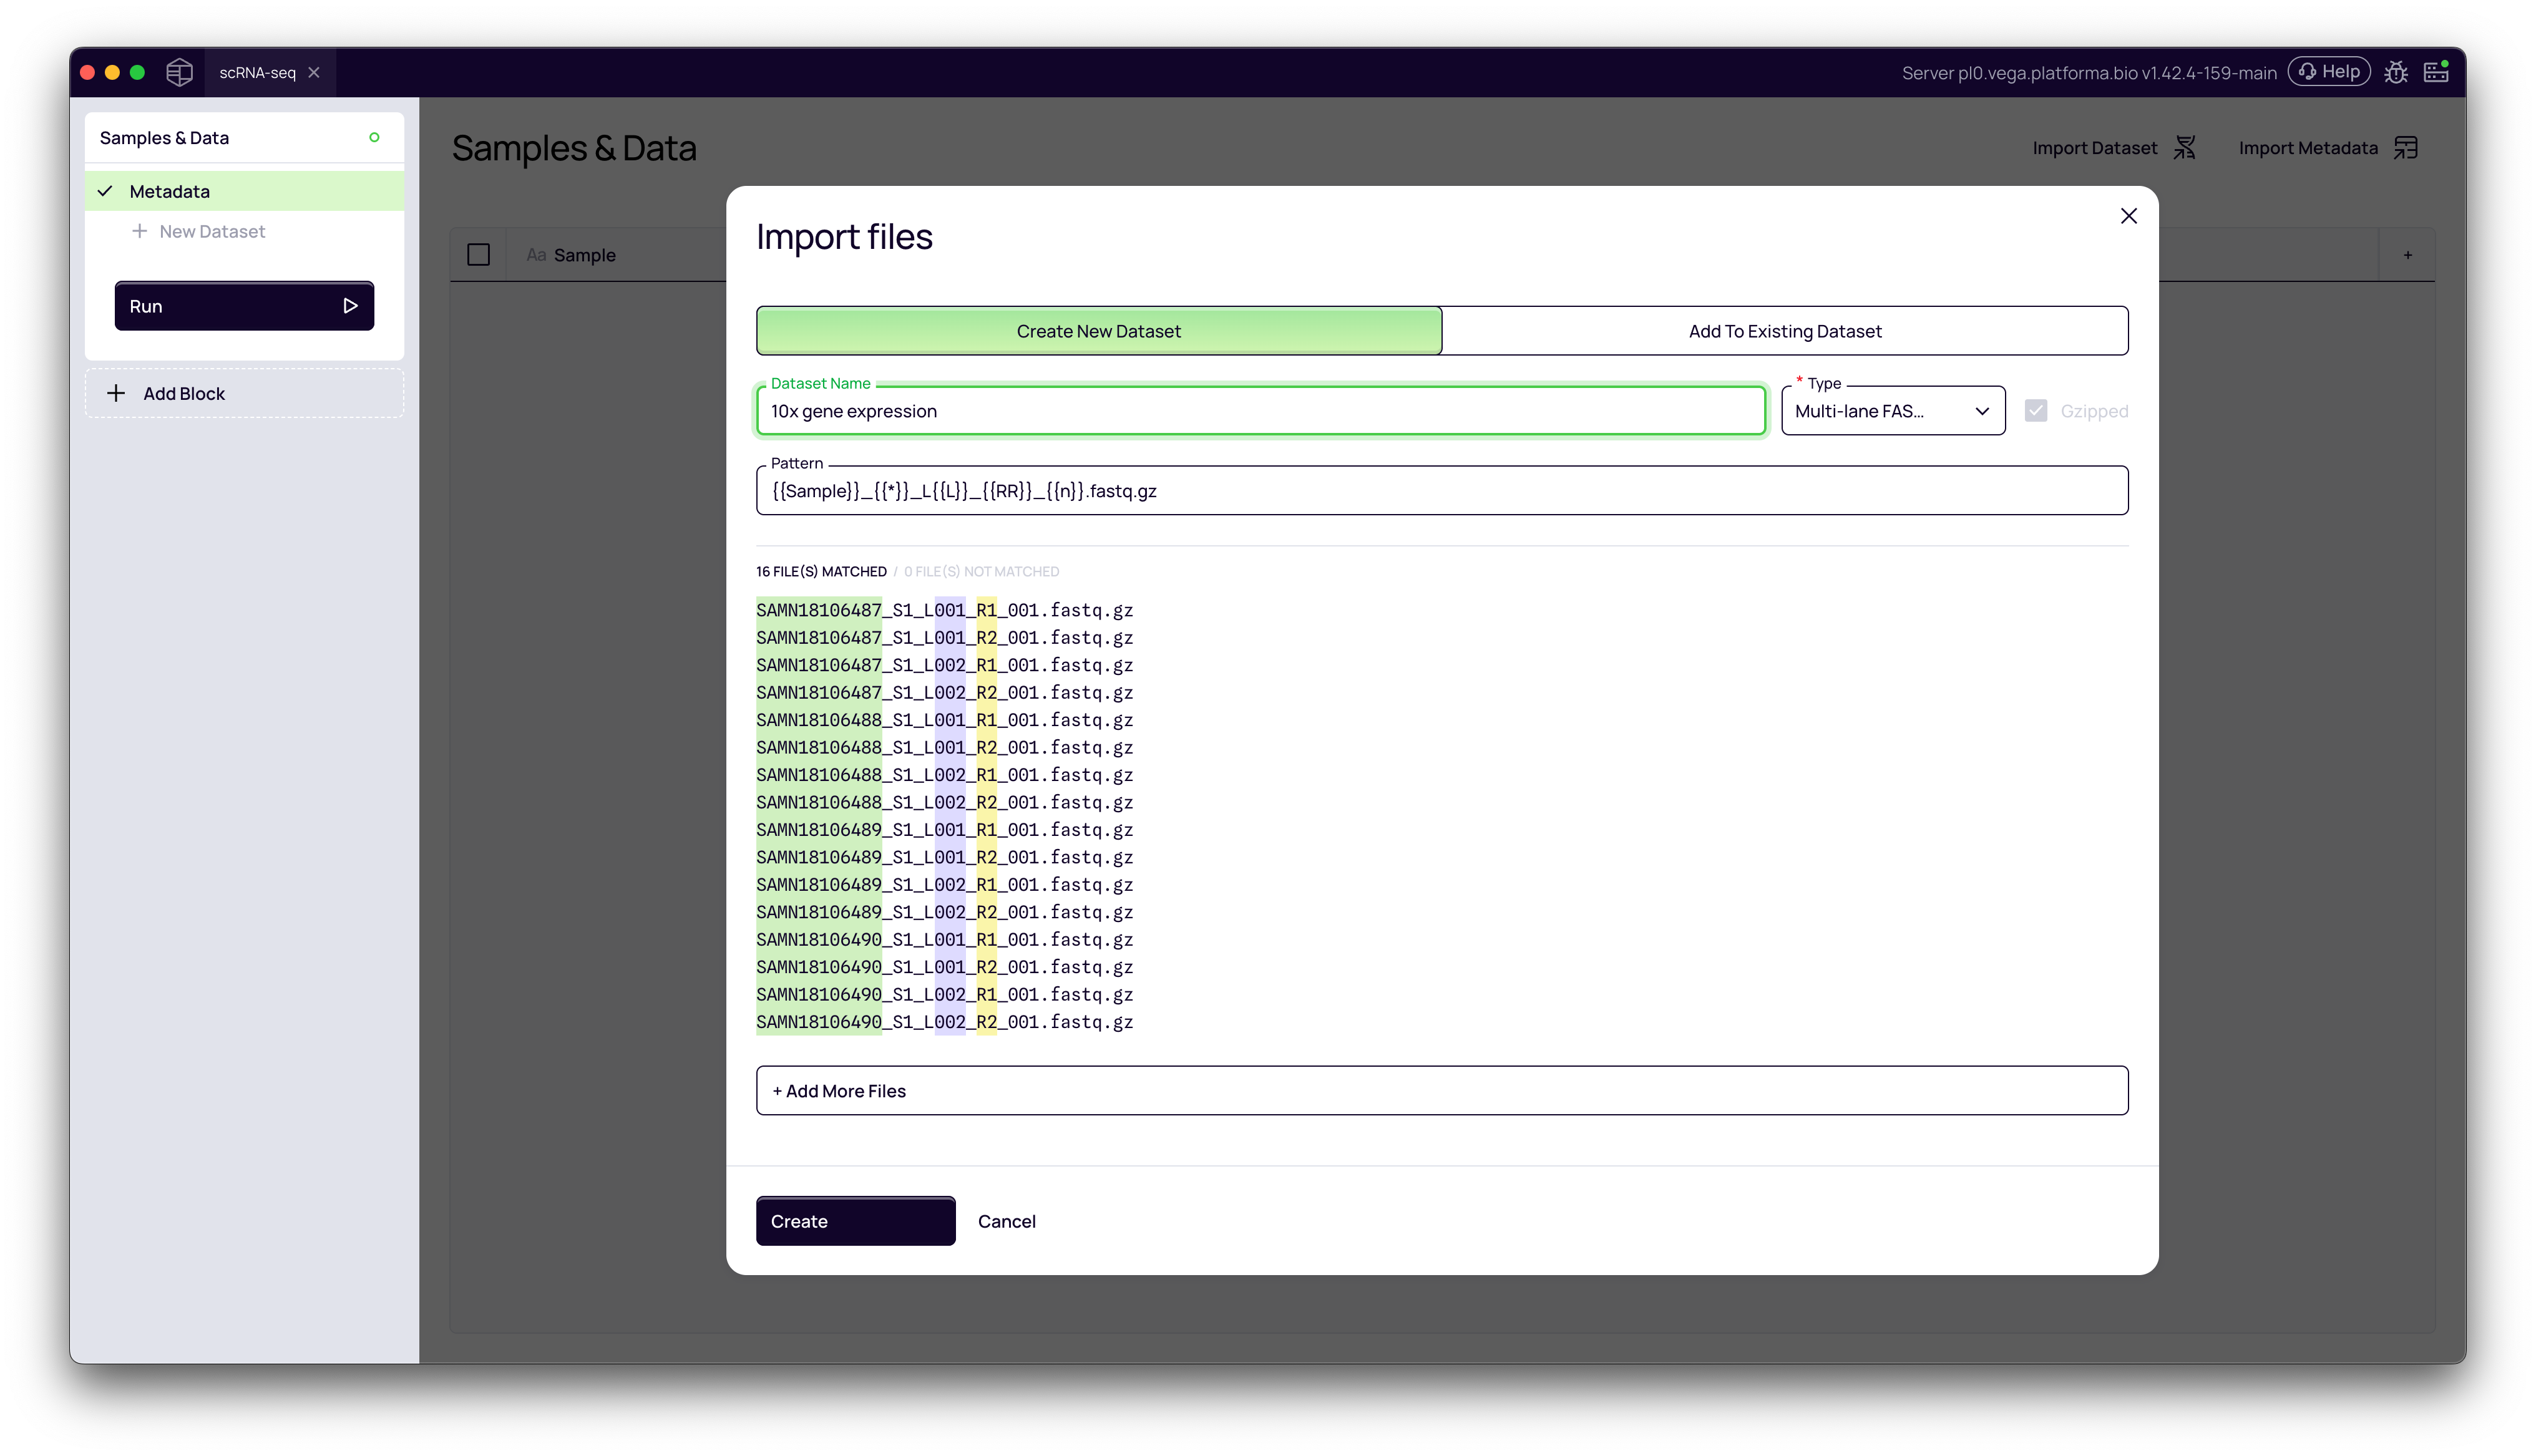
3. Finalizing the Dataset
Give your dataset a descriptive name in the Dataset name field (e.g., "10x gene expression") and click Create.
3. Reviewing and Importing Metadata
Your data is now imported, but to get the most out of your analysis, you should add your experimental metadata.
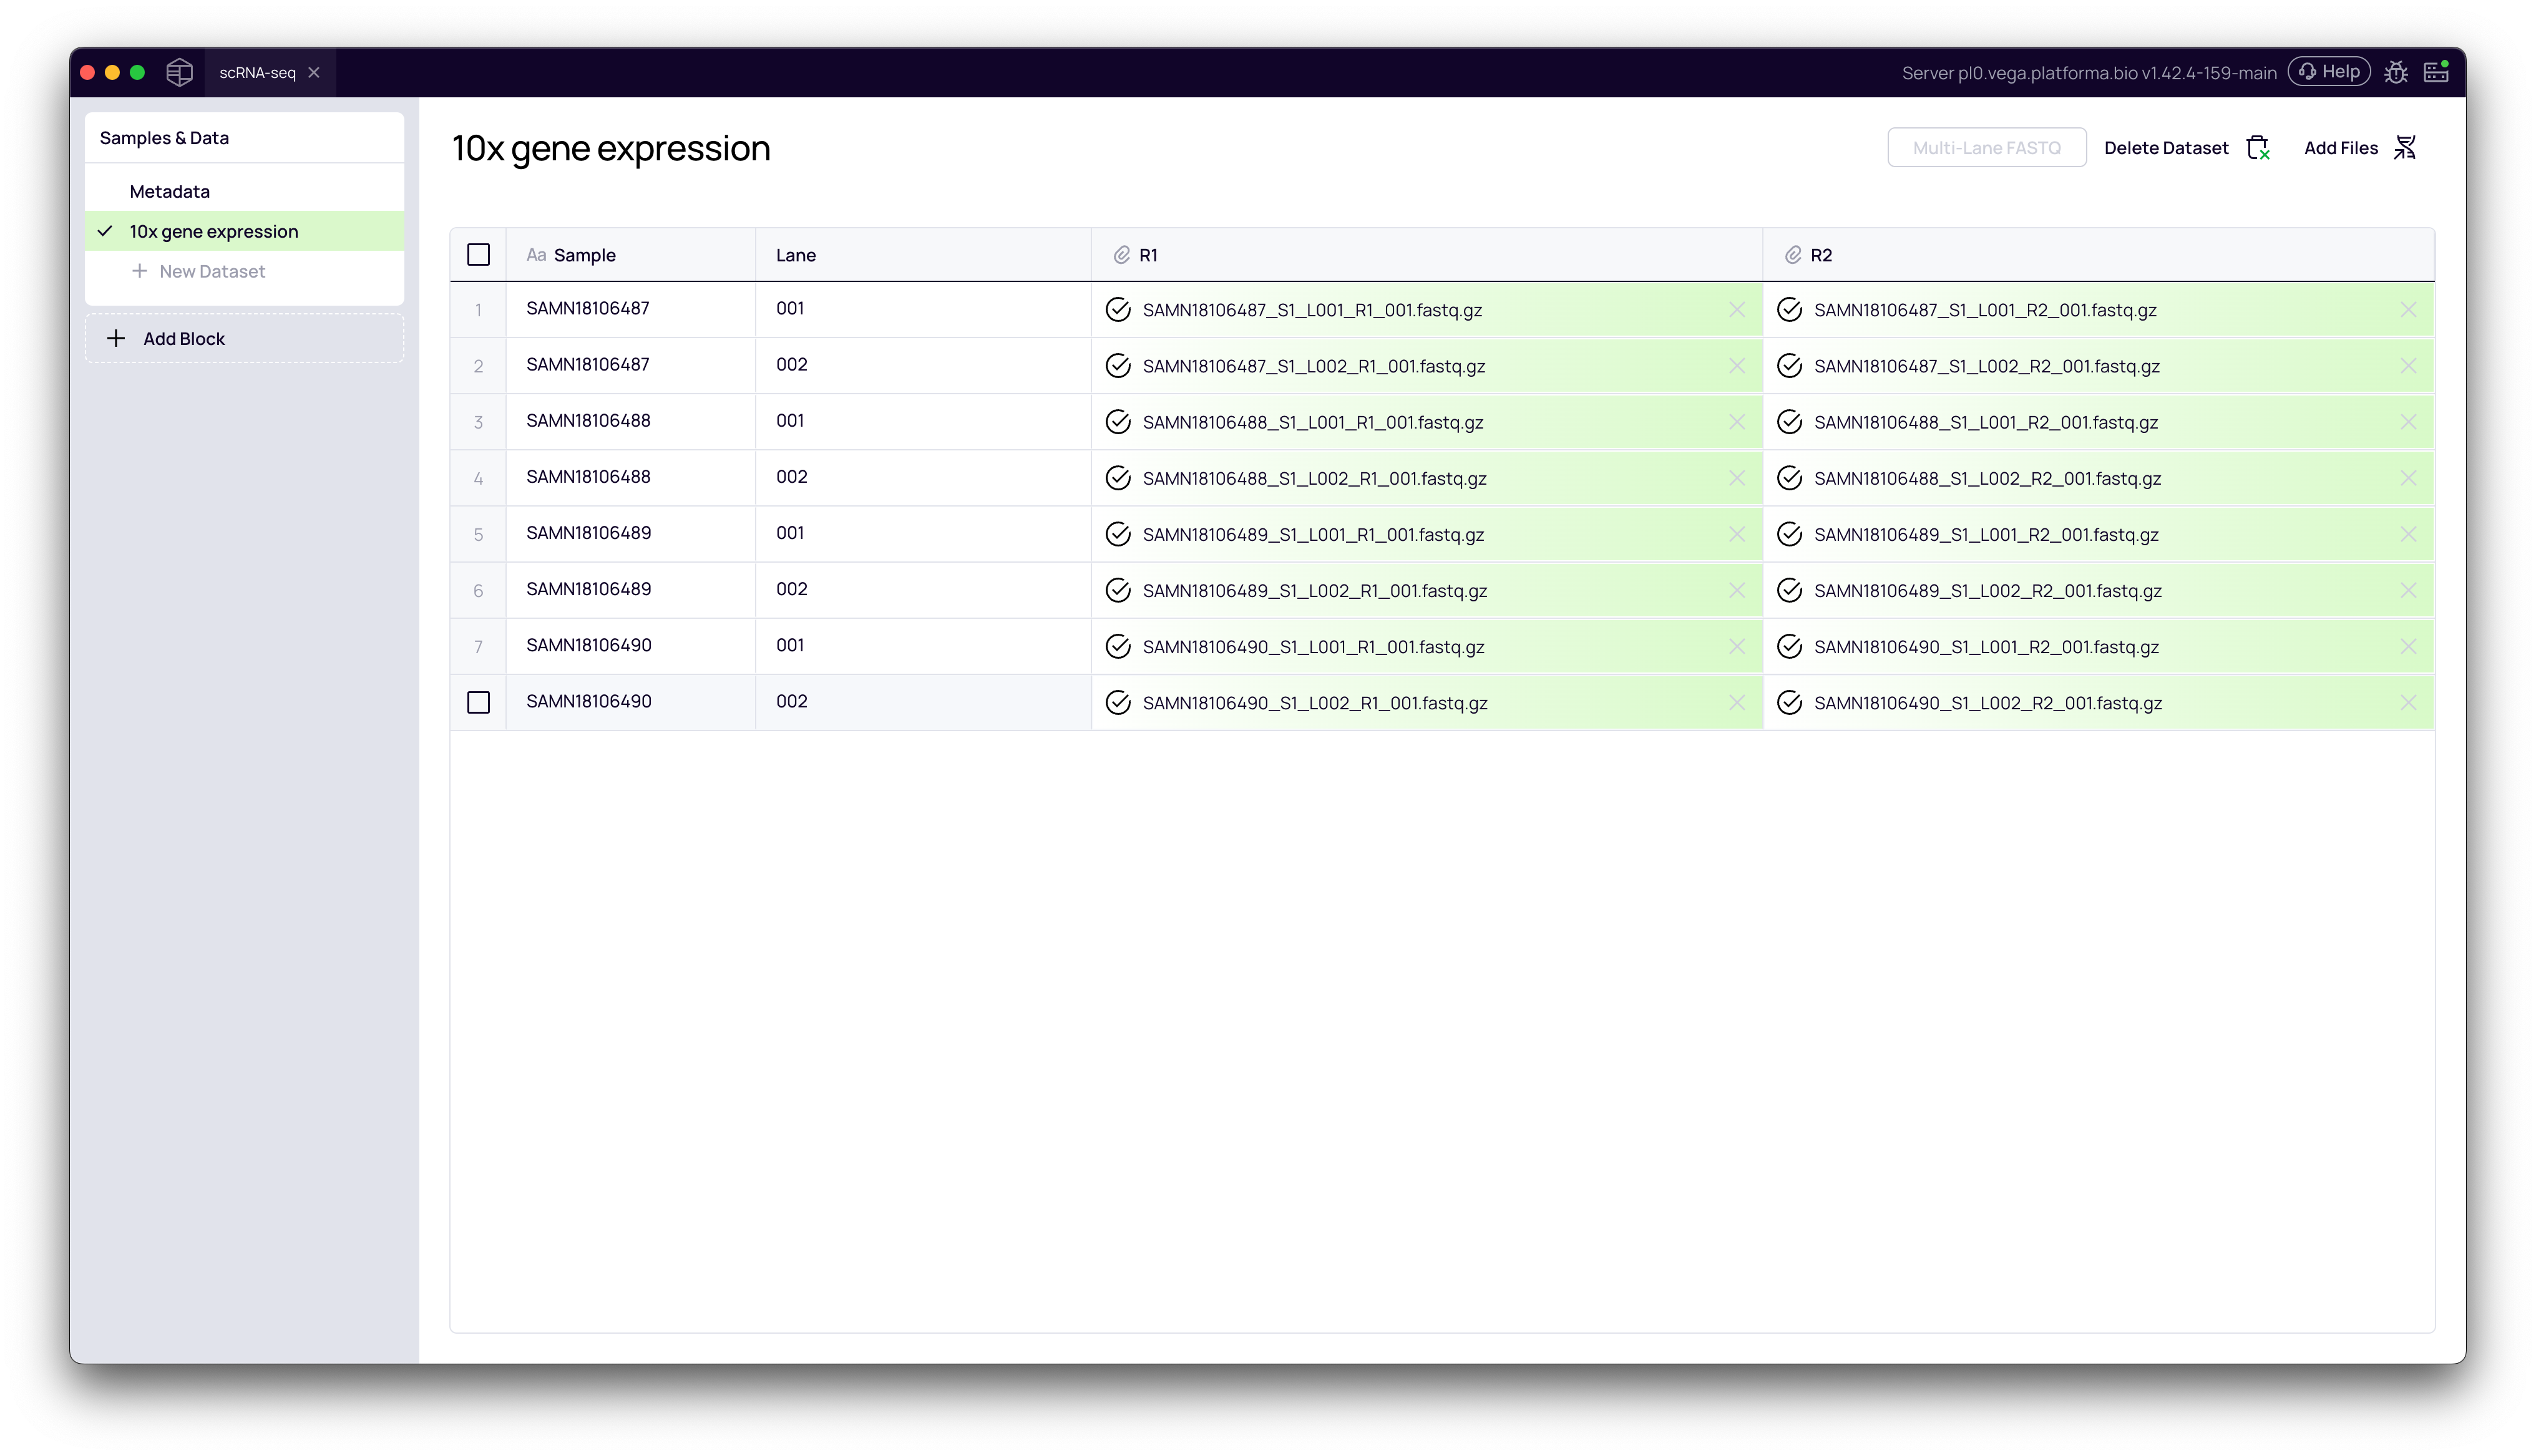
1. Reviewing the Imported Data
Back on the Samples & Data page, you will see your new dataset. If you click on it, you'll see a table of your files. Notice how the files for L001 and L002 are correctly grouped under their respective sample names (e.g., SAMN18106487).

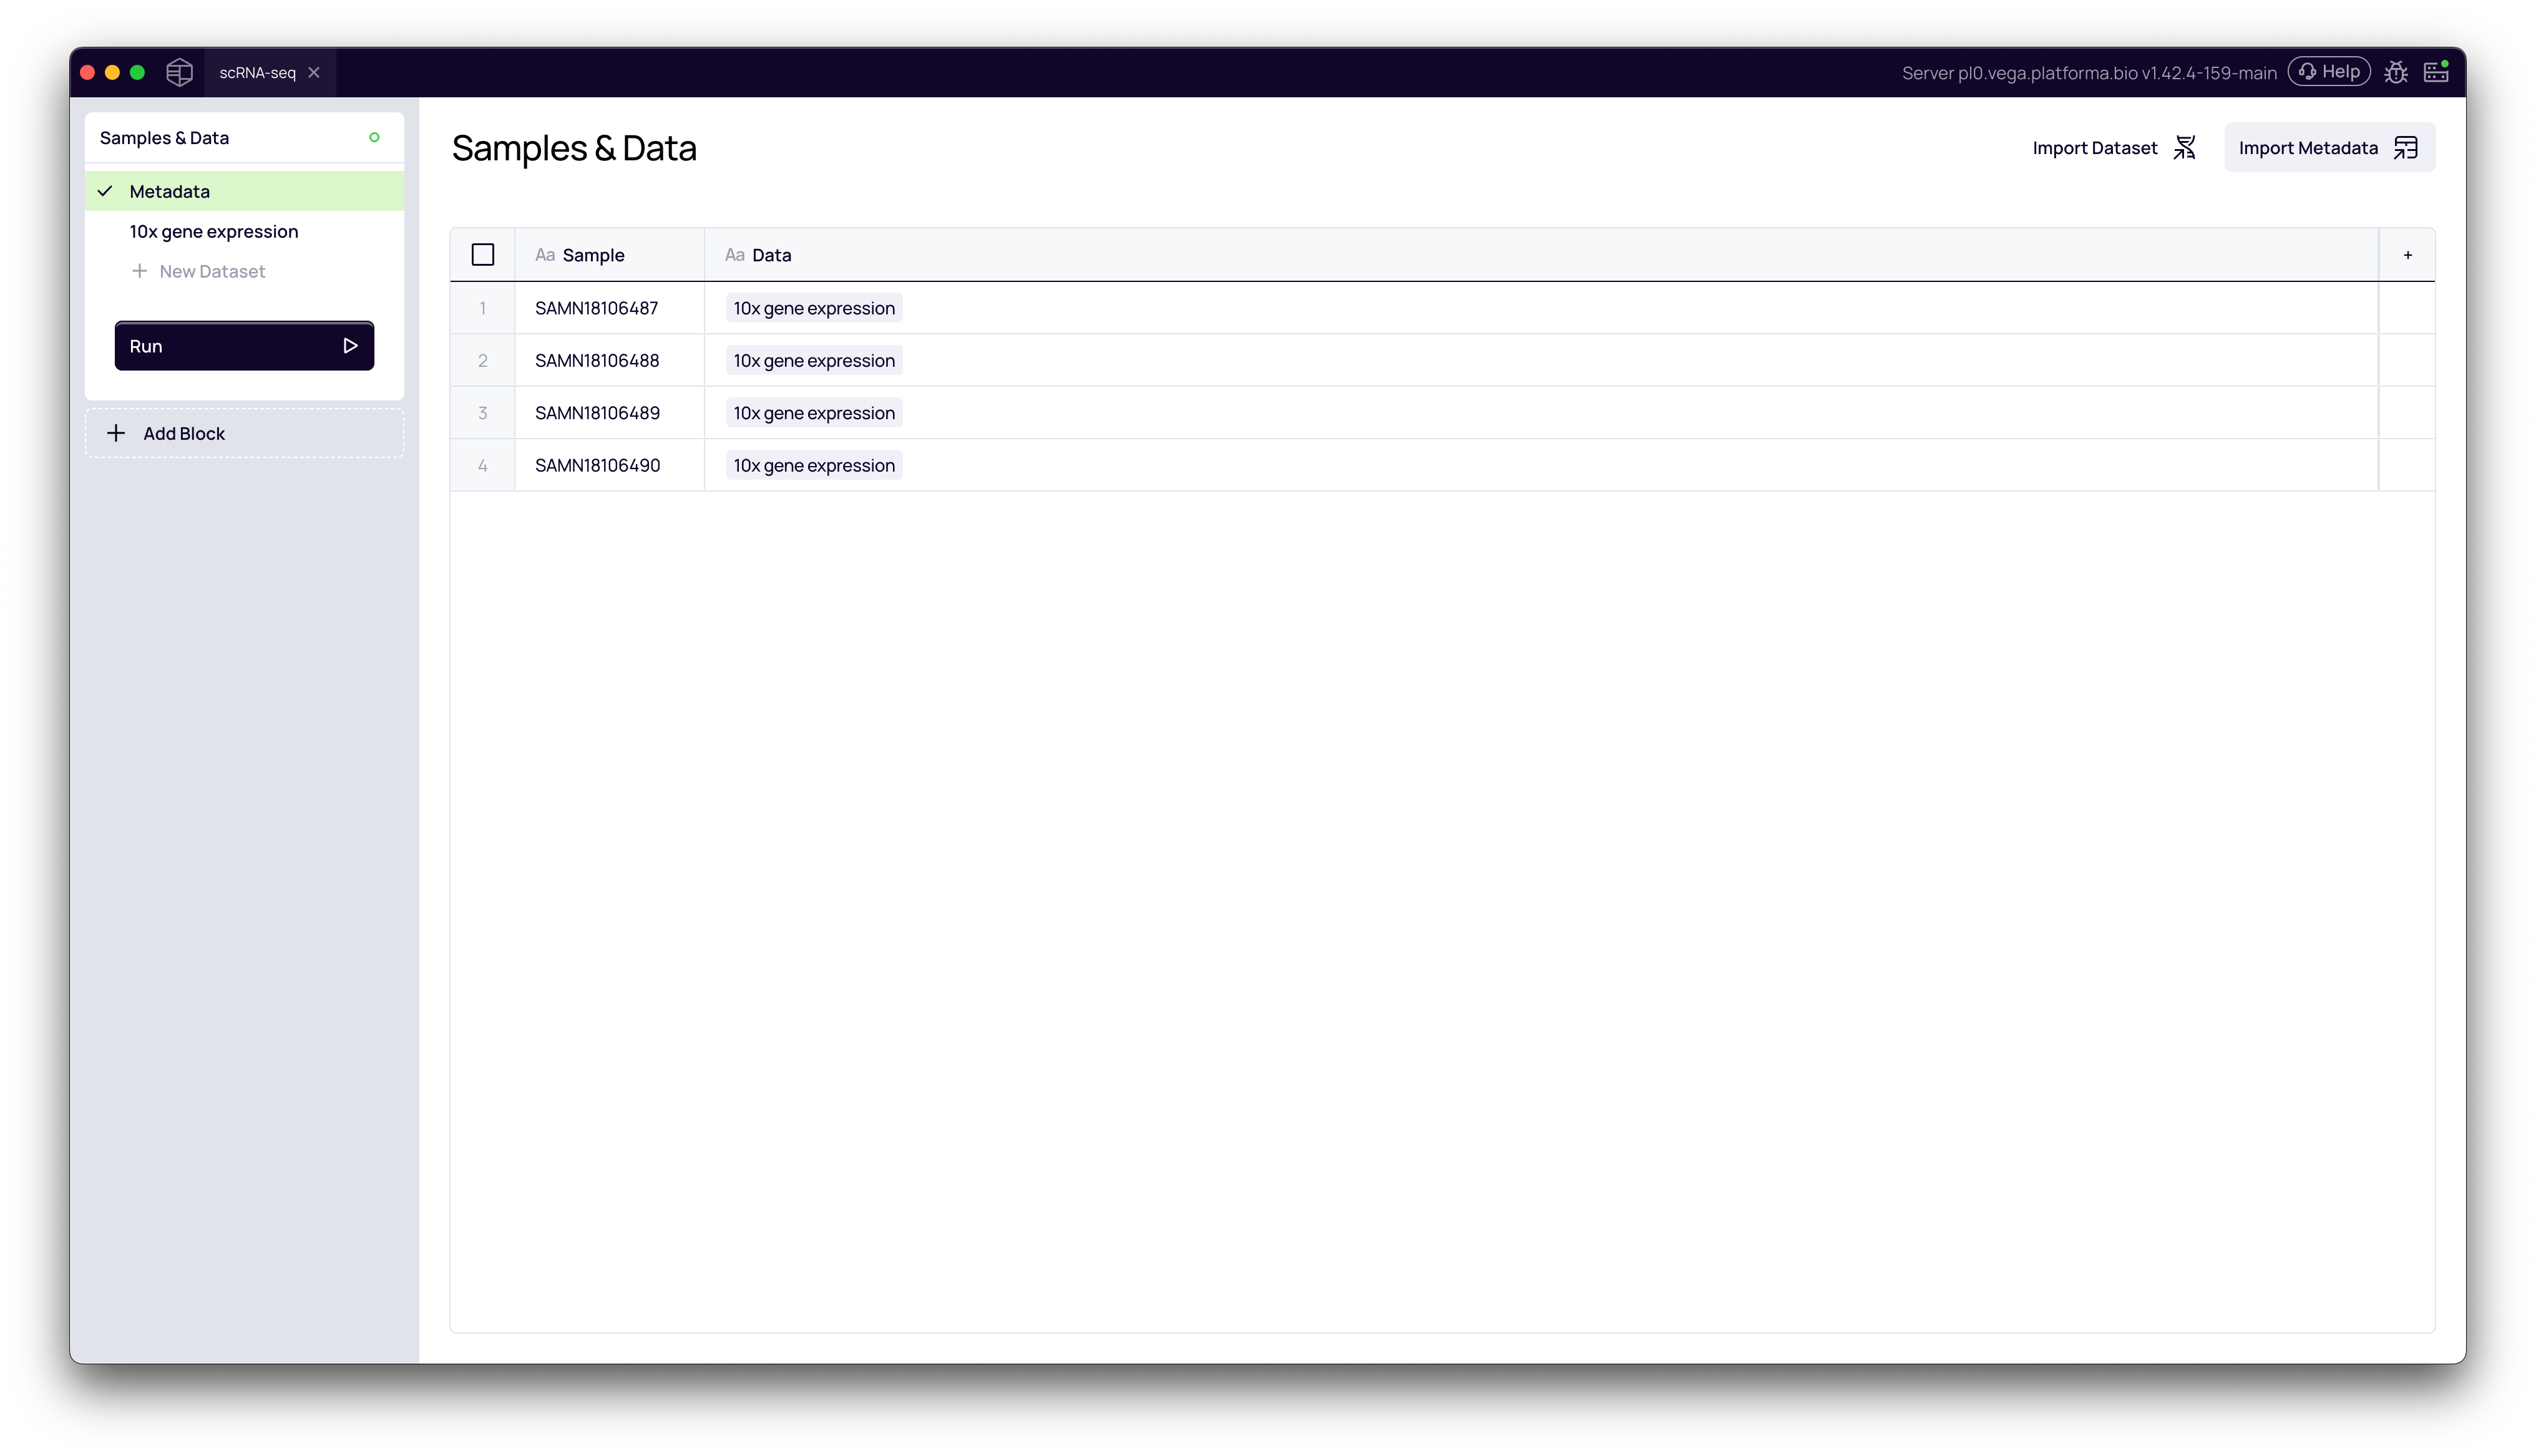
2. Navigate to the Metadata Tab
In the left-hand navigation pane, click on Metadata. This page will list all the samples you just imported, but there is no metadata yet.
3. Import Your Metadata File
- In the top-right corner, click Import Metadata.
- Select your metadata file (e.g.,
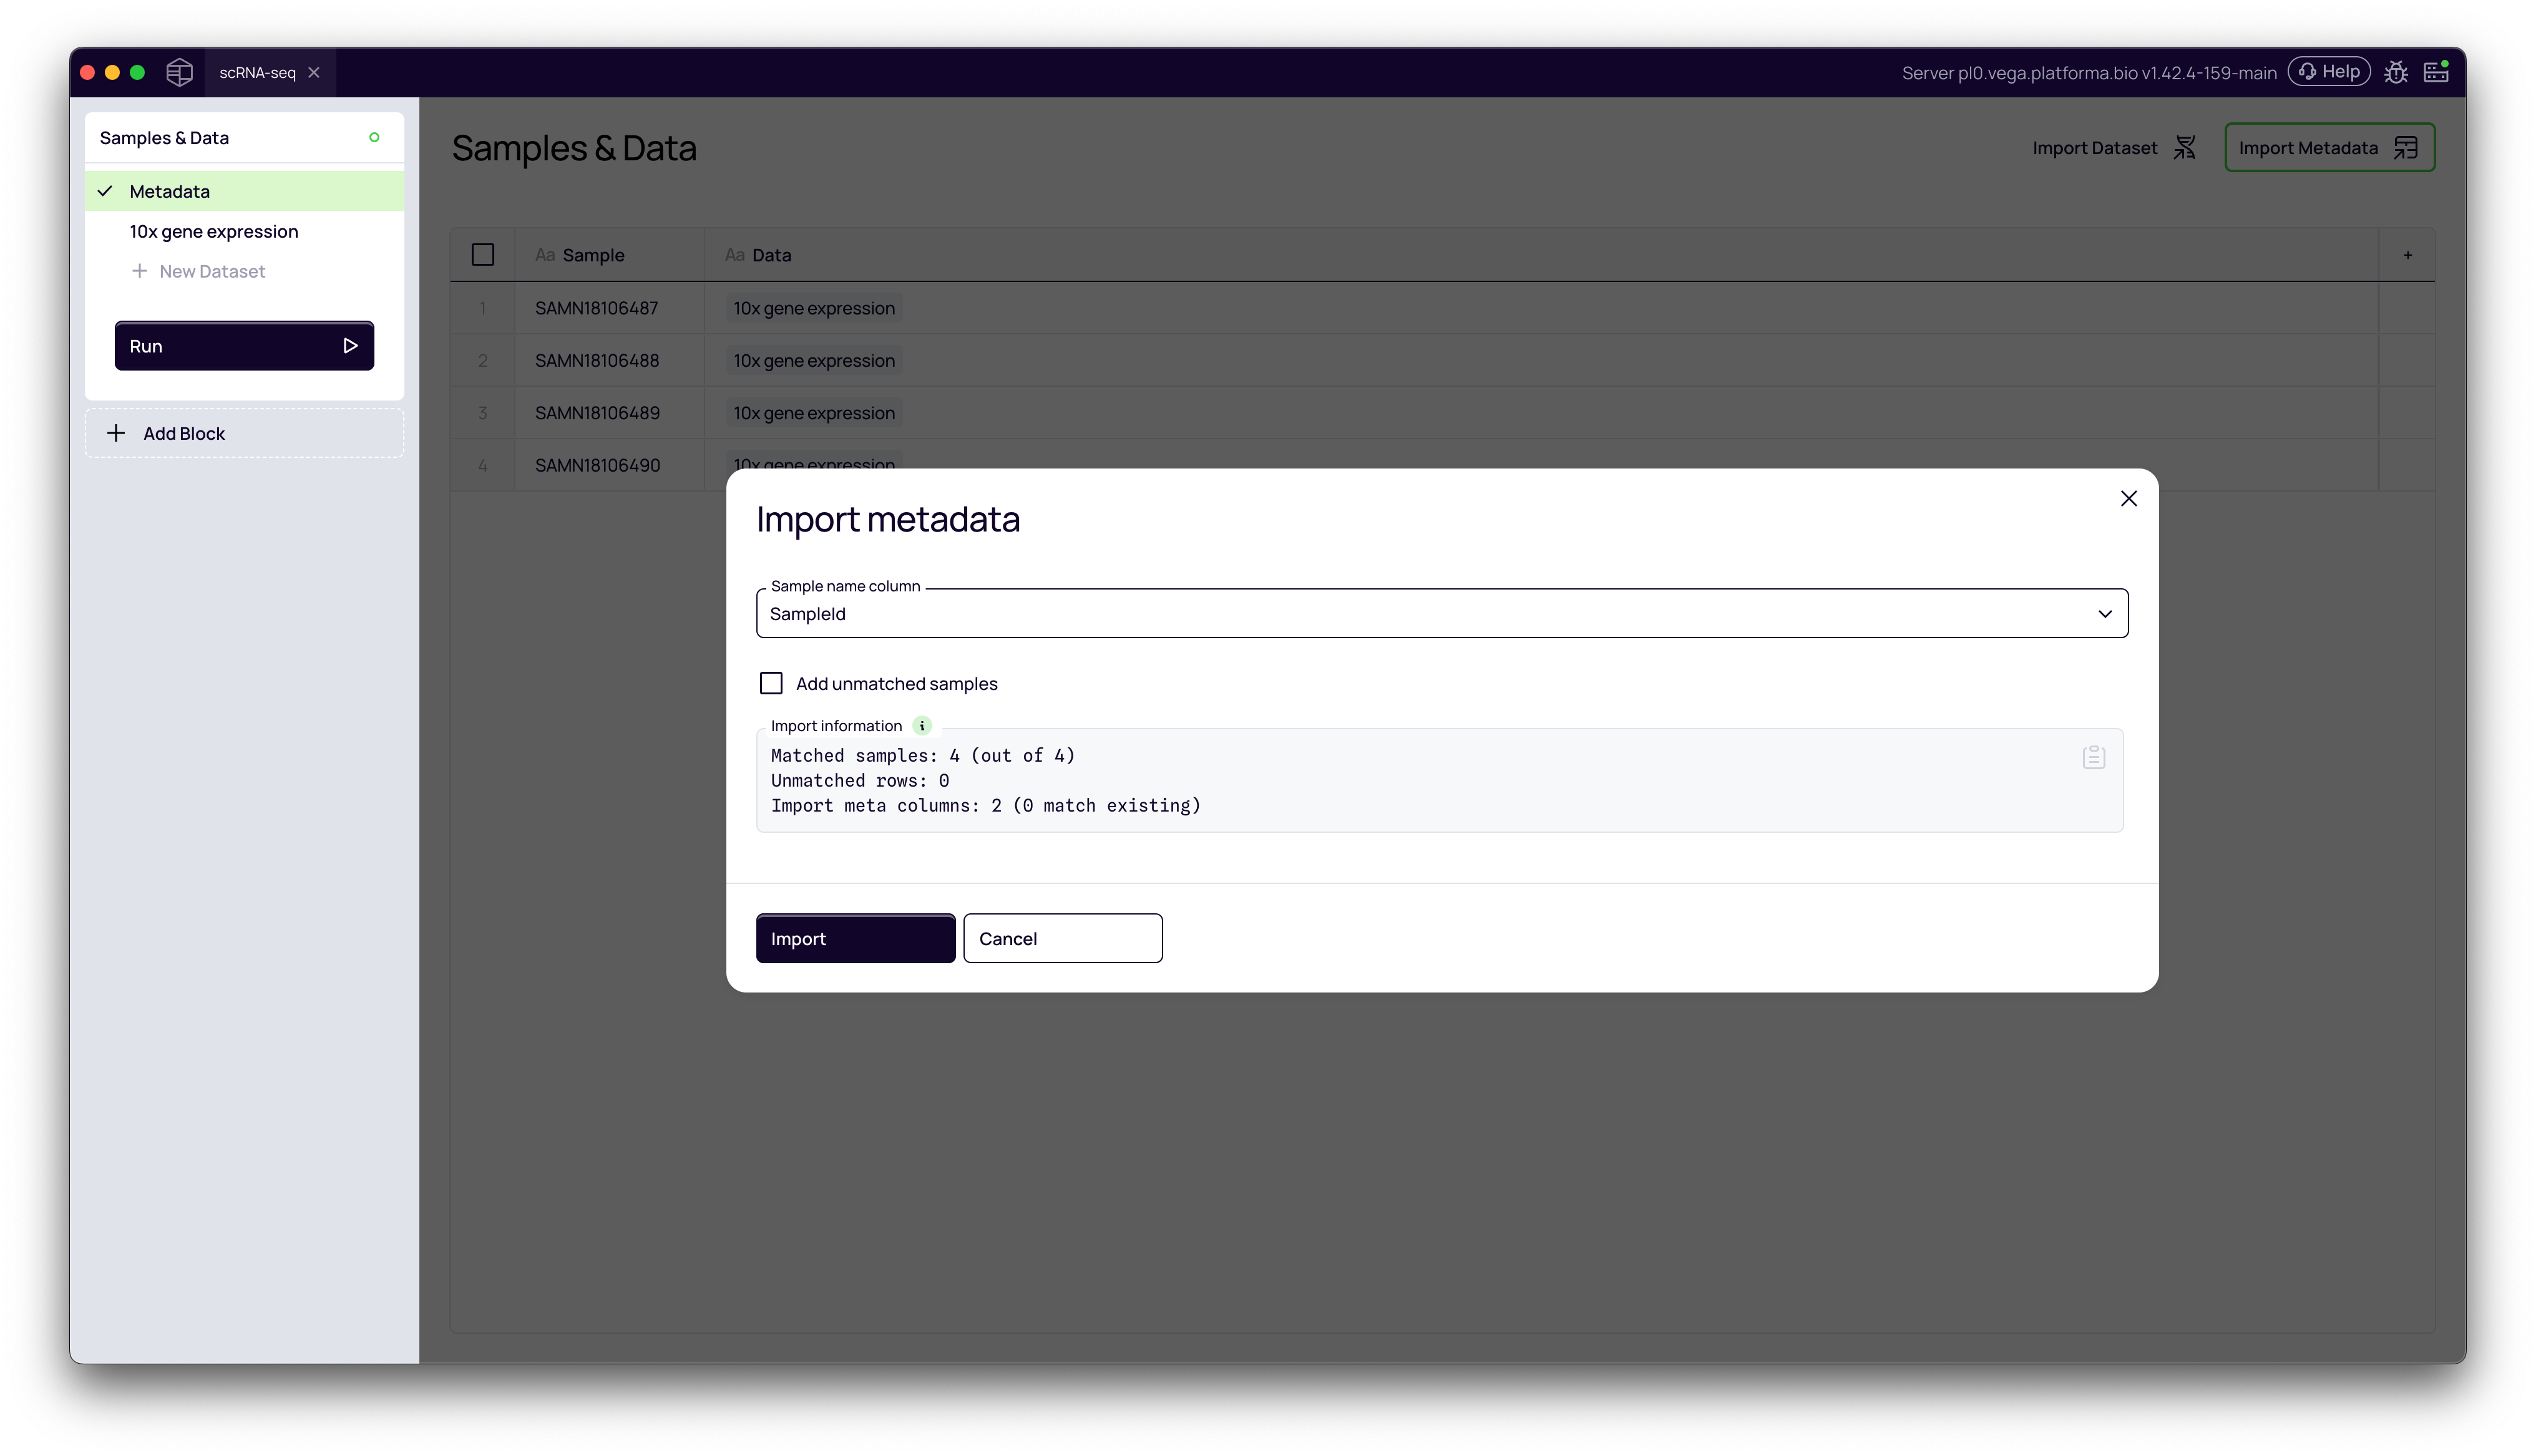
Metadata.csv) from your computer. - The Import metadata modal will appear.
4. Map Metadata to Samples
You must tell Platforma which column in your metadata file contains the sample names. In most cases it will happen automatically.
- Click the Sample name column dropdown.
- Select the column header from your file that matches the sample names you defined in Step 5 (in our case,
SampleID). - Platforma will confirm the match (e.g., "Matched samples: 4 (out of 4)").
- Click Import.
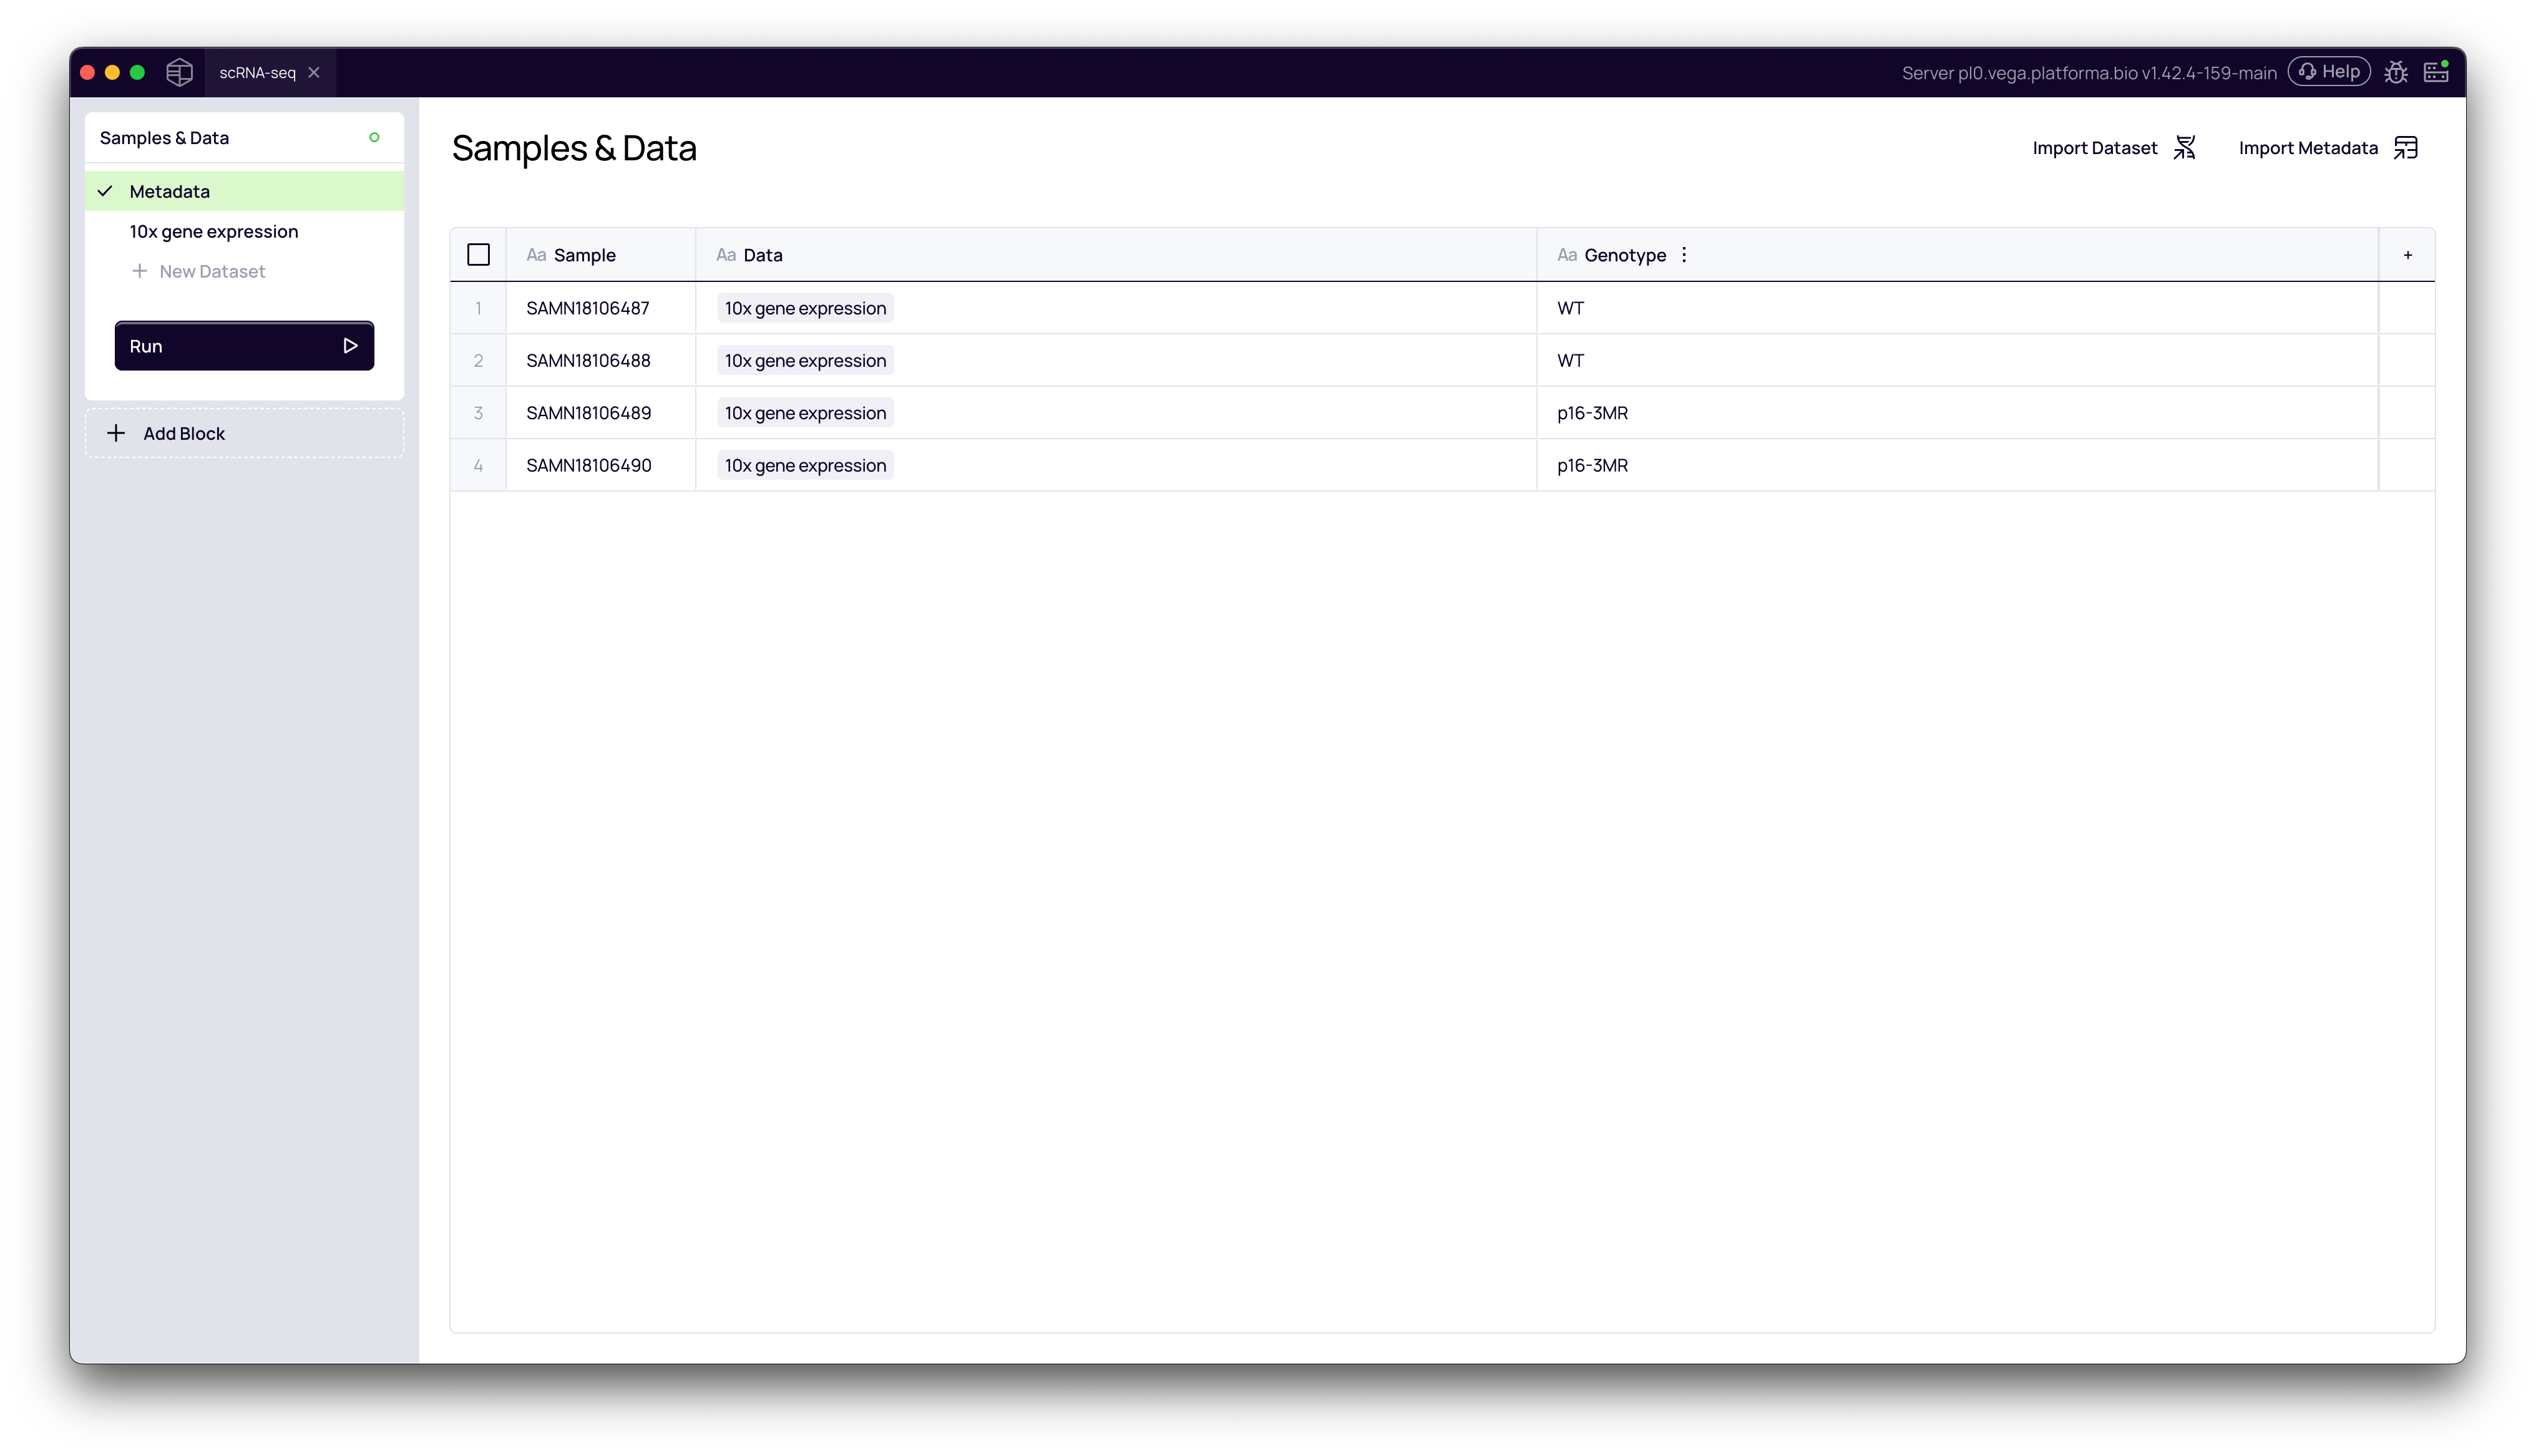
5. Verify the Metadata
The Metadata page will now be populated with your experimental data. You will see your new columns (e.g., Genotype) correctly mapped to each sample.
4. Running the Pipeline
Your project is now fully configured and ready for analysis.
- Navigate back to your dataset tab (e.g., "10x gene expression").
- Click the Run (play) button in the left-hand menu. The files in your table will get green checkmarks as they are validated.
- Click Add Block from the left-hand menu to open the block library.
- Search for and add your first analysis block, such as Cell Ranger for this 10x dataset.
You are now ready to configure and run your downstream analysis pipeline.