Guide: setting up a standalone backend service
This guide is for users who want to set up a persistent, standalone Platforma backend. Running a standalone backend is the most powerful and flexible way to use Platforma.
Why run a separate backend?
- Collaboration: a central backend can be shared by an entire team, allowing everyone to access the same projects and data.
- 24/7 availability: the backend runs continuously on a server, so you can connect from your Desktop App anytime to check on long-running jobs.
- Performance: you can install the backend on a powerful, dedicated server with significant CPU, RAM, and storage resources, enabling analysis of very large datasets.
This guide will walk you through the setup process step-by-step, from a minimal local service to a fully configured, networked service.
The big picture
You are about to install a powerful data analysis engine on a server. The process involves two main components: the Backend (the engine on the server) and the Desktop App (the steering wheel on your computer).
This guide will show you how to get the engine running. Once it's on, you'll be given a unique 'address' and 'key' to plug into your Desktop App, securely connecting the two.
Part 1: running the backend locally
This is the simplest way to run a standalone backend. This setup is perfect for testing or for a single user who wants a persistent backend on their own powerful workstation.
-
Get the backend application.
You can download the Platforma backend binary for your operating system from the Platforma downloads page.
Alternatively, if you are on macOS and use Homebrew, you can install it from our official tap:
brew tap milaboratory/all
brew install platforma -
Unarchive the application (skip this step if you used Homebrew).
In your terminal, navigate to the directory where you downloaded the file and run the following command to extract it. This command works for any version you download.
tar -xzf platforma-*.tar.gzThis will create a new directory (e.g.,
platforma-vX.Y.Z-linux-amd64) containing theplatformaexecutable. -
Run backend.
Navigate into the new directory you just created, then run the backend. You will need to replace
<YOUR_LICENSE_KEY>with the license key that you can get from platforma.bio/getlicense.# The directory name will match the file you downloaded
cd platforma-*/
./platforma --license <YOUR_LICENSE_KEY>That's it! The backend will start up and print a message to the console confirming that it has started successfully.
-
Understanding the output The success message contains important information:
✅ Platforma Backend started successfully.

    Address: http://127.0.0.1:6345?token=qwertyasdf123456

    Root path: /home/user/.platforma/backend/

    Primary storage: http://127.0.0.1:6347

...- address: this is the network address the backend is listening on.
127.0.0.1means it's only listening for connections from the same machine. The address is followed by a?token=...query parameter, which is a secret token you'll need to connect your Desktop App. Think of theTokenas a secret password that proves to the backend that it's really your Desktop App trying to connect. It's generated automatically for you, and you just need to copy and paste it once. - root path: this is the directory on your filesystem where the backend will store all its data, including the state database, software packages, and working directories.
- primary storage endpoint: this is the endpoint that backend sets up for the Desktop App to upload and download files.
- address: this is the network address the backend is listening on.
-
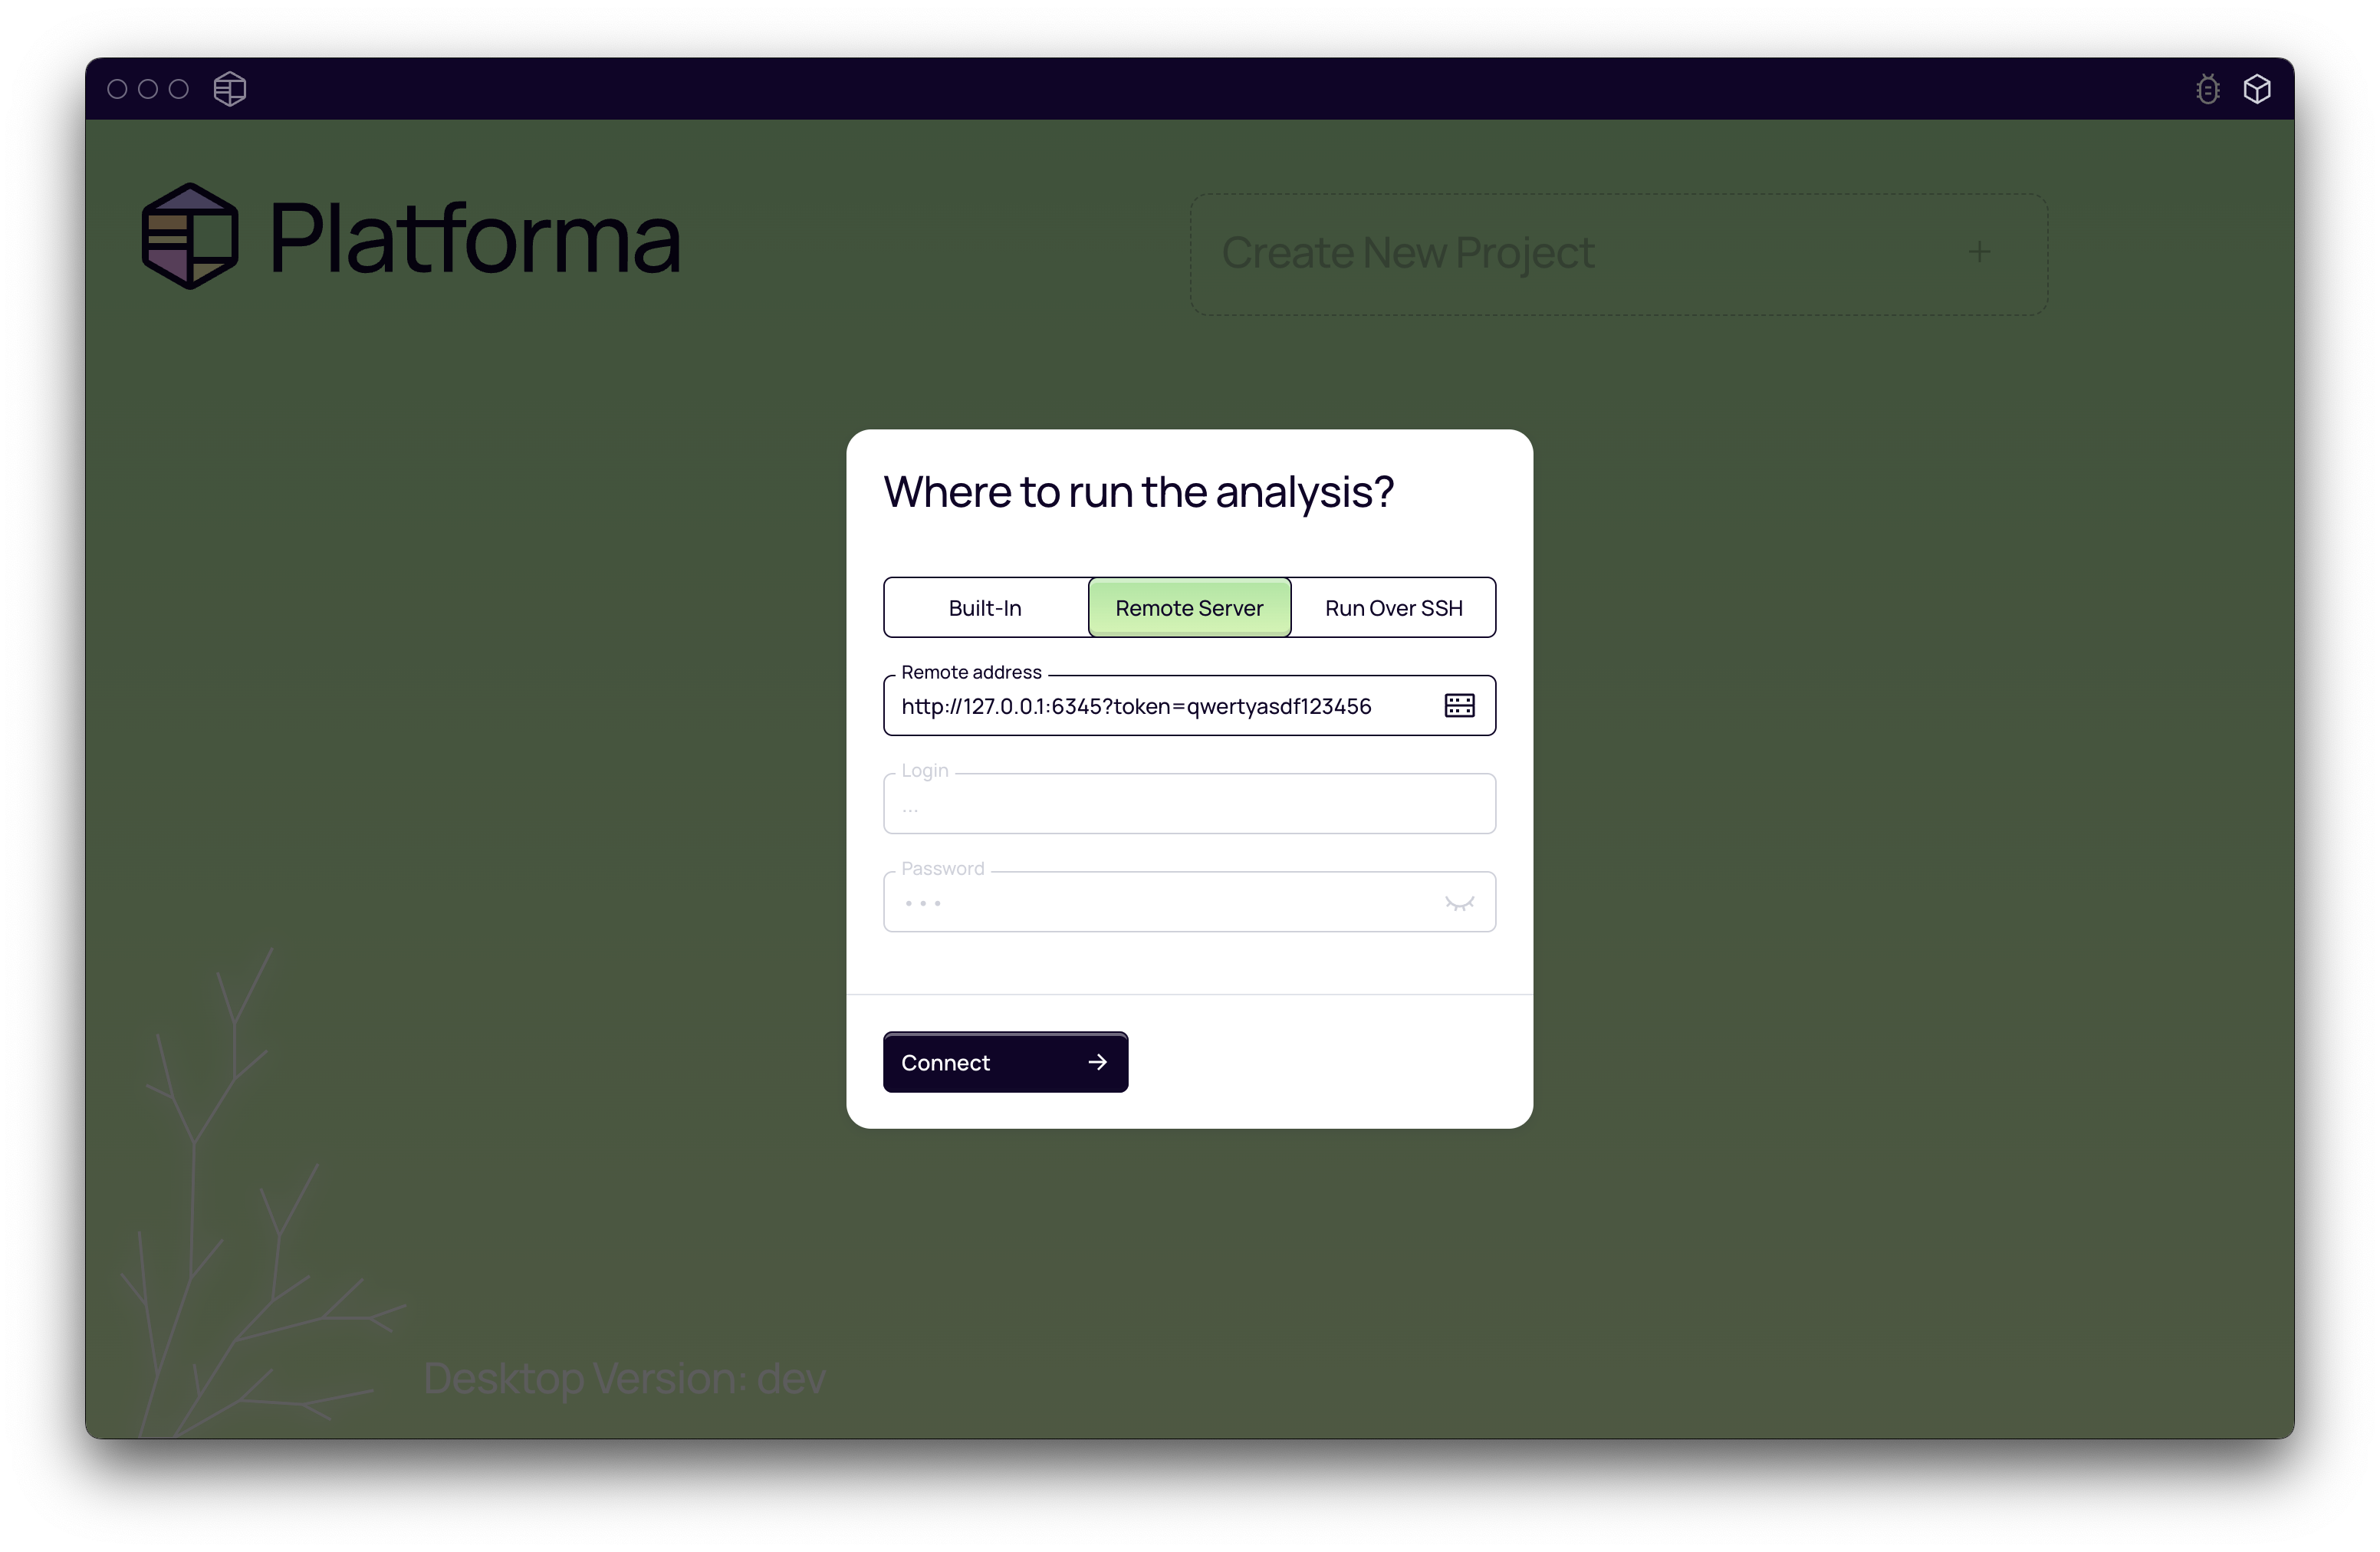
Connecting your desktop app
- Open the Platforma Desktop App.
- On the welcome screen, choose "Remote Server".
- Enter the
Remote addressfrom the terminal output. - Click connect. You are now connected to your persistent local backend.
Part 2: accessing the backend over the network
Running the backend on your local machine is great, but the real power comes when you run it on a server and connect to it remotely.
Option A: simple remote access with SSH port forwarding
If you started the backend on a remote server (following the steps in Part 1) and just want to connect to it yourself, you can use SSH port forwarding. This is a secure way to "forward" the backend's port on the remote server to your local machine.
-
Start the backend on the remote server: SSH into your remote server and run the command from Part 1. It will be listening on
http://127.0.0.1:6345on the server and the file storage service onhttp://127.0.0.1:6347. -
Create an SSH tunnel: On your local machine, open a new terminal and run this command. This command tells SSH to forward traffic for both the main API (port
6345) and the file storage service (port6347) to your local machine.ssh -L 6345:127.0.0.1:6345 -L 6347:127.0.0.1:6347 user@your-remote-server.comKeep this terminal window open.
-
Connect in the Desktop App:
- In the Platforma Desktop App, connect to a new service.
- For the Address, use
http://127.0.0.1:6345?token=.... - Use the same
Tokenthat was generated on the remote server. - You are now securely connected to the backend running on your remote server.
Option B: making the backend available on your network
To allow other users on your network to connect to your backend, you need to tell it to listen on a network-accessible IP address instead of just 127.0.0.1.
-
Find your server's network IP: find the internal IP address of the server where you will run the backend. This might be something like
10.0.1.5or192.168.1.50. -
Start the backend with a listen address: use the
--listen-addressflag to specify the IP address../platforma --license <YOUR_LICENSE_KEY> \
--listen-address 'http://<YOUR_SERVER_IP>'(Do not include the port number in the address).
The backend will now start and listen on
http://<YOUR_SERVER_IP>:6345. -
Connect from Desktop Apps: Any user on the same network can now connect to the backend using the address
http://<YOUR_SERVER_IP>:6345and the generated token. You may need to adjust firewall rules on your server to allow incoming connections on ports 6345 and 6347.
This is the foundation for a multi-user setup. In the next parts, we'll cover how to configure storage, add user accounts, and secure the connection.
Part 3: configuring primary storage
What is primary storage?
When you run an analysis, Platforma generates a lot of data — tables, charts, and processed files. Primary Storage is a long-term home for these results. Think of it as your project's main 'Results' folder. You need to tell the backend where this folder is and how your Desktop App can access it to show you your analysis results.
How to configure primary storage
By default, the backend uses a simple file-system based storage, but for a cloud-based setup you can configure it to use an S3-compatible service (like AWS S3, MinIO) or Google Cloud Storage (GCS).
Filesystem storage (default)
When the backend runs on a server, you can override the default file-system based storage path and endpoint URL that the Desktop App can use to upload and download files from it.
-
Flag:
--primary-storage-fs-url -
Example:
./platforma --license <YOUR_LICENSE_KEY> \
--main-root '/home/user/storage' \ # this is the root directory for the backend primary storage and other data
--listen-address 'http://<YOUR_SERVER_IP>' \
--primary-storage-fs-url 'http://<YOUR_SERVER_IP>:6347'This command tells the backend to make its file storage available at the specified URL. The Desktop App will then use this address to download results.
S3 or GCS object storage
For more scalable or cloud-based setups, you can use an S3-compatible service (like AWS S3, MinIO) or Google Cloud Storage (GCS) as your primary storage.
-
Why use object storage?: it's highly scalable, durable, and ideal for large-scale data storage in a cloud environment.
-
When using S3/GCS, the
--no-host-data-libraryflag is set by default as all data will be managed through object storage. -
S3 Flag:
--primary-storage-s3 -
GCS Flag:
--primary-storage-gcs -
Example (S3):
./platforma --license <YOUR_LICENSE_KEY> \
--listen-address 'http://<YOUR_SERVER_IP>' \
--primary-storage-s3 's3://your-bucket-name/platforma-results'
The backend will automatically handle credential discovery (e.g., from environment variables or IAM roles). For specific endpoint or credential configurations, see the CLI Reference.
Part 4: adding data libraries
What are data libraries?
You likely already have your raw sequencing data (FASTQ, BAM files) sitting on a shared drive or server. Data Libraries let you connect Platforma directly to these existing folders. This is powerful because you don't need to upload or copy your huge raw data files anywhere. Platforma will read them directly from where they already live.
By default, the backend automatically creates one data library called host, which points to the entire filesystem (/) of the server it's running on. You can disable this for security or clarity.
How to configure data libraries
Disabling the default host library
If you prefer to explicitly define all data locations, you can disable the default host library.
- Flag:
--no-host-data-library
Filesystem-based library
You can mount any directory on the server's filesystem as a data library.
-
Flag:
--data-library-fs -
Format:
id=path(e.g.,shared-sequencing=/mnt/sequencing-data) -
Example:
./platforma --license <YOUR_LICENSE_KEY> \
            --no-host-data-library \
            --data-library-fs "shared=/path/to/shared/folder" \
            --data-library-fs "project-x=/path/to/project-x/data"
S3-based library
You can also mount an S3 bucket as a read-only data library.
-
Flag:
--data-library-s3 -
Format:
id=s3://bucket-name/prefix -
Example:
./platforma --license <YOUR_LICENSE_KEY> \
            --data-library-s3 "10x-public=s3://10x-genomics/chromium/gems/"
This allows users to browse and use public datasets or your own S3-based data repositories directly within Platforma.
Part 5: setting up user accounts
By default, the backend starts in a single-user mode where anyone with the address and token can connect. For team environments, you'll want to enable authentication to ensure users have their own separate project spaces.
Why manage users?
- Privacy & project separation: each user or team gets their own workspace. They can't see or modify the projects of others.
- Access control: ensures only authorized individuals can connect to the backend and use its resources.
How to configure authentication
HTPasswd file
This is the simplest way to manage a small list of users. You provide a standard htpasswd file containing usernames and encrypted passwords.
-
Flag:
--auth-htpasswd -
Example:
./platforma --license <YOUR_LICENSE_KEY> \
--auth-htpasswd '/path/to/your/users.htpasswd' -
How to create the file: You can use the
htpasswdutility (often included with Apache web server tools) to create and manage the file.# Create a new file with the first user
htpasswd -c -B /path/to/your/users.htpasswd username1
# Add another user
htpasswd -B /path/to/your/users.htpasswd username2The backend automatically re-reads this file, so you can add or remove users without a restart.
LDAP integration
For organizations with a central user directory, you can connect the Platforma backend to an LDAP or Active Directory server.
- Flags:
--auth-ldap-server,--auth-ldap-dn - Example:
The backend will authenticate users against the LDAP server. For more advanced LDAP configurations (like StartTLS), see the CLI Reference.
./platforma --license <YOUR_LICENSE_KEY> \
          --auth-ldap-server 'ldap://ldap.your-company.com' \
          --auth-ldap-dn 'cn=%u,ou=users,dc=your-company,dc=com'
Part 6: securing the connection with TLS
If your backend is accessible over a network, it's highly recommended to encrypt the connection between the Desktop App and the backend using TLS. This prevents credentials and data from being intercepted.
Why is this important?
Without TLS, authentication tokens and other data are sent in plaintext, which is a security risk on any untrusted network.
How to enable TLS
You need a TLS certificate and a private key. You can get these from your IT department or a Certificate Authority (like Let's Encrypt).
- Modify the Listen Address: Change the protocol in your listen address from
httptohttps. - Provide the Certificate and Key: Use the
--listen-tlsflag to point to your certificate and key files.
- Flag:
--listen-tls - Format:
/path/to/certificate.cert,/path/to/private.key - Example:
The backend will now serve traffic over HTTPS, securing all communication with connected Desktop Apps.
./platforma --license <YOUR_LICENSE_KEY> \
          --listen-address 'https://<YOUR_SERVER_DOMAIN>' \
          --listen-tls '/path/to/your/certificate.cert,/path/to/your/private.key'
You can use the --self-signed-tls flag to instruct backend to automatically generate a self-signed certificate. This is convenient for testing, but Desktop Apps will show a security warning, and you may need to manually trust the certificate on client machines.