Guide: running backend service on Windows with WSL
This guide is for Windows users who want to run a local Platforma backend to get access to all Platforma features.
Why run a backend on WSL?
Many bioinformatics tools, and therefore some Platforma blocks, are designed for Linux and do not run on Windows. By using the Windows Subsystem for Linux (WSL), you can run a full-featured Platforma backend on a Linux environment directly on your Windows machine.
This setup offers the best of both worlds:
- You can continue using the familiar Windows Desktop App.
- All analysis tasks run in a fully compatible Linux environment, ensuring all blocks work correctly.
- It's a simpler alternative to setting up a dedicated Linux server.
This guide will walk you through the process step-by-step.
Step 1: enable WSL on Windows
The first step is to install WSL. Modern versions of Windows make this very easy.
-
Open PowerShell as Administrator.
- Click the Start button, type "PowerShell".
- Right-click on "Windows PowerShell" and select "Run as administrator".
-
Run the installation command.
- In the PowerShell window, type the following command and press Enter:
wsl --install
This command will automatically enable the required Windows features, download the latest Linux kernel, and install Ubuntu as your default Linux distribution.
- Restart your computer.
- After the process is complete, restart your computer to finalize the installation.
For more detailed information, you can refer to the official Microsoft WSL installation guide.
Step 2: set up your Linux environment
-
Launch Ubuntu.
- After restarting, you can find "Ubuntu" in your Start Menu. Launch it.
-
Create a user account.
- The first time you launch a newly installed Linux distribution, a console window will open, and you'll be asked to wait for files to de-archive.
- Then, you will be prompted to create a new user account (with a username and password). This account is for your Linux environment and doesn't need to match your Windows username. Remember this password, as you'll need it for
sudocommands.
Your Linux environment is now ready.
Step 3: install and run Platforma backend in WSL
Now you'll download and run the Platforma backend inside your new Ubuntu environment.
-
Open your Ubuntu terminal.
- You can launch it from the Start Menu.
-
Create a directory and download the Platforma Backend.
Be sure to download the right fileYou are downloading the Linux x86_64 backend, not the Desktop App. Even though you are on Windows, the backend will run inside the Linux (WSL) environment.
The following commands will create a directory, download the backend into it, and extract the archive. Copy and paste them into your Ubuntu terminal.
# Create a directory in your home folder
mkdir ~/platforma-backend
cd ~/platforma-backend

# Download the backend using a fixed URL
wget -O platforma-backend.tar.gz https://dl.platforma.bio/software/platforma-backend/pl-linux-amd64.tgz

# Unarchive the application
tar -xzf platforma-backend.tar.gz -
Run the backend.
- Navigate into the new directory with binaries and run the backend. You will need to replace
<YOUR_LICENSE_KEY>with your license key.
# The directory with platforma backend binaries
cd binaries/

./platforma --license <YOUR_LICENSE_KEY> - Navigate into the new directory with binaries and run the backend. You will need to replace
-
Check the output.
- The backend will start, and you will see a success message with the connection details:
✅ Platforma Backend started successfully.

    Address: http://127.0.0.1:6345?token=qwertyasdf123456

...- Keep this terminal window open. The backend is now running.
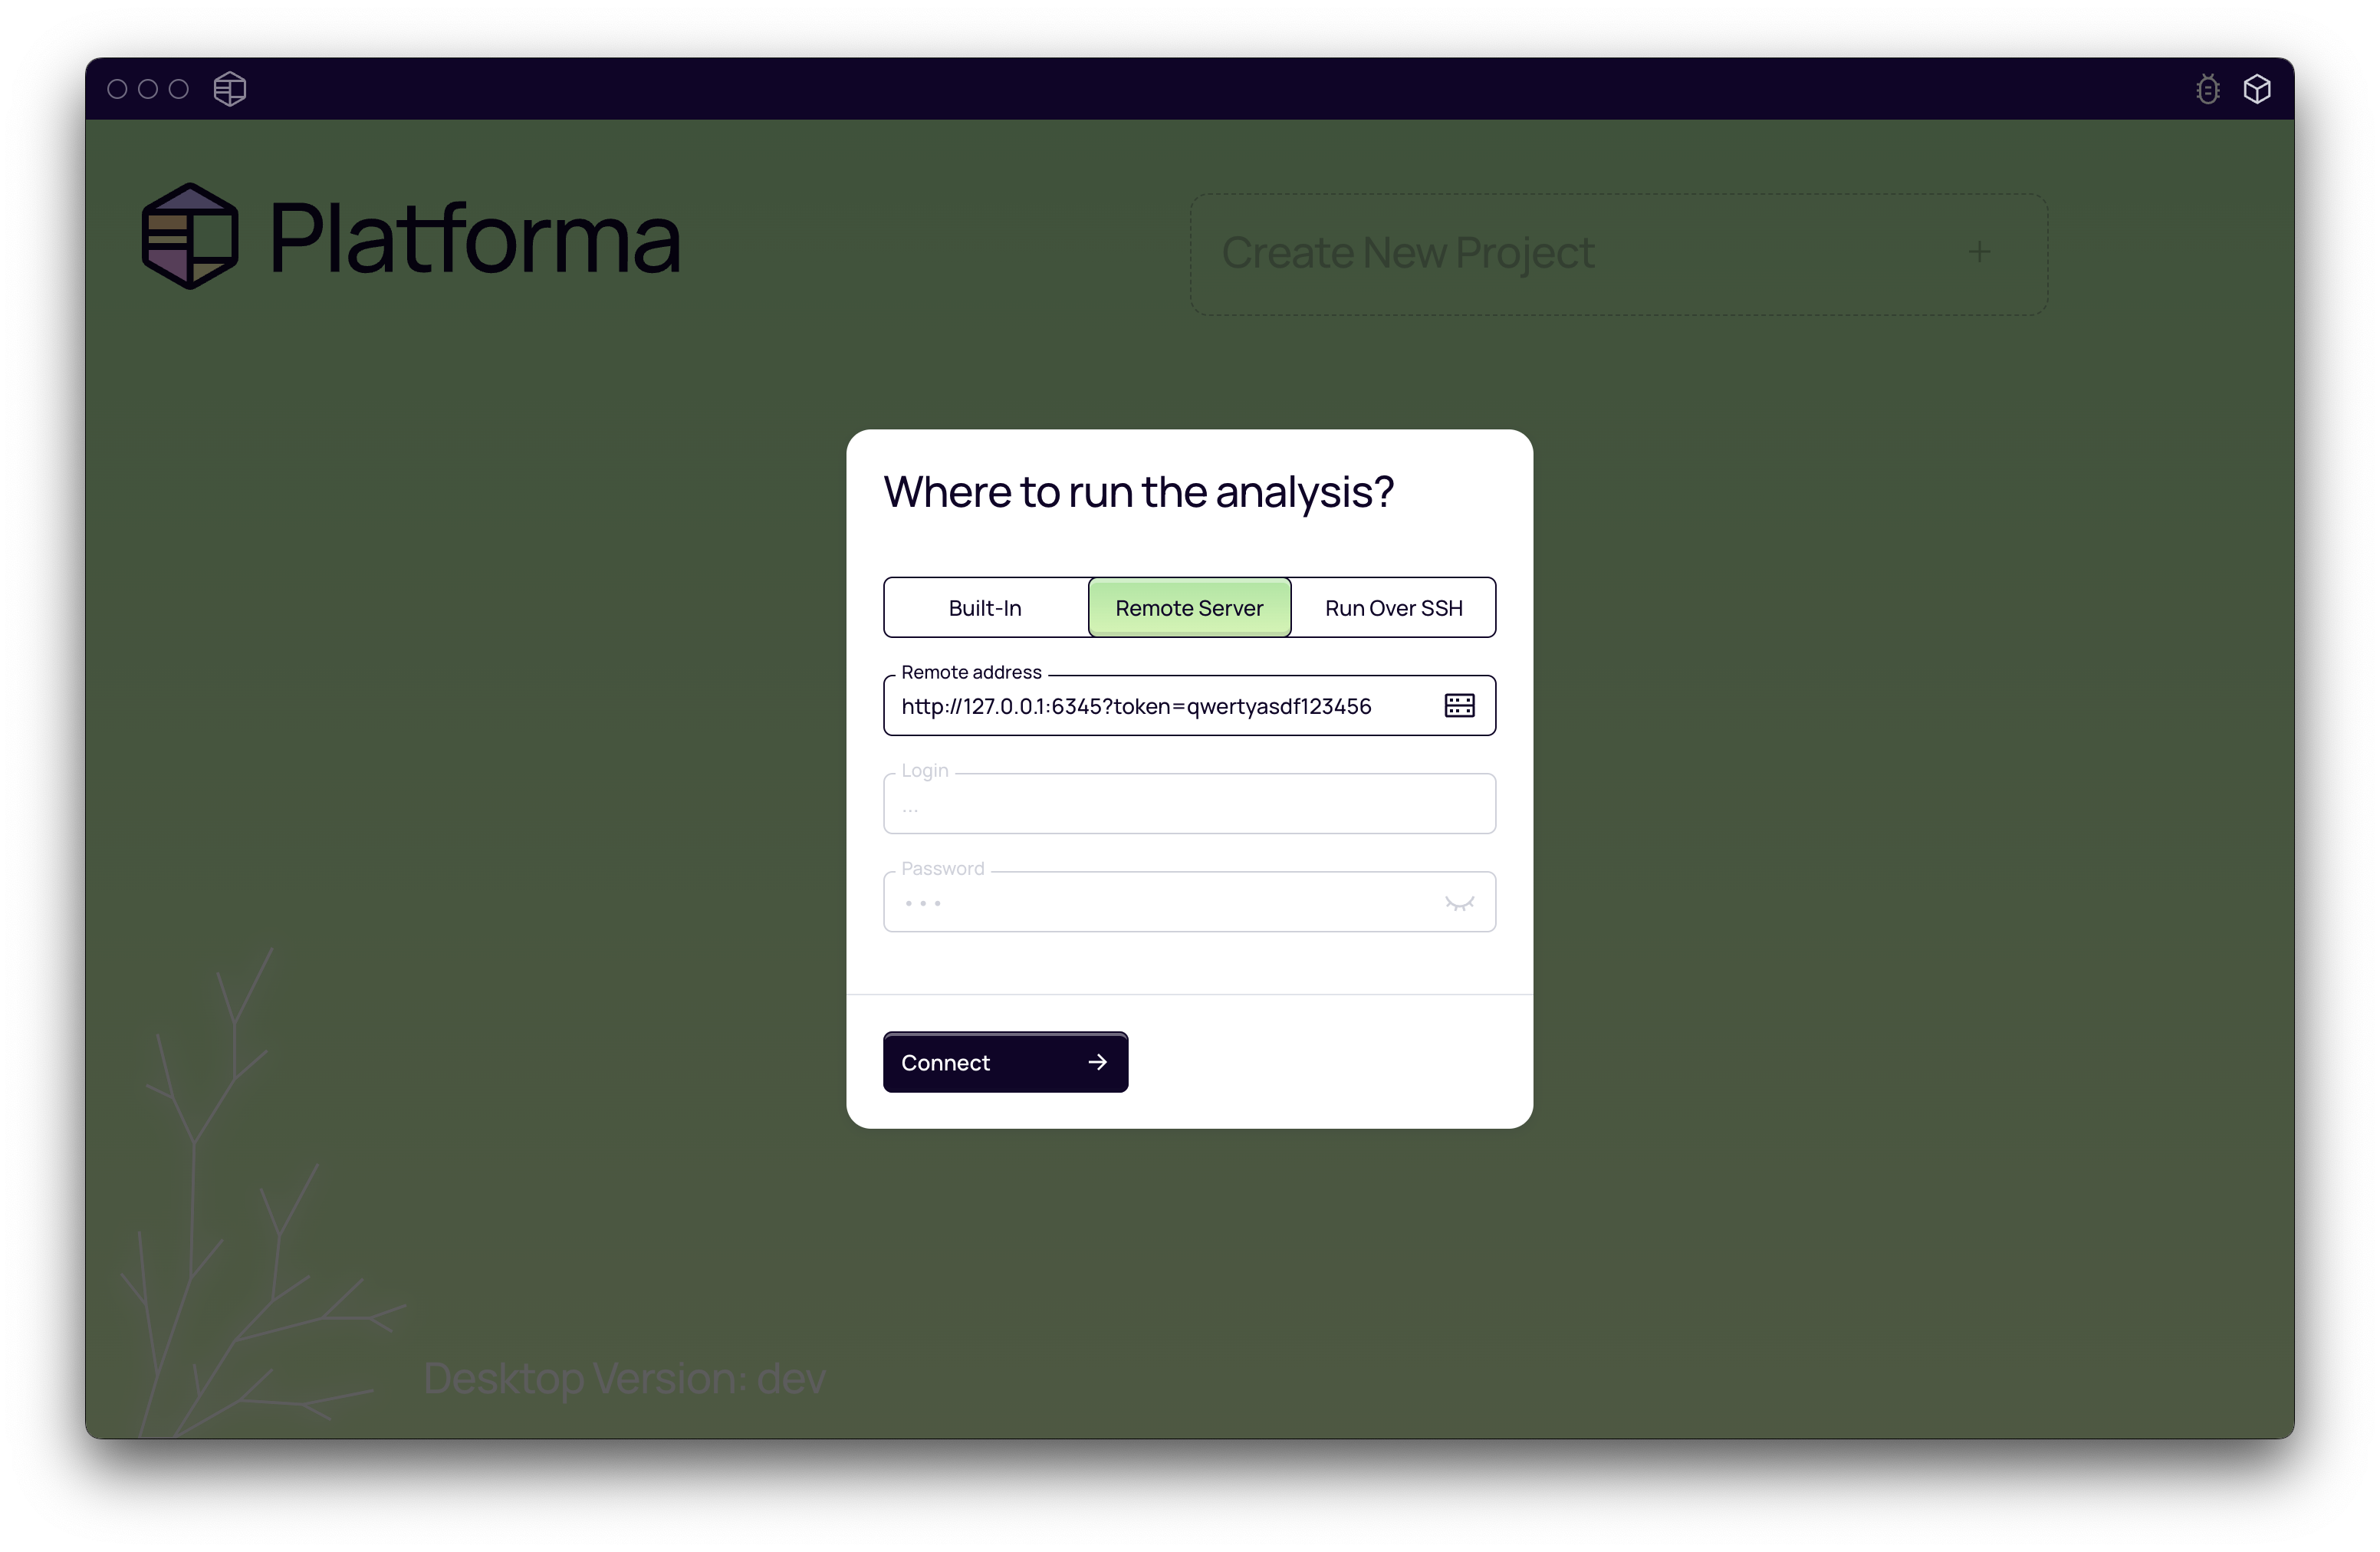
Step 4: connect Platforma Desktop App
The final step is to connect your Windows Desktop App to the backend now running in WSL.
-
Open the Platforma Desktop App on Windows.
-
On the welcome screen, choose Remote Server.
-
Enter the address.
- Copy the full
Addressfrom the Ubuntu terminal output (including the?token=...part). - Paste it into the "Remote address" field in the Desktop App. Because WSL networking is integrated with Windows,
127.0.0.1(orlocalhost) works directly.
- Copy the full
-
Click Connect.
That's it! Your Platforma Desktop App is now connected to the powerful Linux backend running on your own machine. You can now use all Platforma blocks and features without compatibility issues.
Optional: Increase Memory for WSL
Many bioinformatics tools are memory-intensive. By default, WSL limits the amount of RAM that the Linux environment can use (typically up to 50% of your total RAM, with a max of 8GB on older versions). For any serious analysis, it is highly recommended to increase this limit.
-
Create a WSL configuration file.
- Open Windows File Explorer.
- In the address bar, type
%USERPROFILE%and press Enter. This will take you to your user folder (e.g.,C:\Users\YourUsername). - Right-click in the folder, select New > Text Document.
- Name the file
.wslconfig, making sure to remove the.txtextension. Windows might warn you about changing the file extension; accept the change.
-
Edit the configuration file.
- Open the newly created
.wslconfigfile in a text editor like Notepad. - Copy and paste the following content into the file:
[wsl2]
memory=16GB  # Sets the memory available to WSL to 16GB
processors=4 # Sets the number of processors available to WSL to 4
You should adjust these values based on your computer's hardware. A good rule of thumb is to allocate up to 75% of your total RAM. For example, if you have 32GB of RAM, you could set
memory=24GB. - Open the newly created
-
Restart WSL.
-
For the changes to take effect, you must shut down WSL.
-
Open PowerShell or Command Prompt on Windows (it does not need to be run as an administrator).
-
Run the command:
wsl --shutdown -
Now, relaunch your Ubuntu terminal from the Start Menu. The new memory and processor limits will be active.
-