Setup environment
For development purposes, it's convenient to have a local Platforma backend running with access to the local file system and PATH.
Run local backend
You can easily start a local backend using the @platforma-sdk/bootstrap package:
pnpx @platforma-sdk/bootstrap@latest start local s3 --license <your_license_code>
This command will download the latest Platforma backend binary, start a local Min.IO service as the default S3-compatible storage, and run the backend service with the default settings.
Alternatively, you can run the backend in a Docker container with the following command:
pnpx @platforma-sdk/bootstrap@latest start docker s3 --license <your_license_code>
When using bootstrap in local mode, the Runner Controller can execute commands available in the local PATH, which is useful for development purposes.
To view all available options for bootstrap, run:
pnpx @platforma-sdk/bootstrap@latest start local s3 --help
Set path to development blocks
To add a local development block registry, specify the path to the directory containing your development blocks in the devBlocksPaths section of the settings in the desktop app:
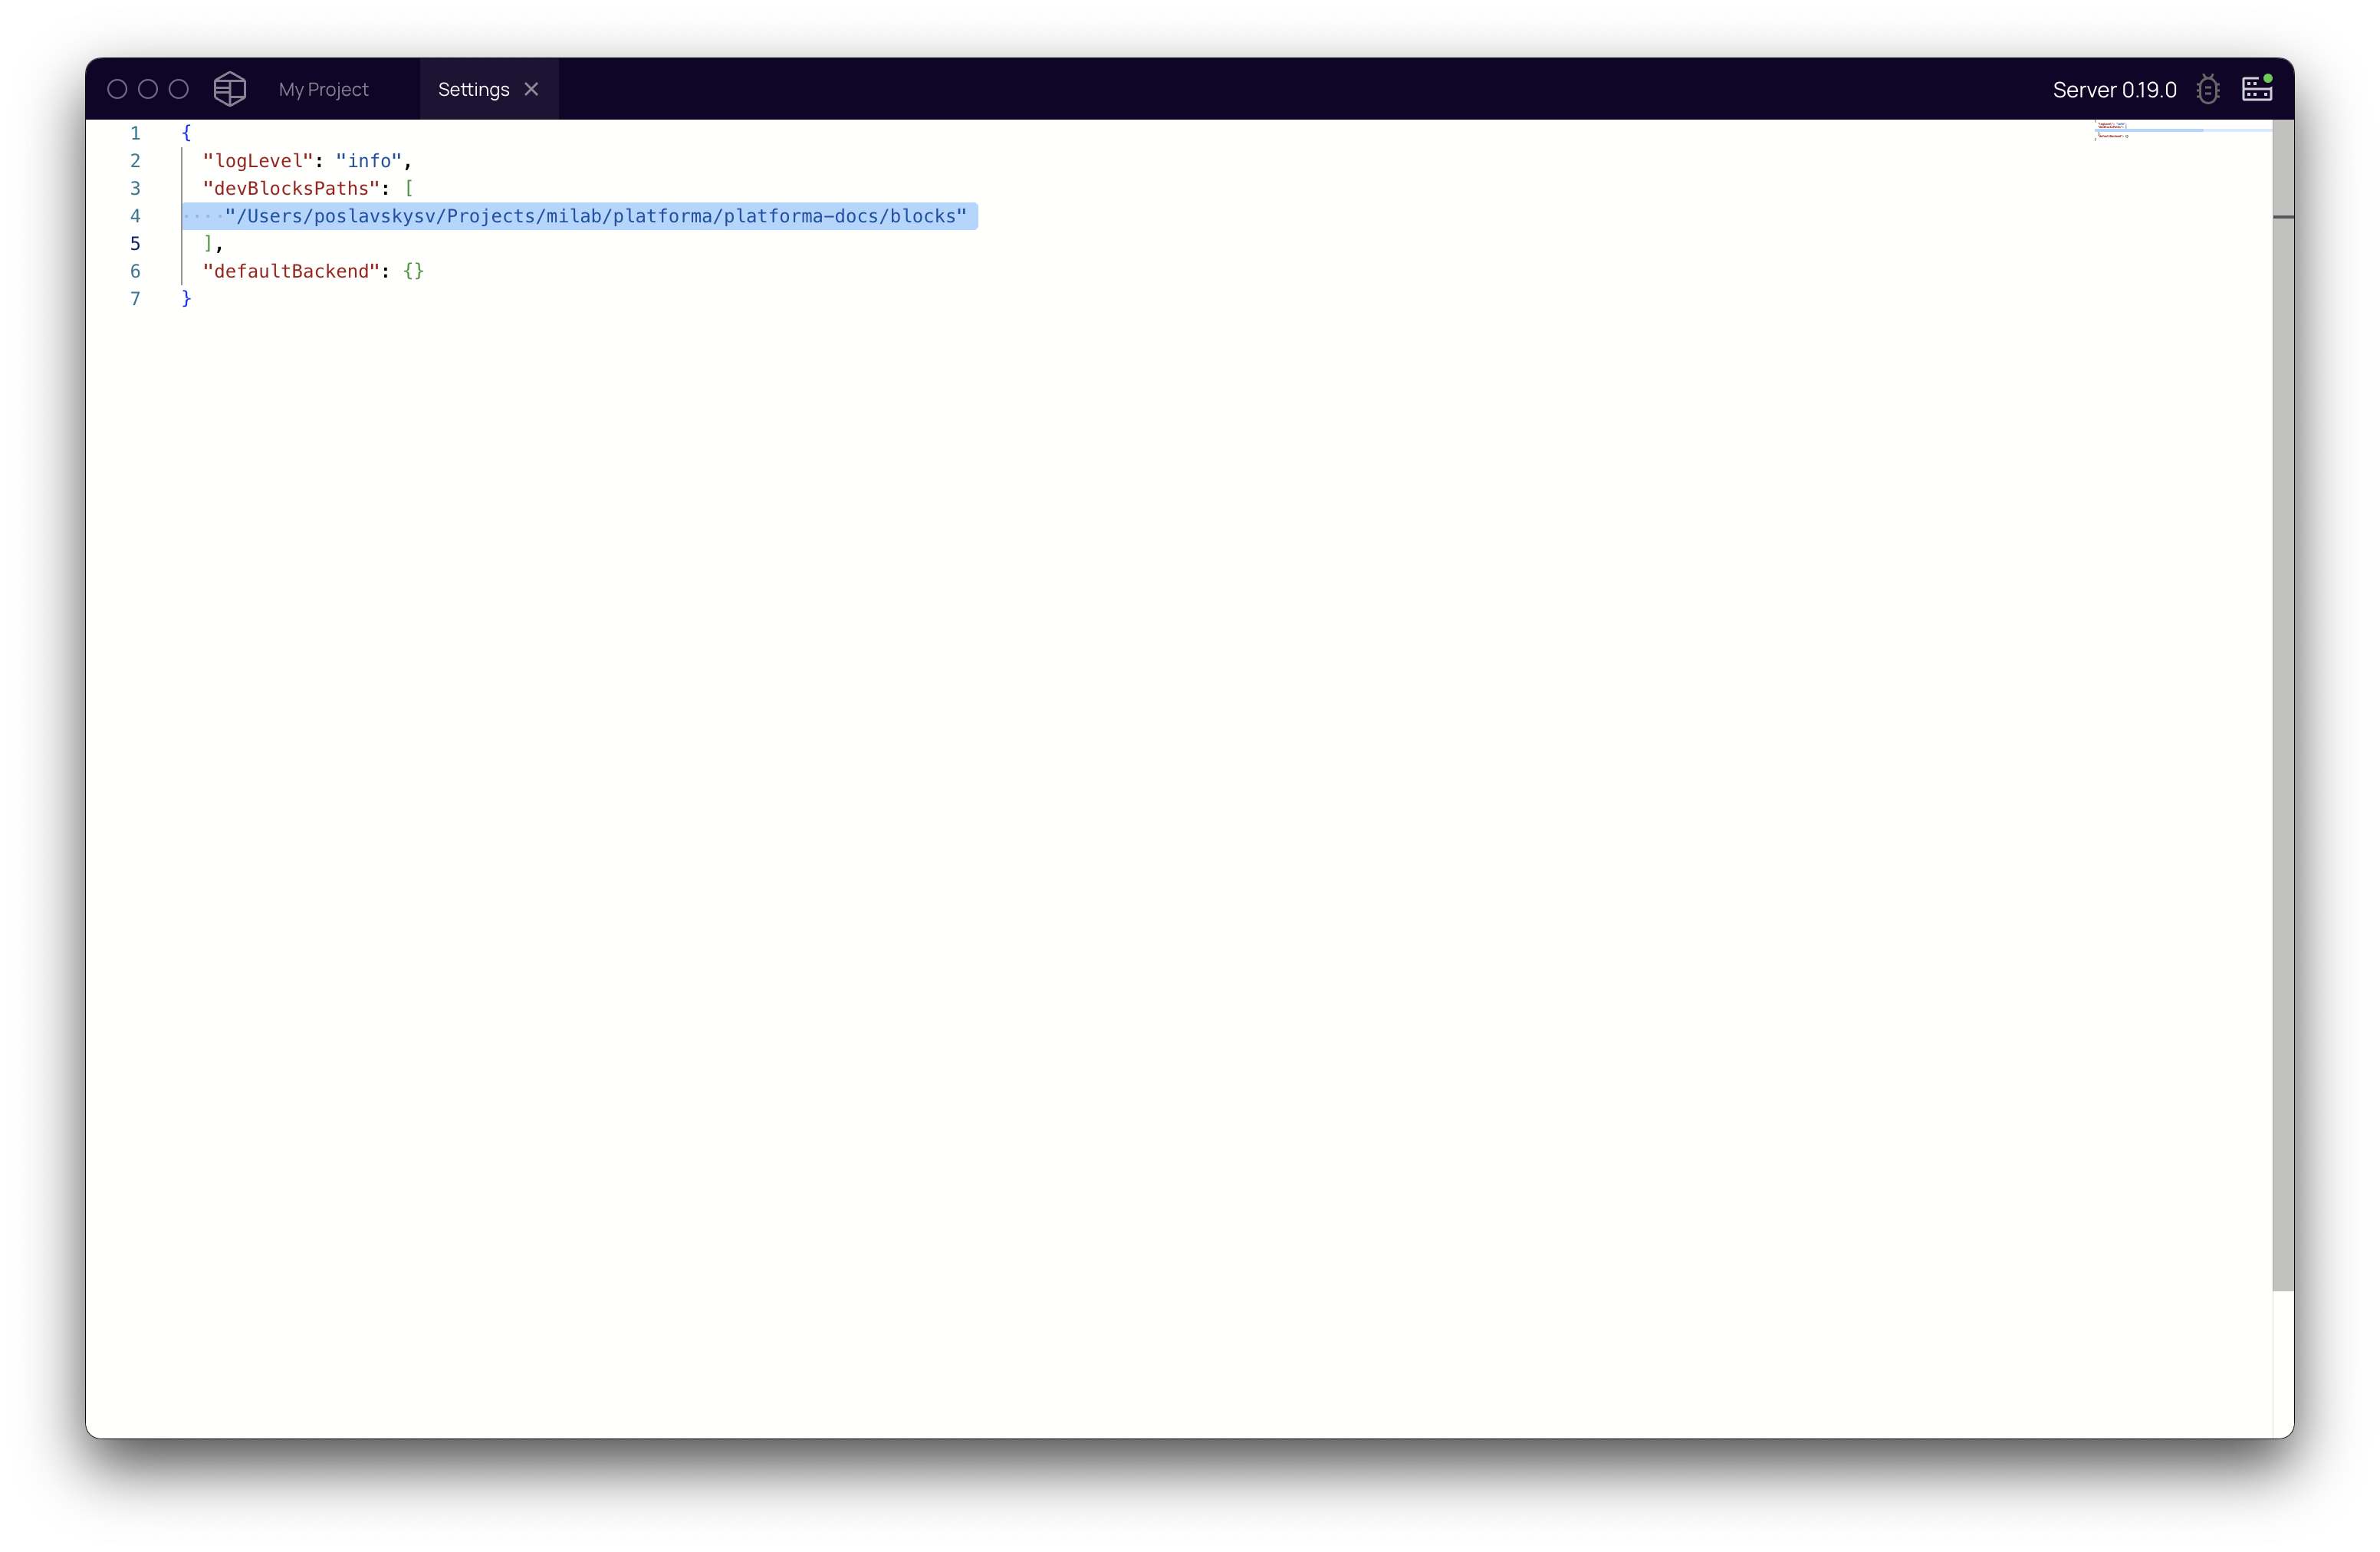
The path can point to a directory with multiple blocks, making them all available in Platforma:
└── /directory/with/dev/blocks/
    ├── block1
    │   └── ...
    ├── block2
    │   └── ...
    └── block3
        └── ...
You can add multiple paths.
Generate block boilerplate
Generate a block boilerplate with the following command:
pnpx @platforma-sdk/bootstrap@latest create-block
You will be prompted to enter the following information:
-
Name of publishing organization in NPM registry: The NPM organization name used for publication. For example, the Platforma Open Community uses
@pl-open. If developing private blocks not intended for publication, any identifier can be used. -
Name of developer organization: Your organization or lab's name.
-
Package name of block The block's identifier, written in lowercase letters without spaces (distinct from the block title).
The resulting block package will have the following structure:
<@npm-publisher>/<organization>.<block>
After generation, modify the root package.json to fill in the block's meta information in the block.meta section:
See block meta information
"block": {
  "meta": {
    "title": "Block Title",
    "logo": "file:logos/block-logo.png",
    "url": "https://github.com/milaboratory/block-boilerplate",
    "docs": "https://github.com/milaboratory/block-boilerplate/docs",
    "support": "mailto:support@milaboratories.com",
    "description": "Block description",
    "longDescription": "file:./docs/description.md",
    "changelog": "file:CHANGELOG.md",
    "tags": ["tutorial"],
    "organization": {
      "name": "MiLaboratories Inc",
      "url": "https://milaboratories.com",
      "logo": "file:logos/milaboratories.png"
    }
  }
}
Build block
First, install dependencies with pnpm install:
pnpm install
To build the block for development, run the below command. It creates a development version of the block that uses the local software package.
pnpm run build:dev
Use this when your block is ready for distribution. This build assumes the software package is published to the registry and will be downloaded from there when users run the block
pnpm run build
To build only a specific component, such as the model, navigate to the model directory and run:
cd model
pnpm run build
Once built, you can add the block to Platforma:
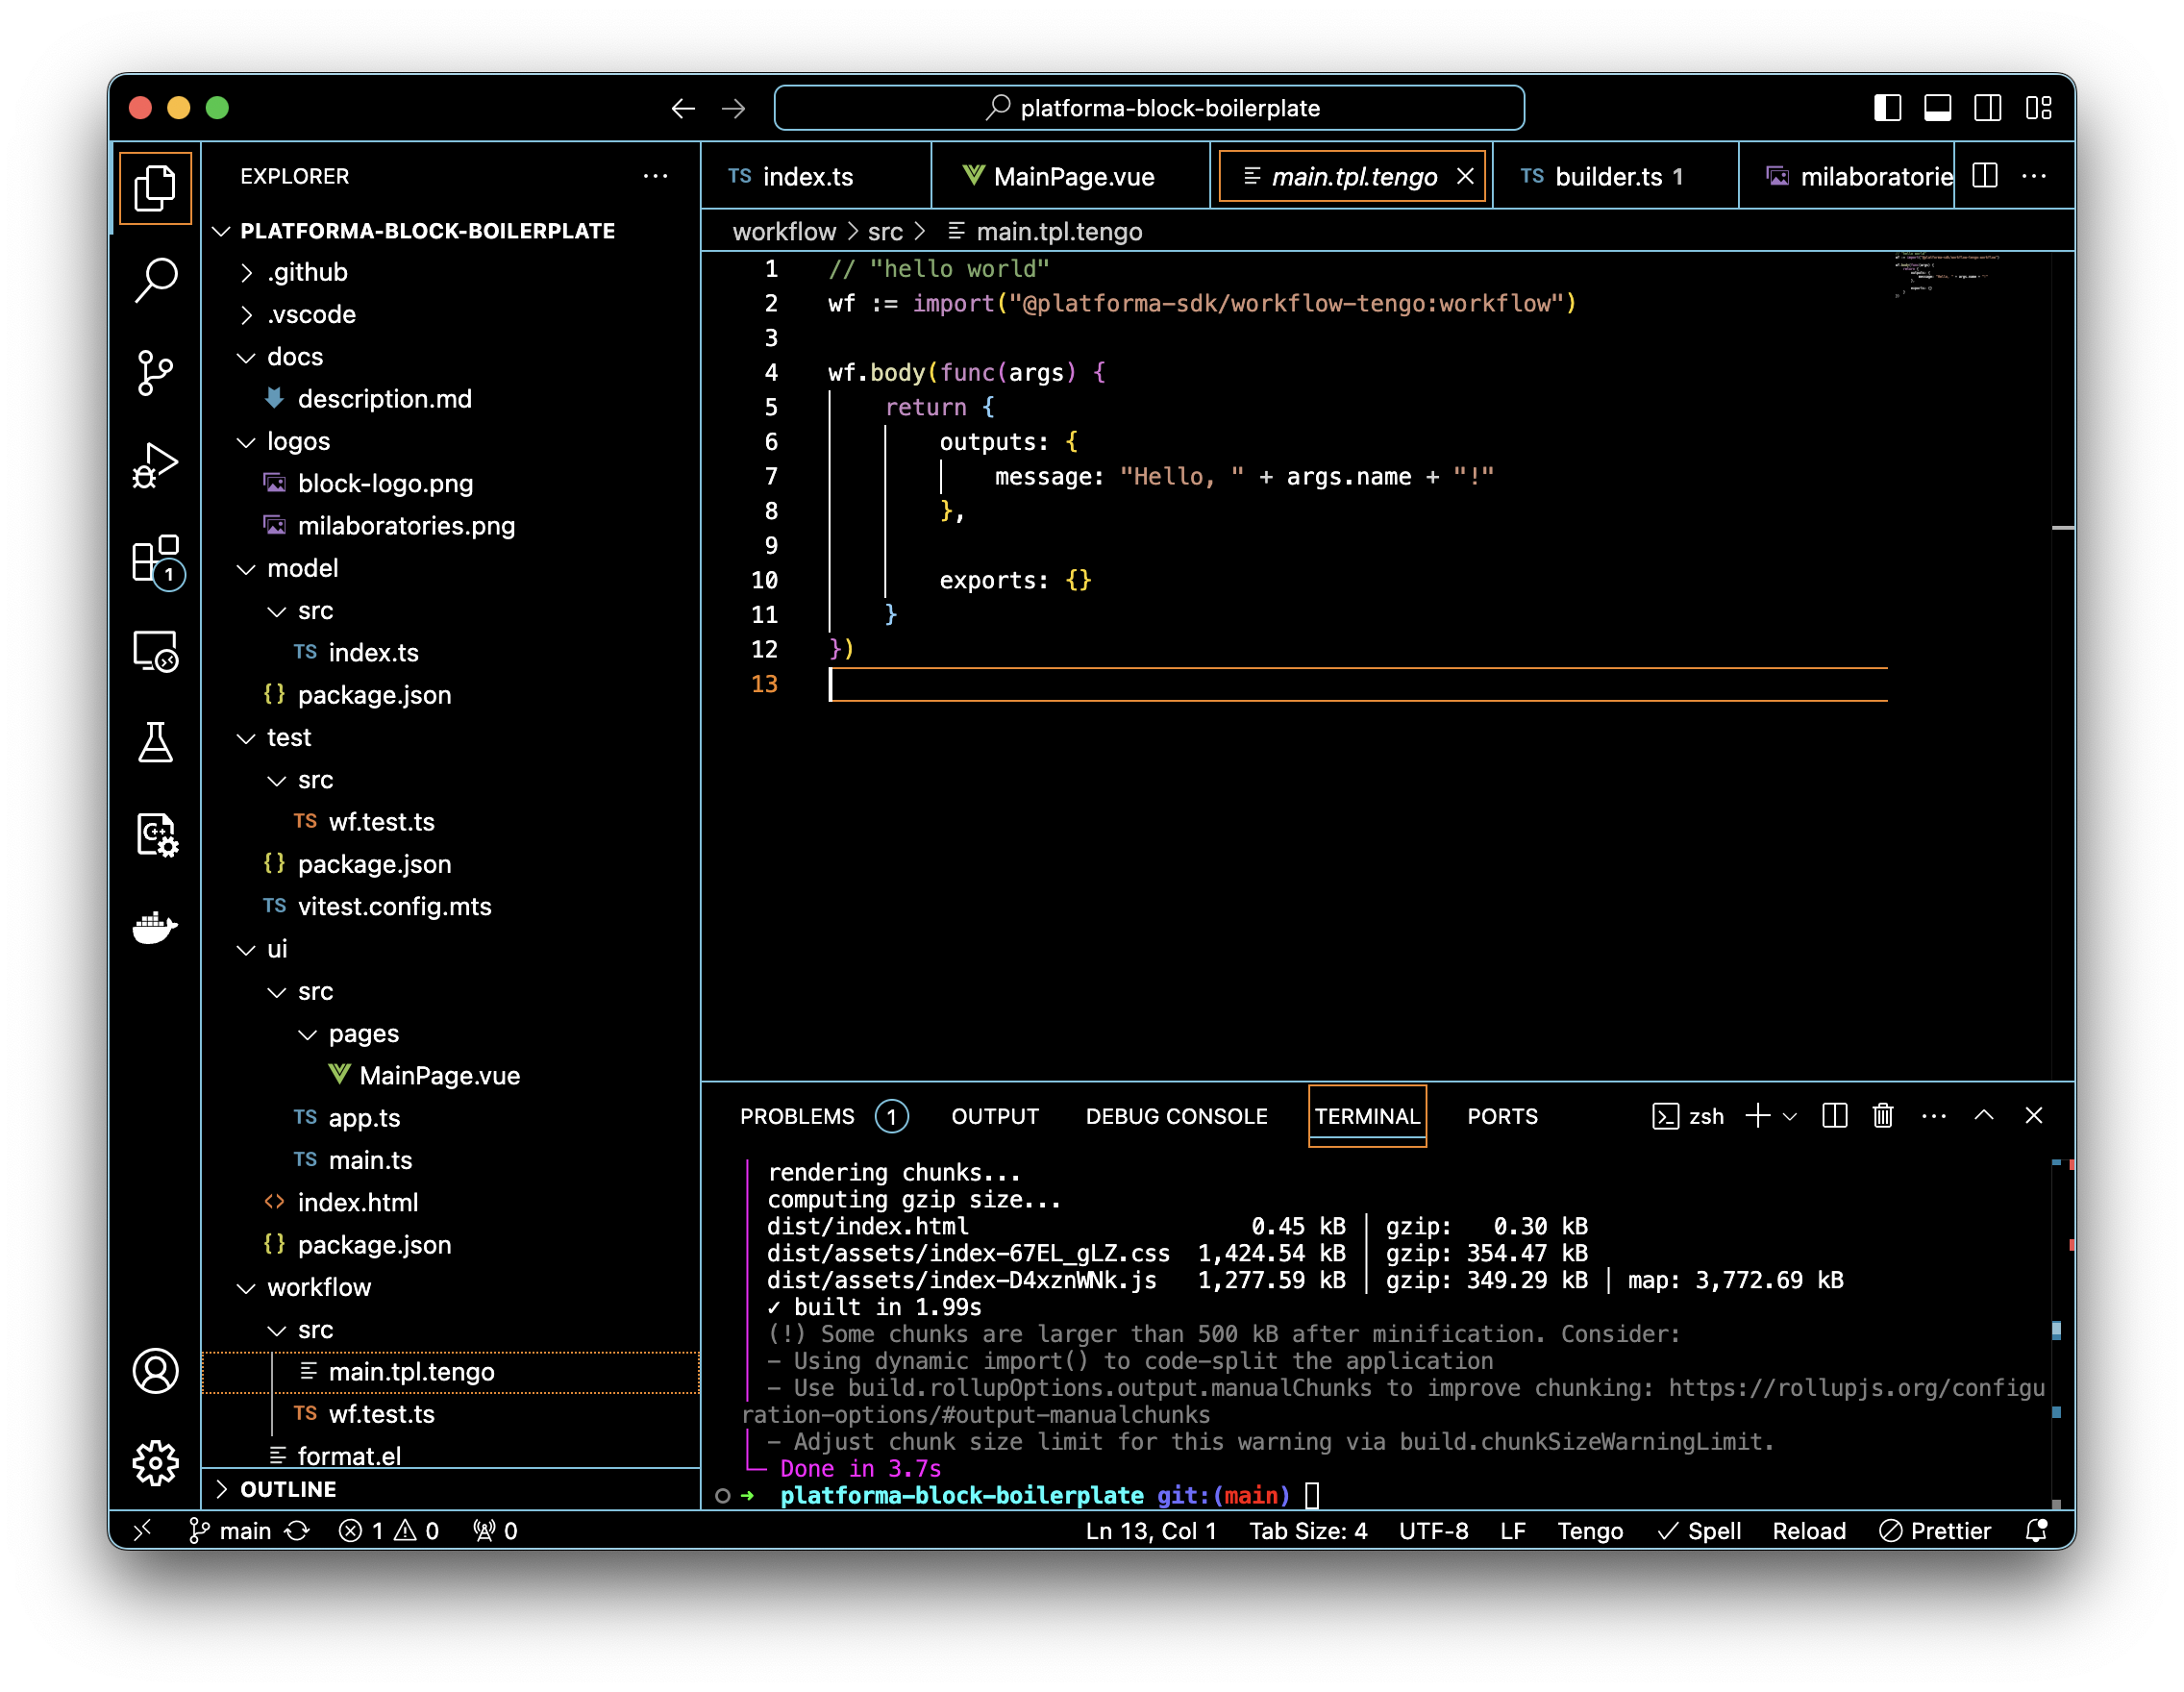
Open block in IDE
Finally, open the block repository in Visual Studio Code to facilitate development. Simply use File -> Open Folder: