How to Import Data
Platforma allows you to analyze immune repertoire data, explore T- and B-cell clonotypes, run differential analysis, and create publication-ready visuals—all without writing code. Before diving into clonotyping, clustering, or visualization, every project begins with one essential step: importing your data.
This guide walks you through how to start a new project and import different types of data into Platforma. You can also watch the video tutorial if you prefer a more visual guide:
Create a new project
Log into Platforma and create a new project.
When you create a new project, the Samples & Data block is automatically added. This is where you define your samples and import data.
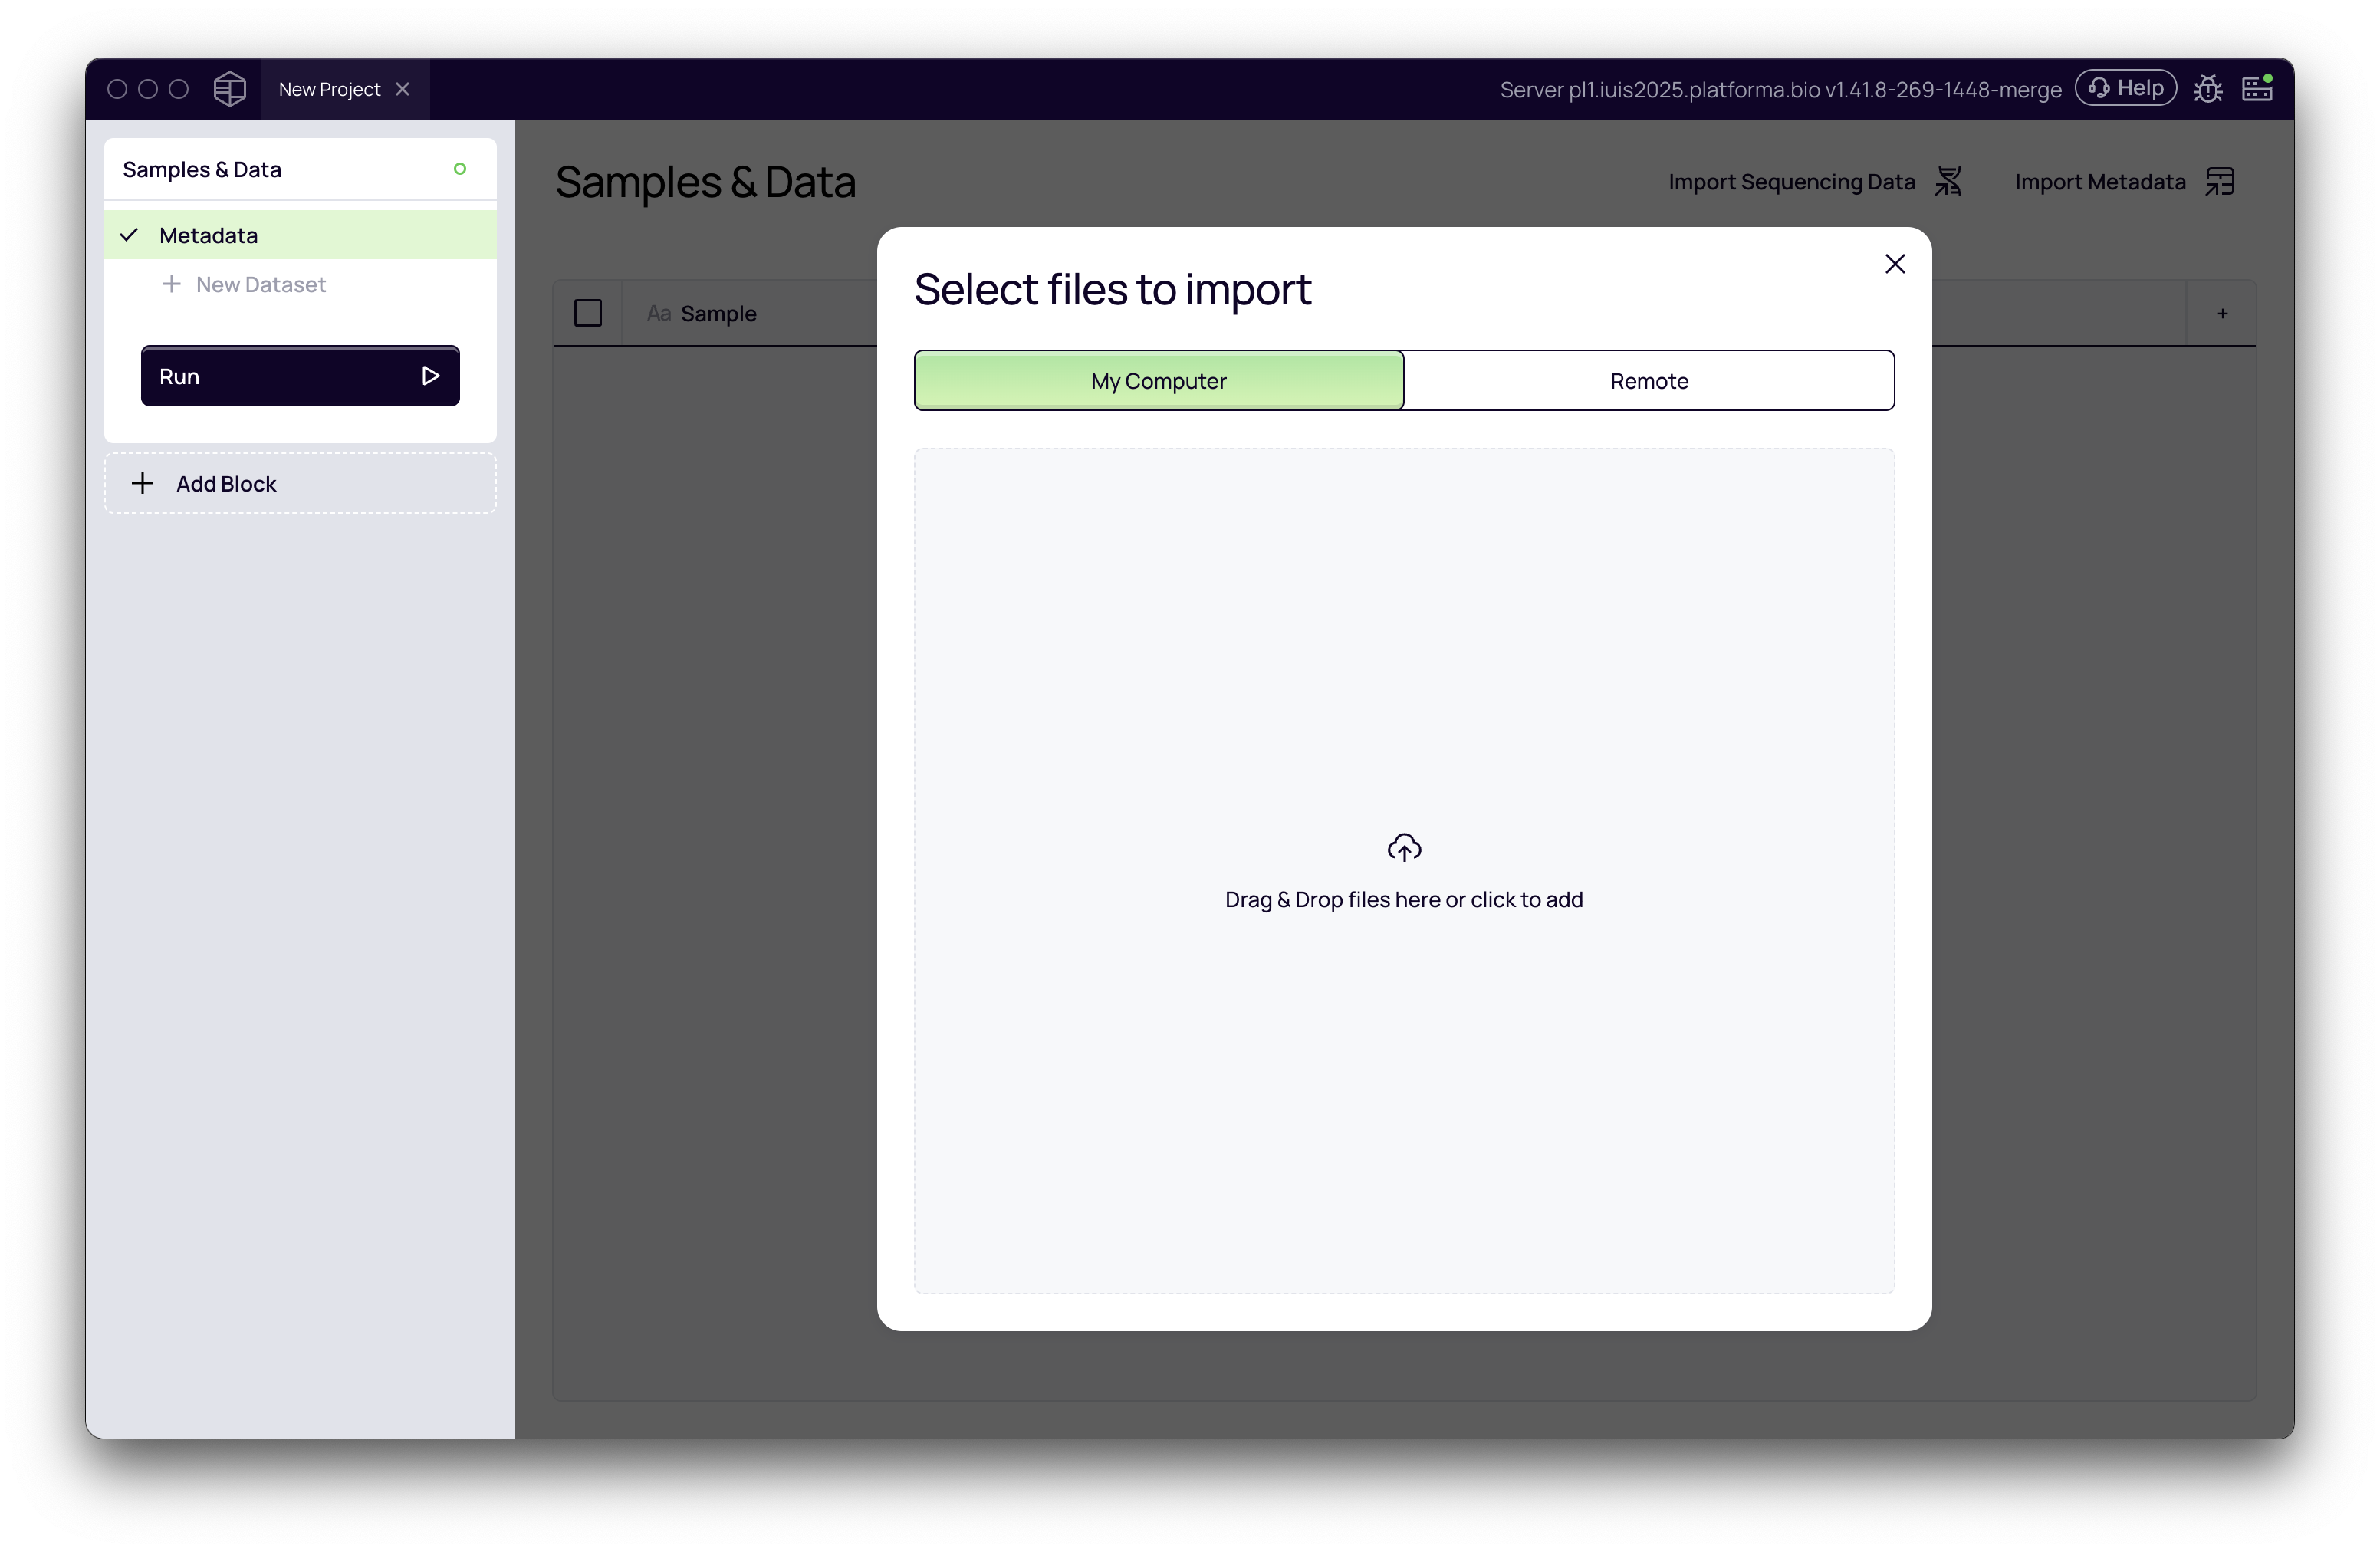
Import Raw Sequencing Data
You can add raw data in two ways: from your computer or from a remote storage location. The "Remote" option is available if you are running a backend configured with access to a shared data lake or storage.
Platforma's powerful import tool can automatically parse filenames to determine sample name, read pairs, sequencing lanes and even metadata information.
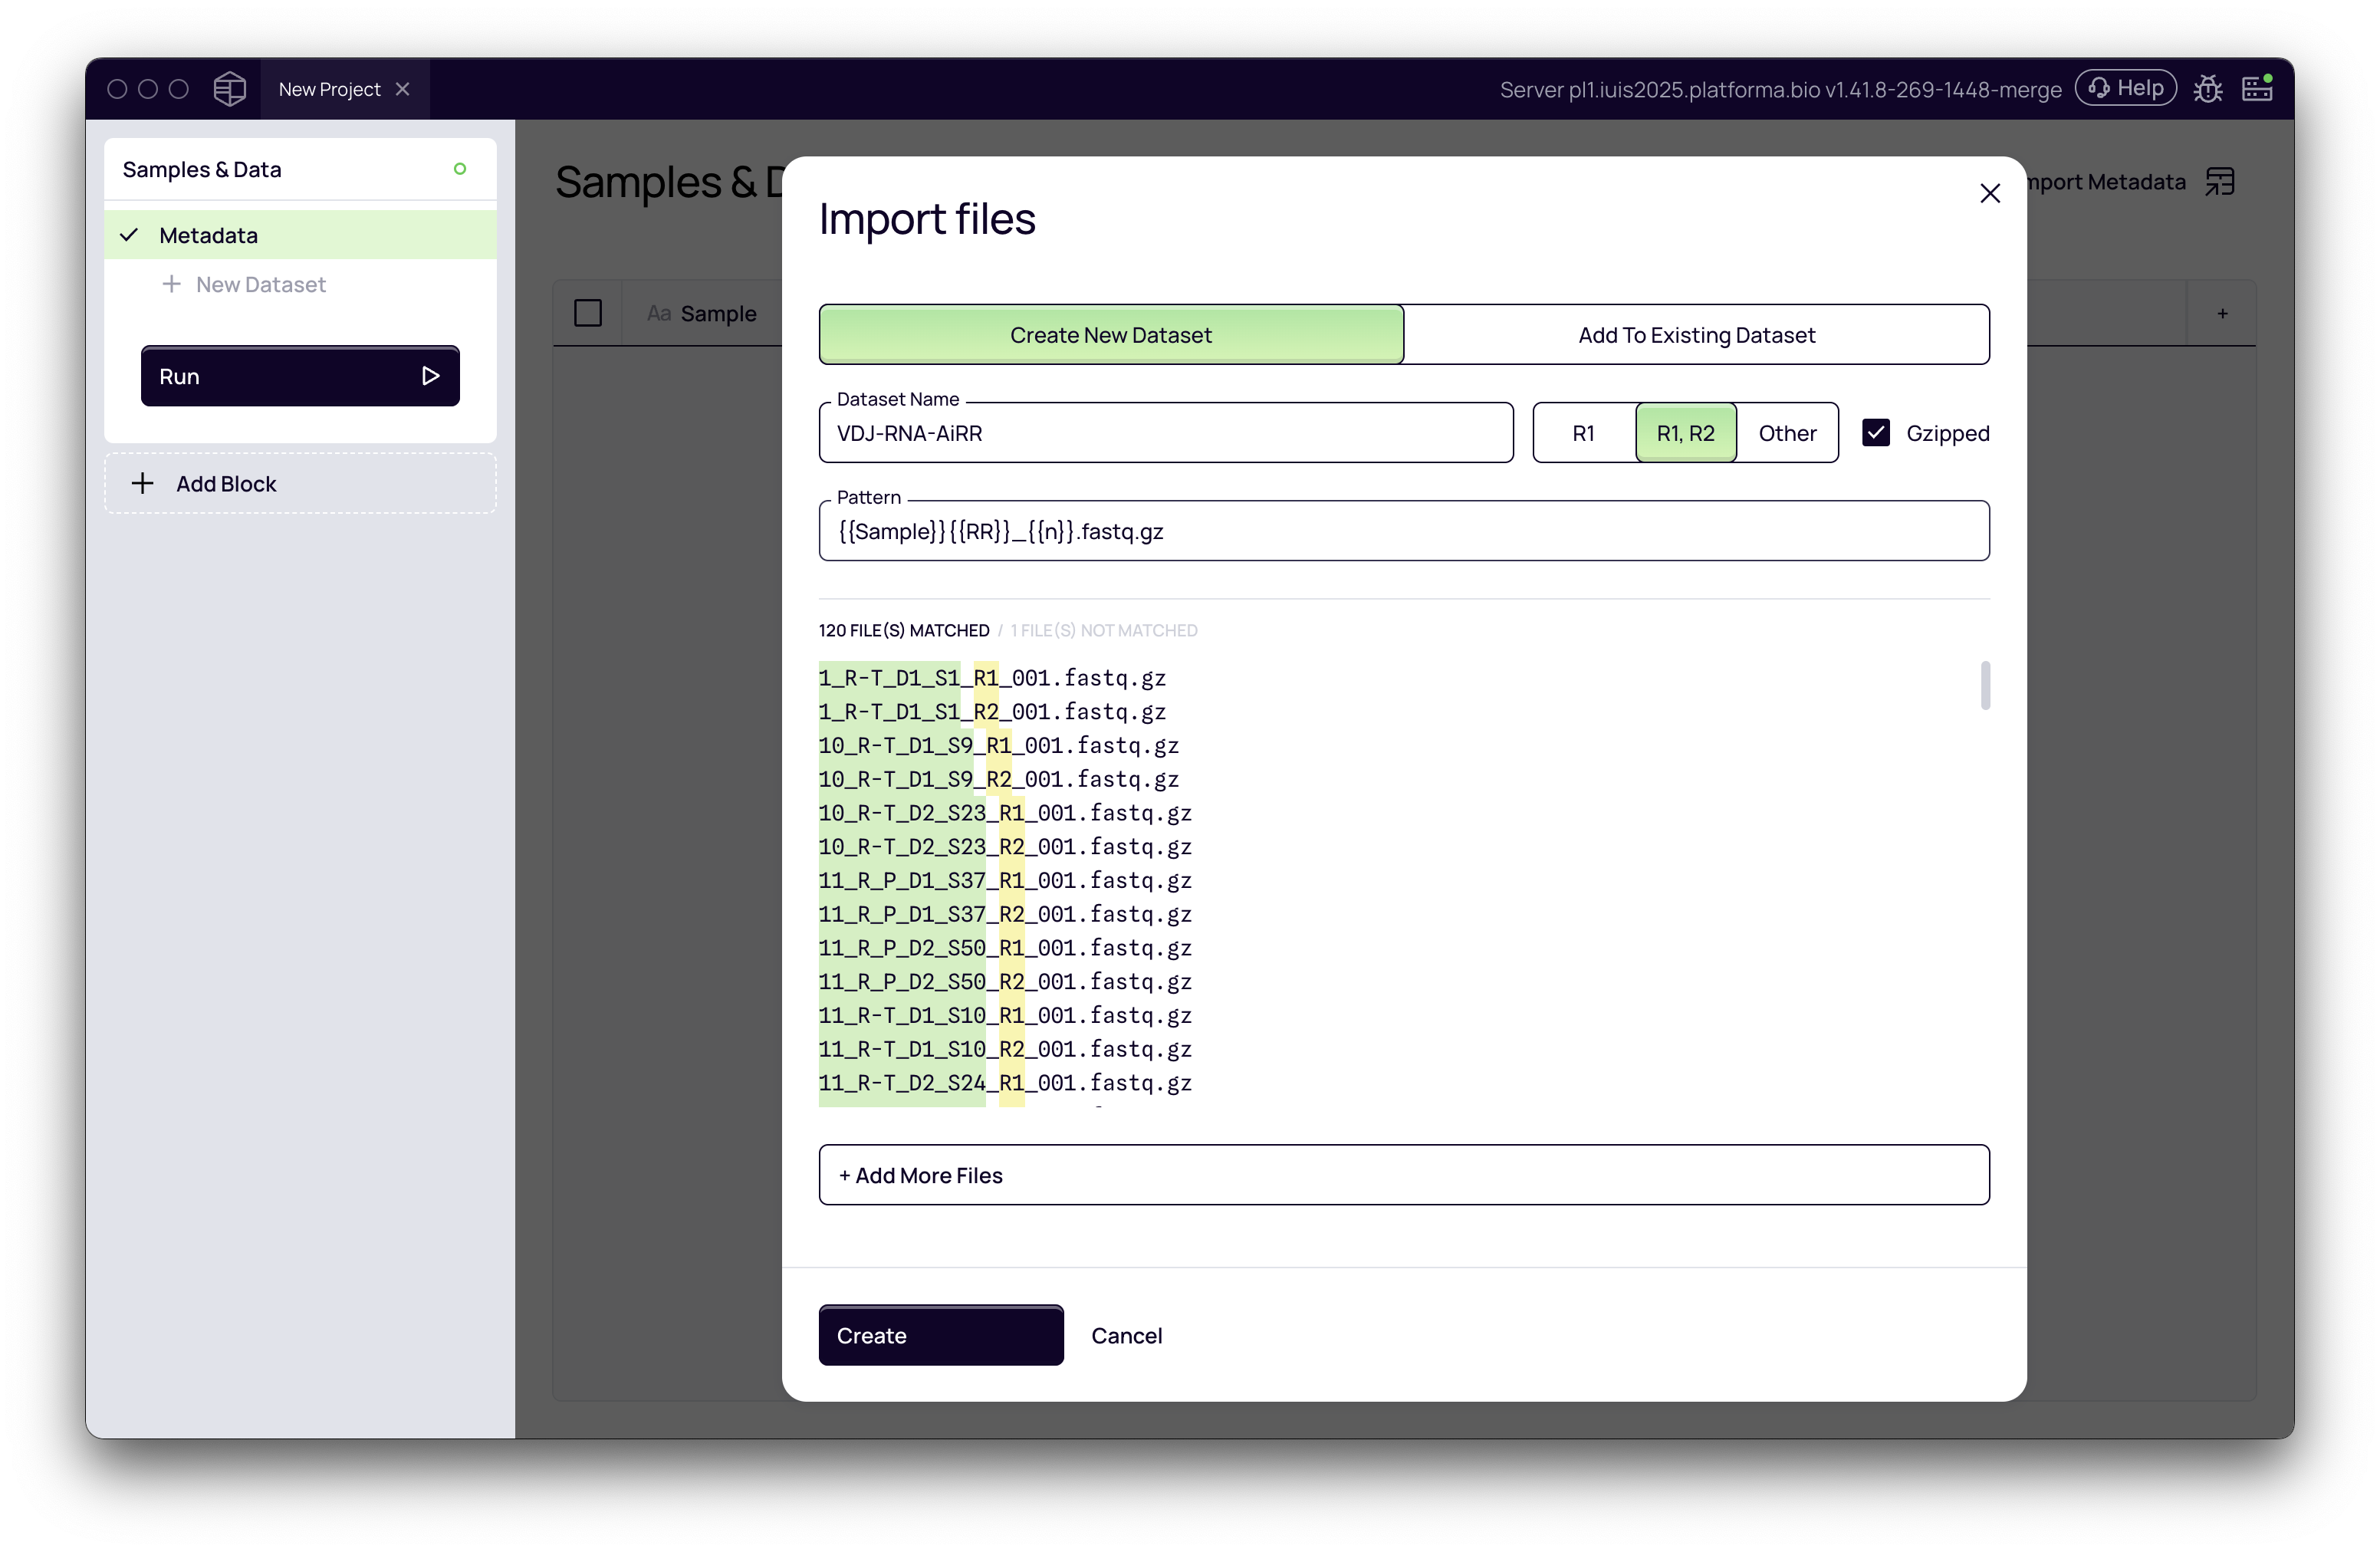
Example: paired-end fastq data
This is the most common format for NGS data.
- Select all of your paired FASTQ files.
- Platforma automatically detects sample names and read pairs (Read 1, Read 2).
- Adjust the file naming pattern if needed, so Platforma correctly infers sample names.
- Give the dataset a descriptive name (e.g., VDJ-RNA-AiRR).
- Click Create Dataset.
Now each sample will be linked to its paired FASTQ files.
If your data consists of only forward reads (R1), the process is just as simple: the import tool will automatically detect that there are no R2 files and will configure the dataset accordingly.
For large experiments, a single library might be sequenced across multiple lanes. Platforma can automatically group these for you, just ensure your filenames contain a lane identifier (e.g., SampleA_L001_R1.fastq.gz, SampleA_L002_R1.fastq.gz).
Import Multiple Datasets
Projects can contain multiple datasets. A common example is single cell multiomics data: for the same samples you may have both gene expression dataset and VDJ dataset.
When importing additional datasets click on + New Dataset and follow the same steps. It is important to ensure that you have same samples in multiple datasets, the specified file name pattern extracts sample names correctly for all datasets.
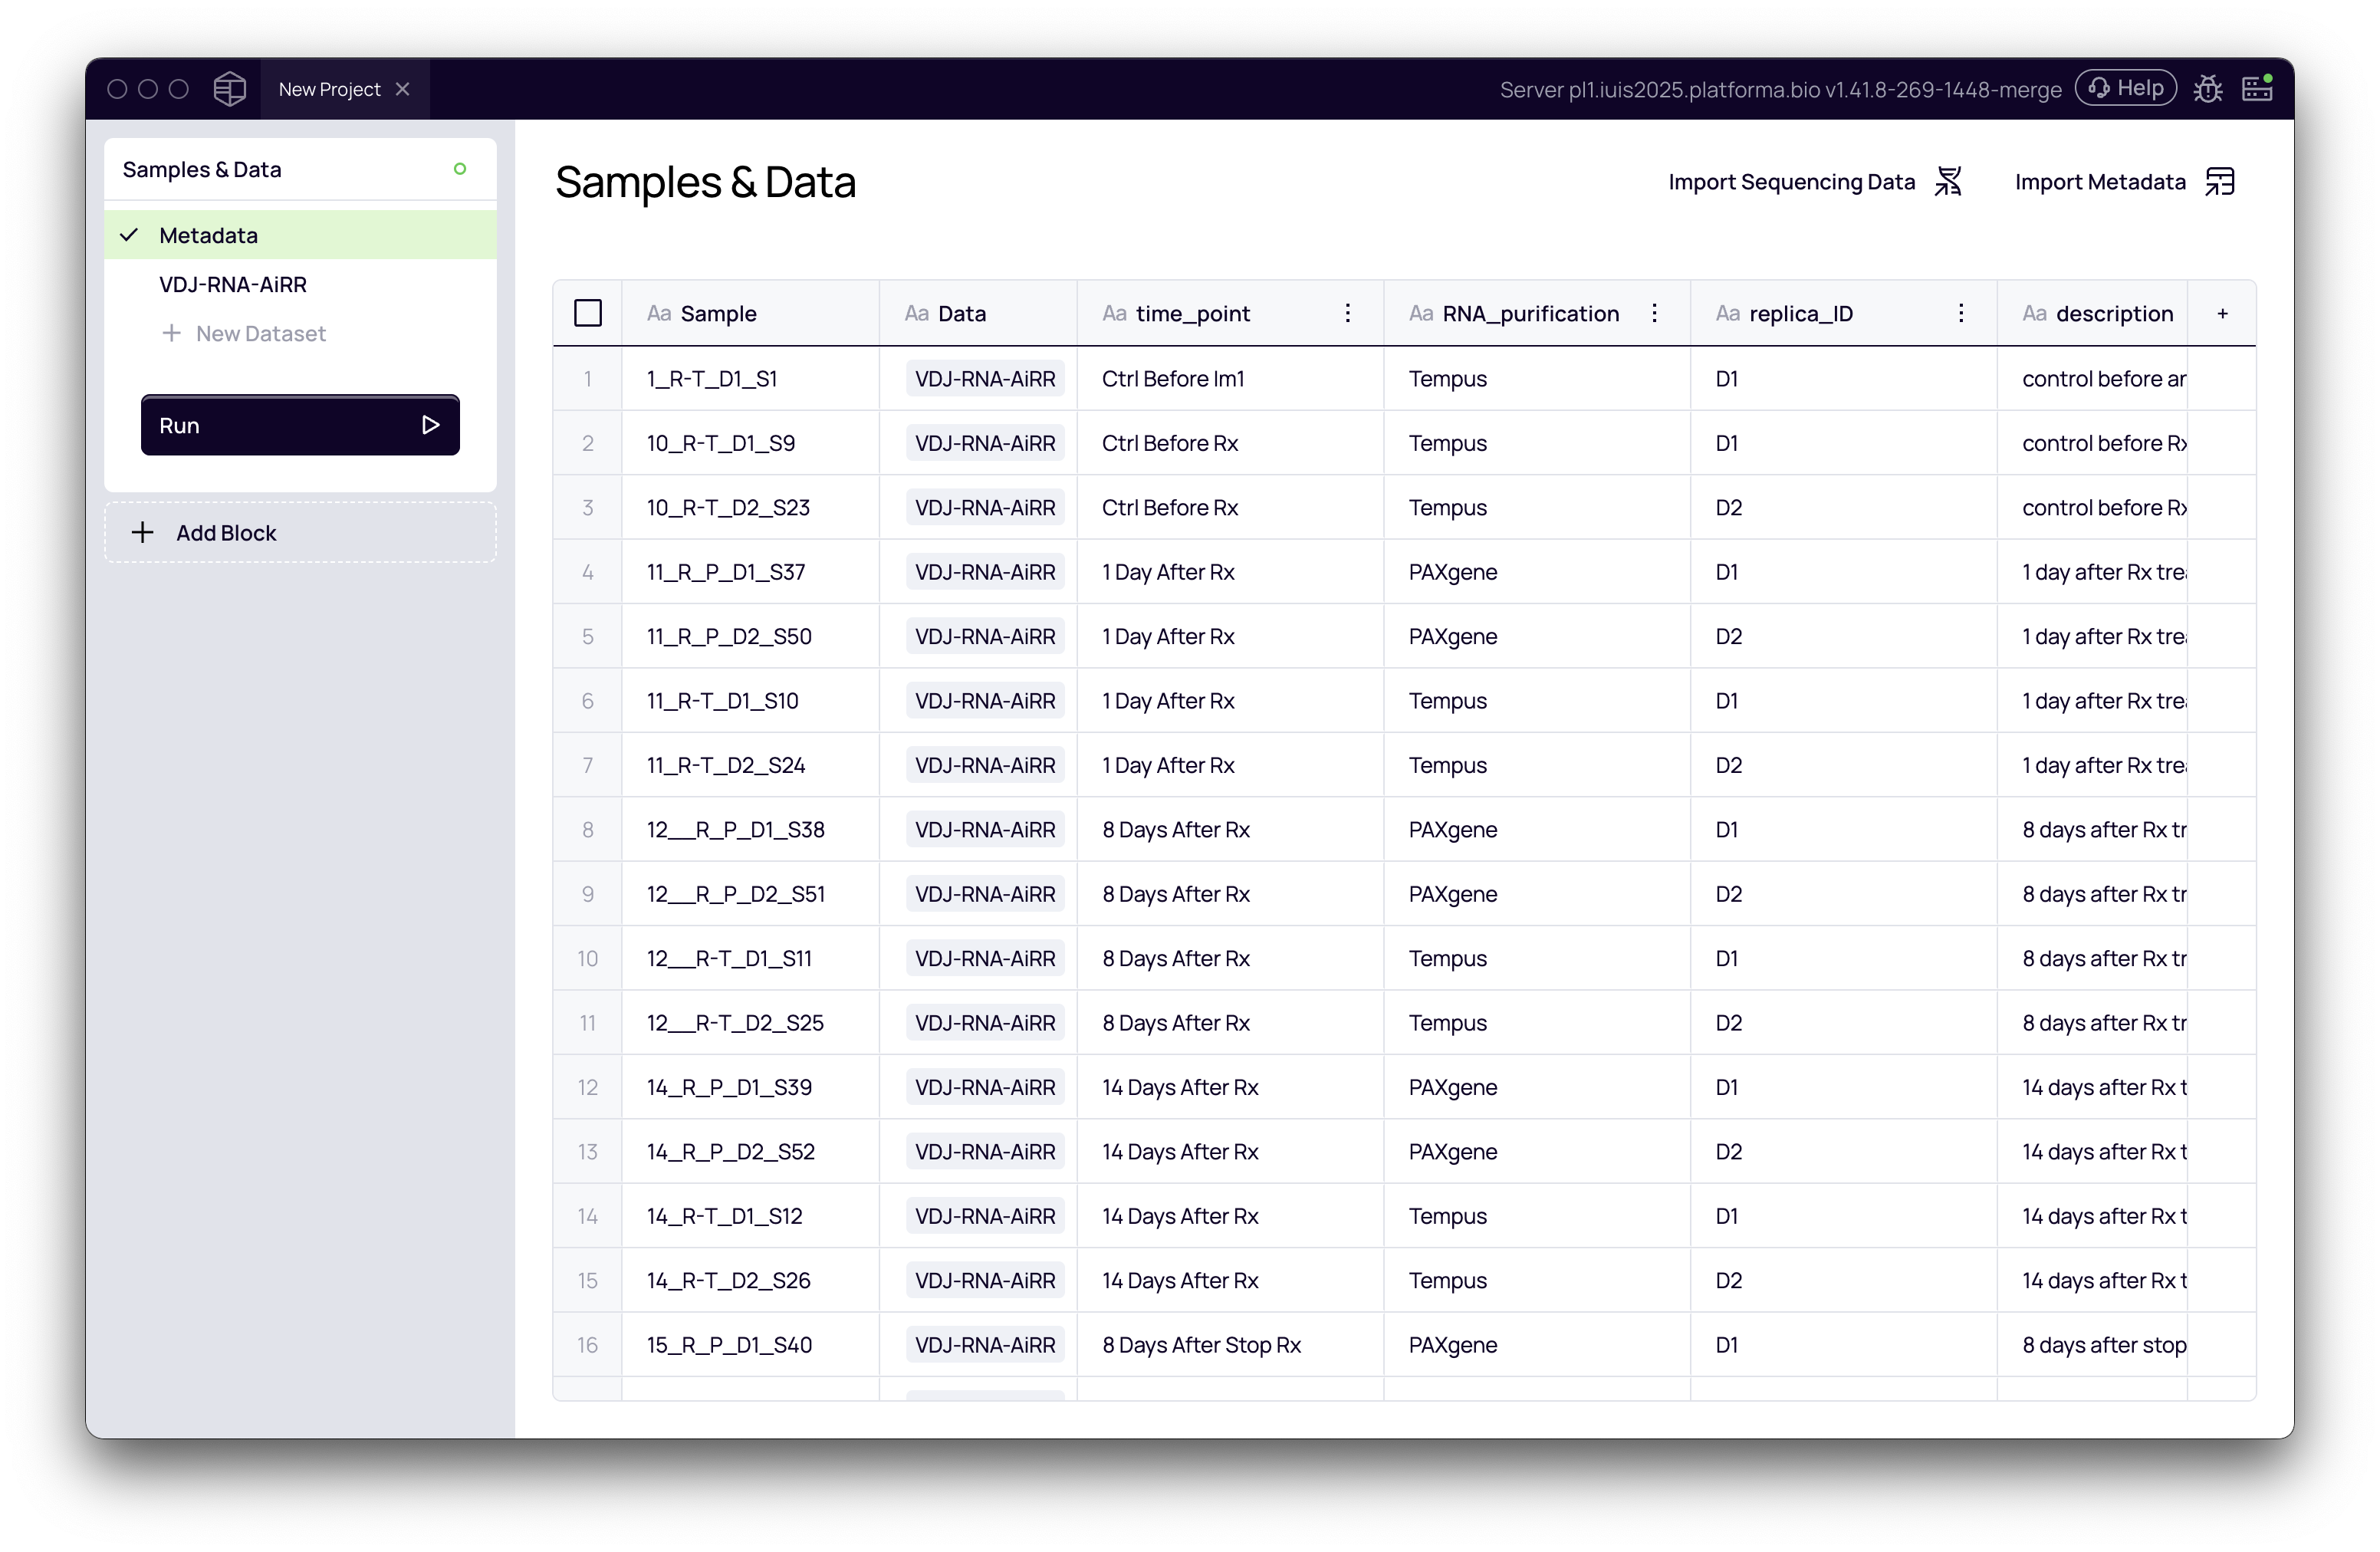
Add Metadata
Metadata describes the biological or experimental context of your samples needed for downstream comparisons.
- Switch to the Metadata section.
- Click Import Metadata and upload an Excel, TSV, or CSV file.
- Crucially: one column must contain sample names that match your dataset.
- In the preview window, ensure the correct column from the "Sample name column" dropdown menu.
- Click Import. Your metadata columns will now appear alongside your sample list.
This step ensures your downstream analysis is tied to the correct biological context.
Finalize the Import and Run Analysis
Once you have defined all your datasets and imported your metadata, you can initiate the import process by click the Run button. Platforma will begin uploading your files (if local) or indexing them (if remote).
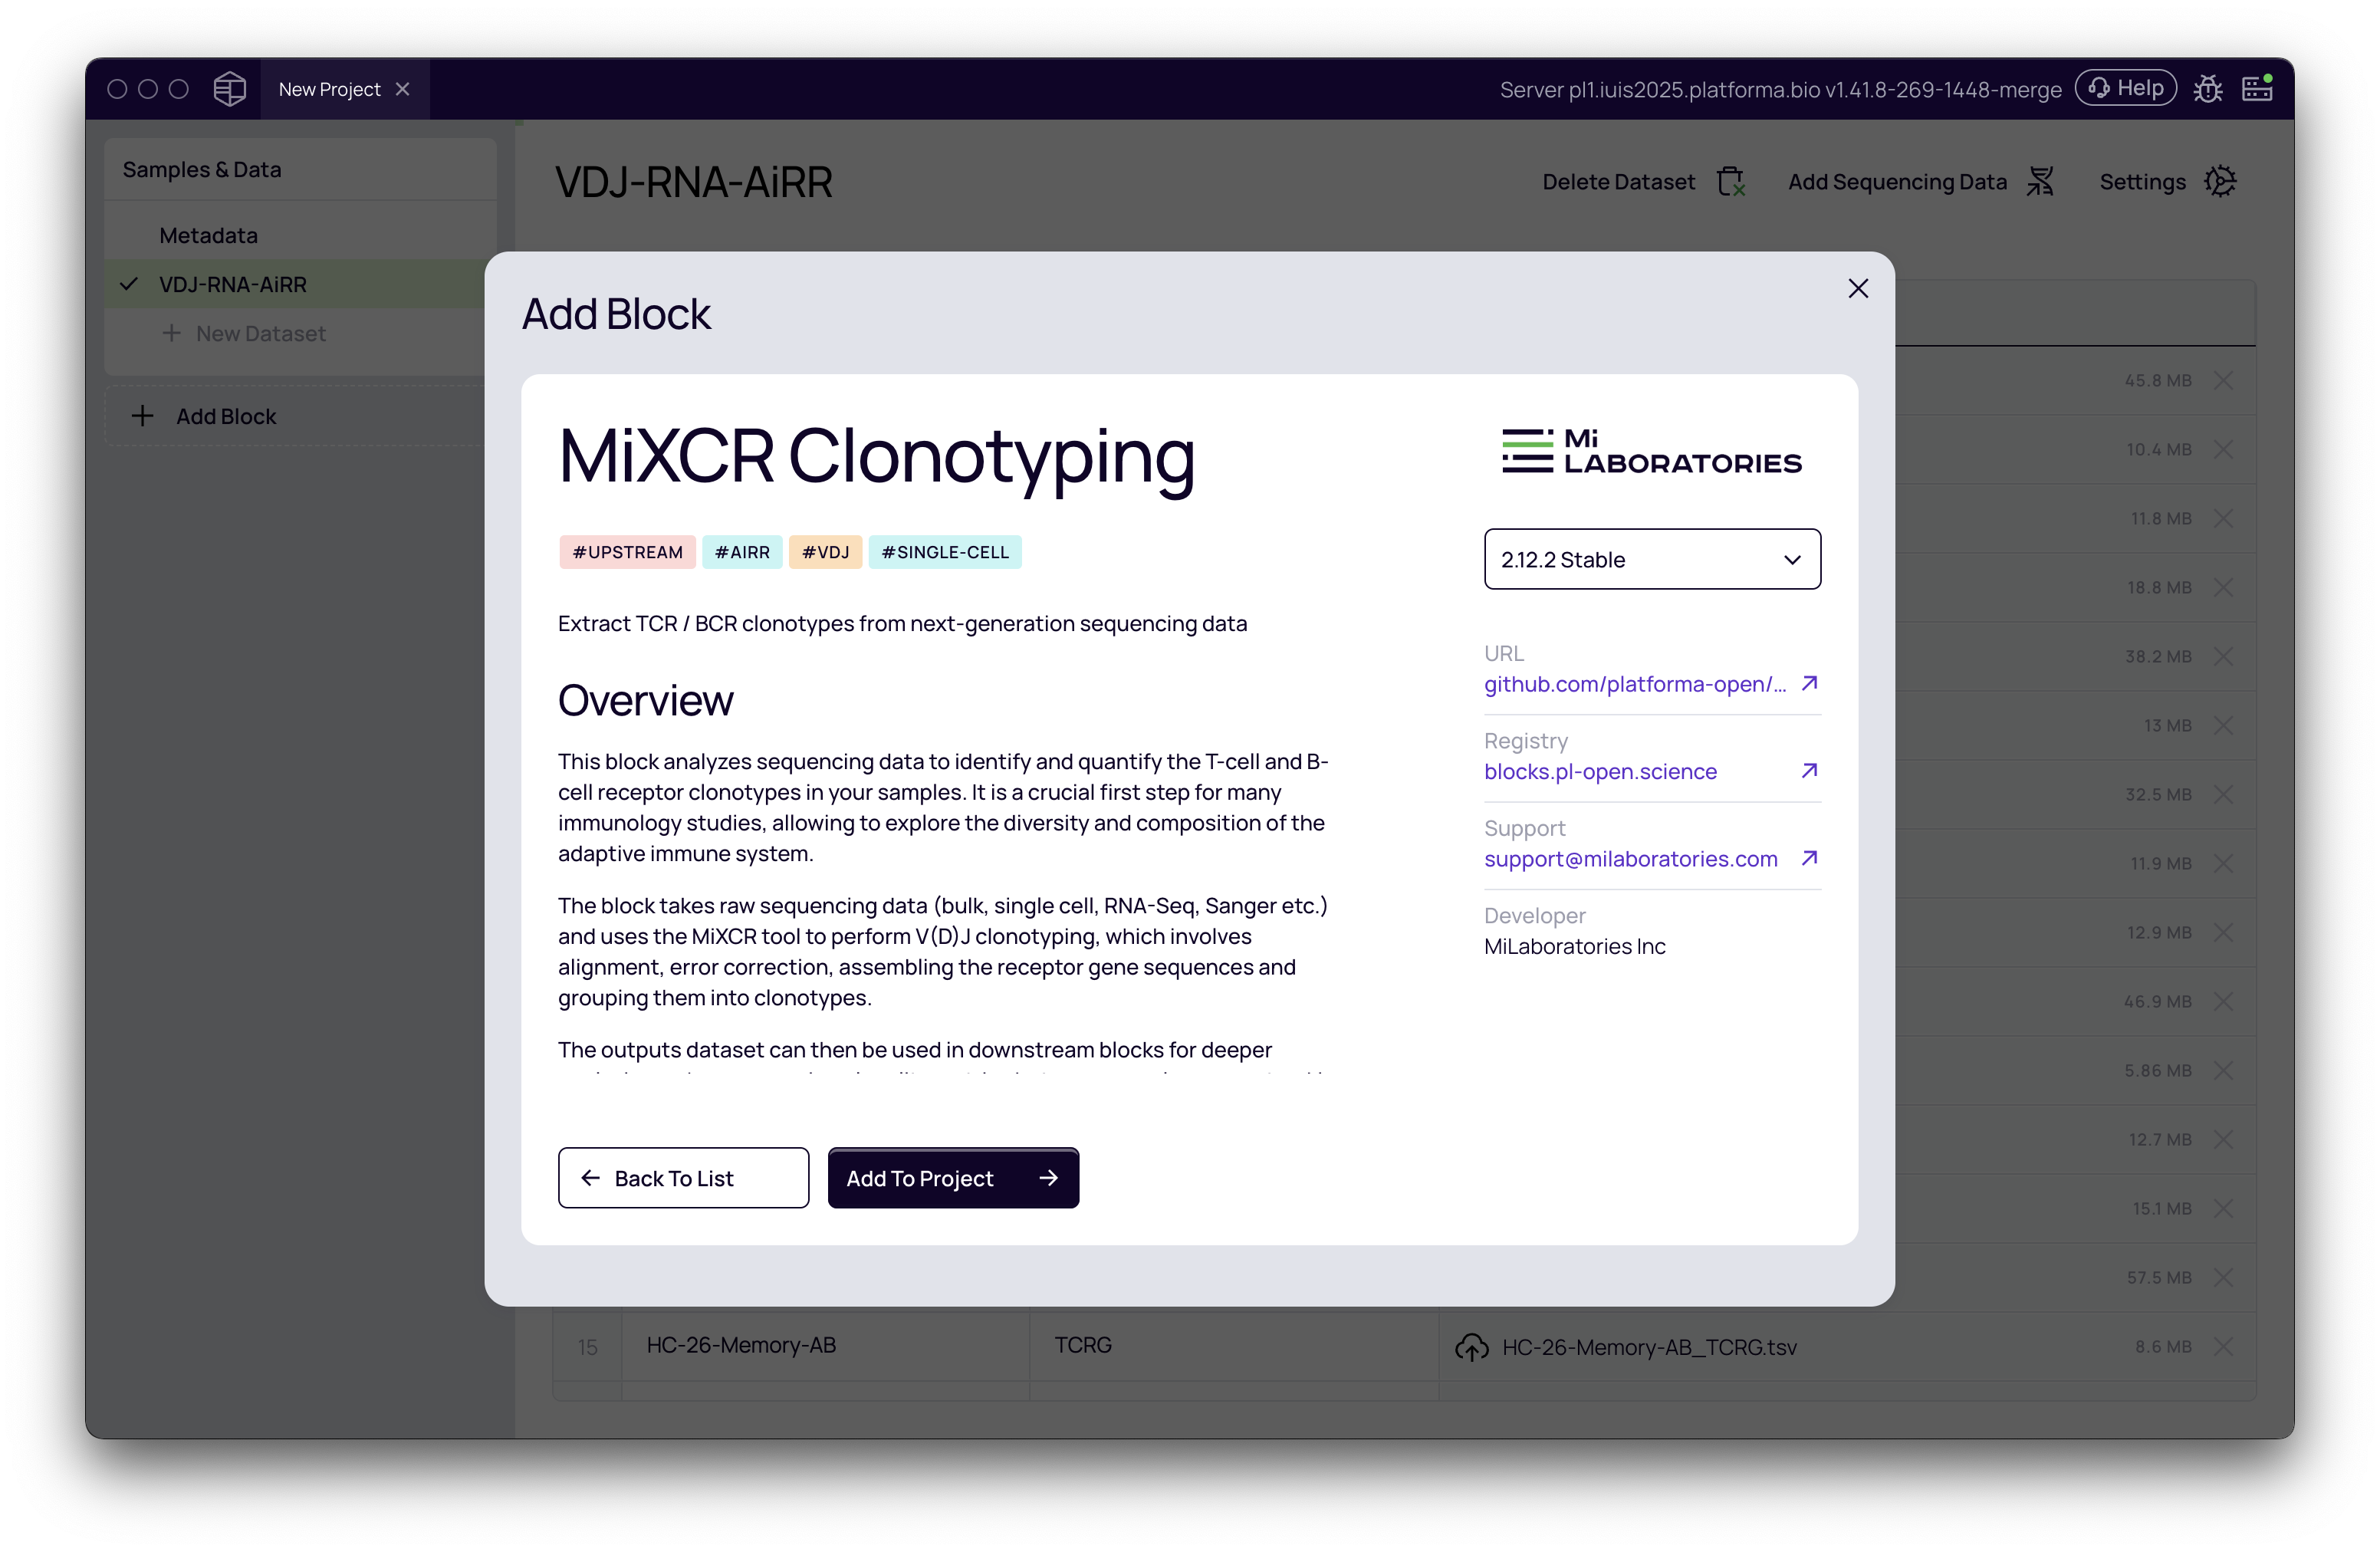
Once your data and metadata are imported, you can proceed with the Clonotyping analysis using MiXCR Clonotyping or other upstream analysis blocks. Future guides will cover these workflows in detail.
What if I already have pre-processed data?
If you have already processed your sequencing data into clonotype tables (e.g., from MiXCR or ImmunoSEQ or another tool), you can import them directly.
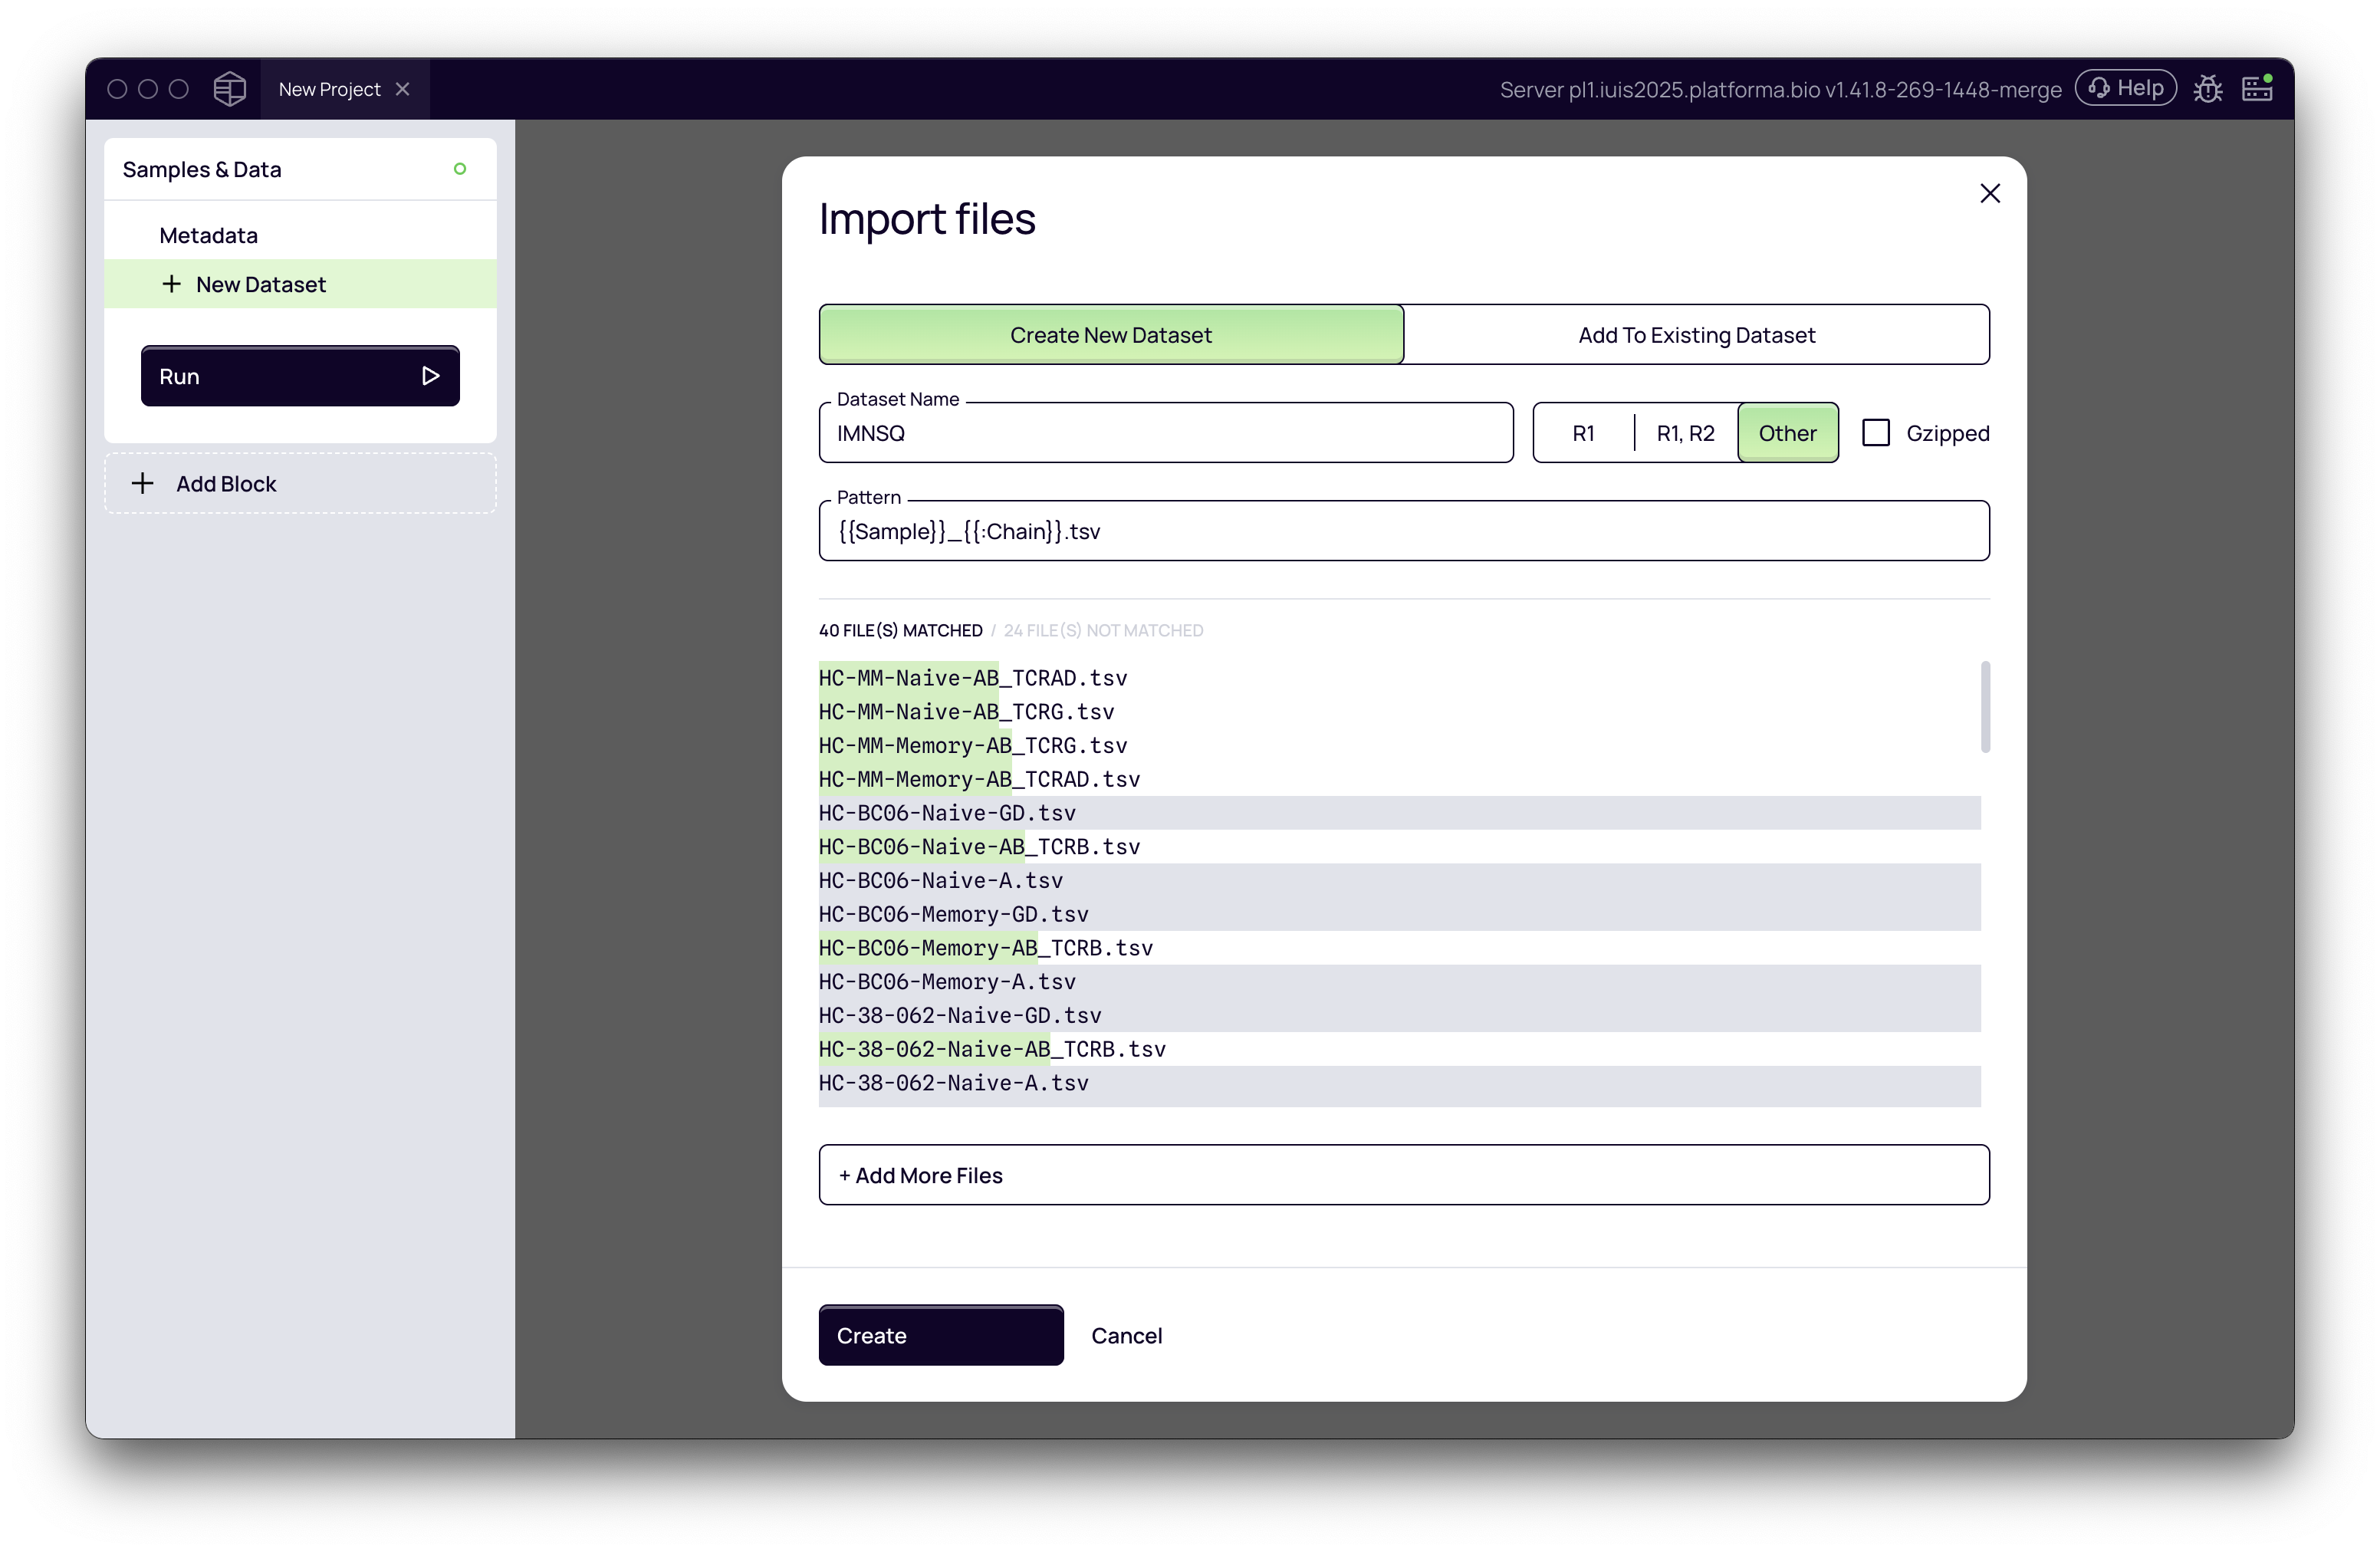
Importing Pre-processed Clonotype Tables
If you have already processed your sequencing data into clonotype tables (e.g., from ImmunoSEQ or another tool), you can import them directly.
- In the Samples & Data block, import your TSV/CSV files in the same way as we do fastq files
- Adjust the naming pattern so e.g. Platforma recognizes chains or other metadata encoded in the file names
- Name the dataset (e.g., "Adaptive-TSV-Clonotypes") and click Create.
Add your metadata and click Run in the same way as we do when importing raw data.
For consistency, always use a standardized file naming convention (underscores vs. dashes, suffixes, etc.).
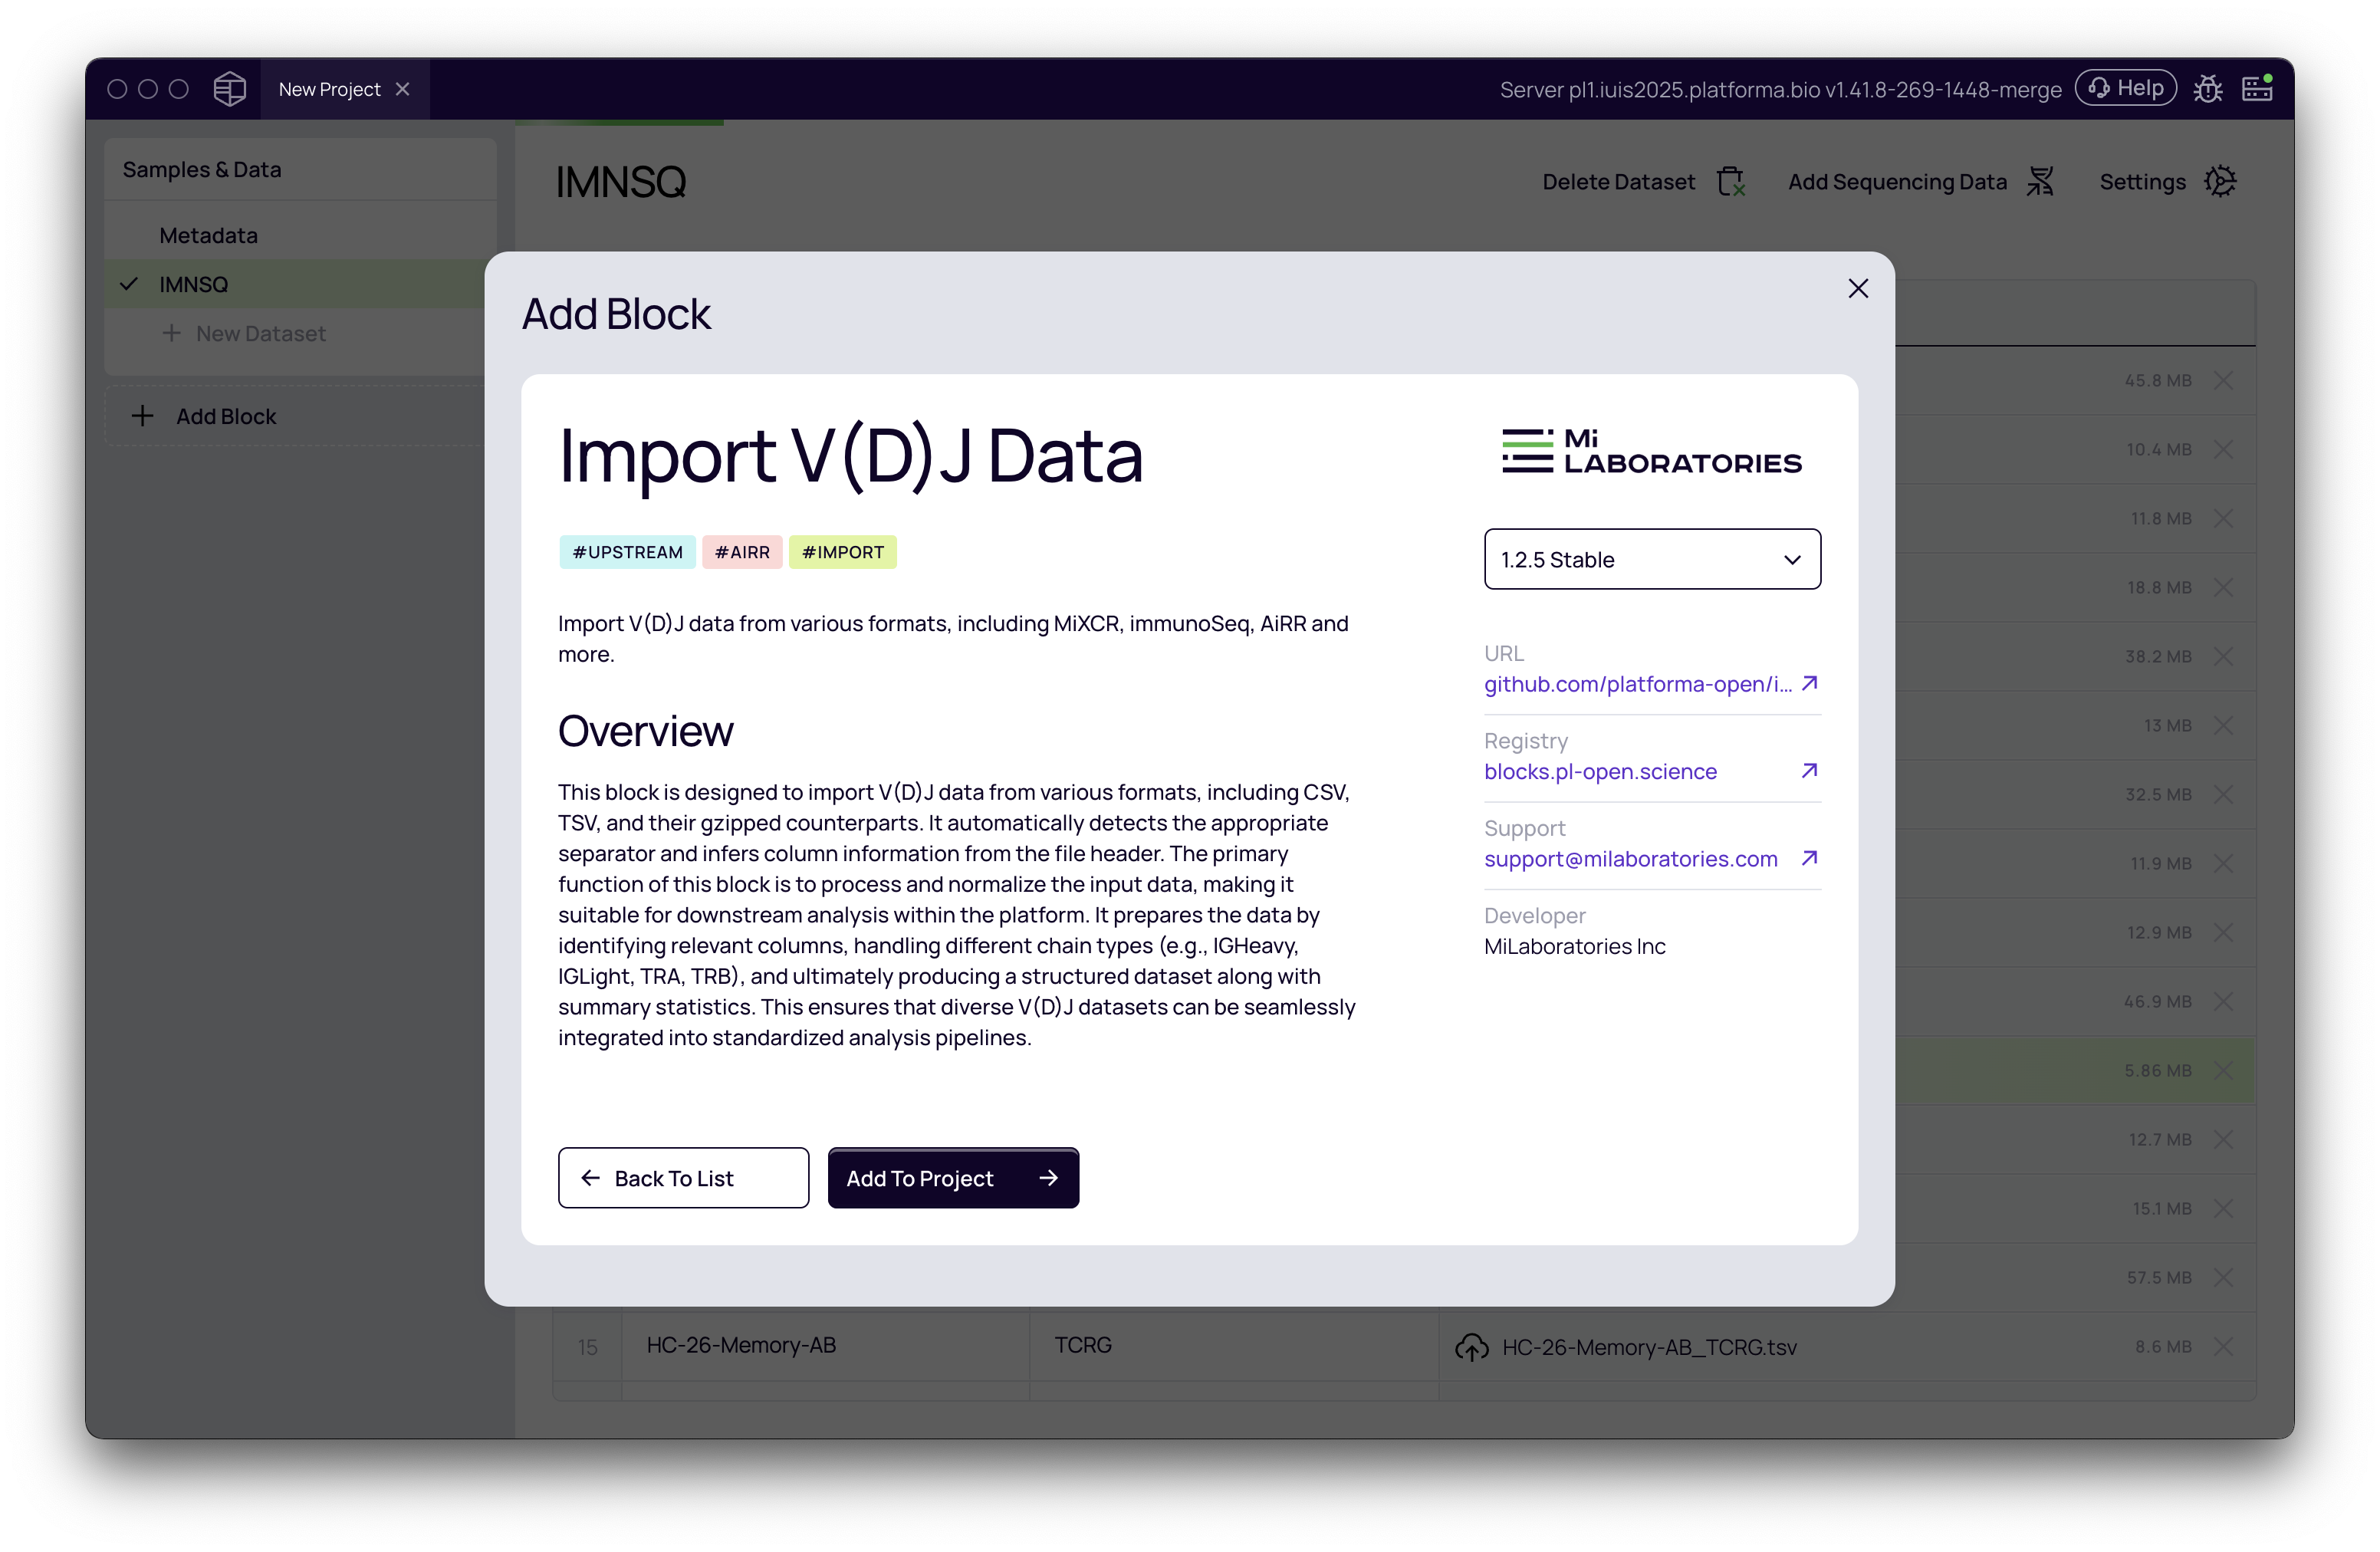
For pre-processed data, you then can add Import V(D)J Data block and import information from tabular data into a clonotyping tables used in the downstream analysis.
Next Steps
With your data successfully imported, you are ready for analysis! The datasets you created are now available as inputs for the upstream analysis blocks.
- For raw data, your next step is the Clonotyping Analysis
- For pre-processed clonotype tables, you will use the Import V(D)J block to prepare the data for the downstream analyses.
Congratulations, you've completed the first step in your Platforma analysis journey!